Yeah he just got to back to doing them again.
Hell yeah!!!
Sent from my KFFOWI using Tapatalk
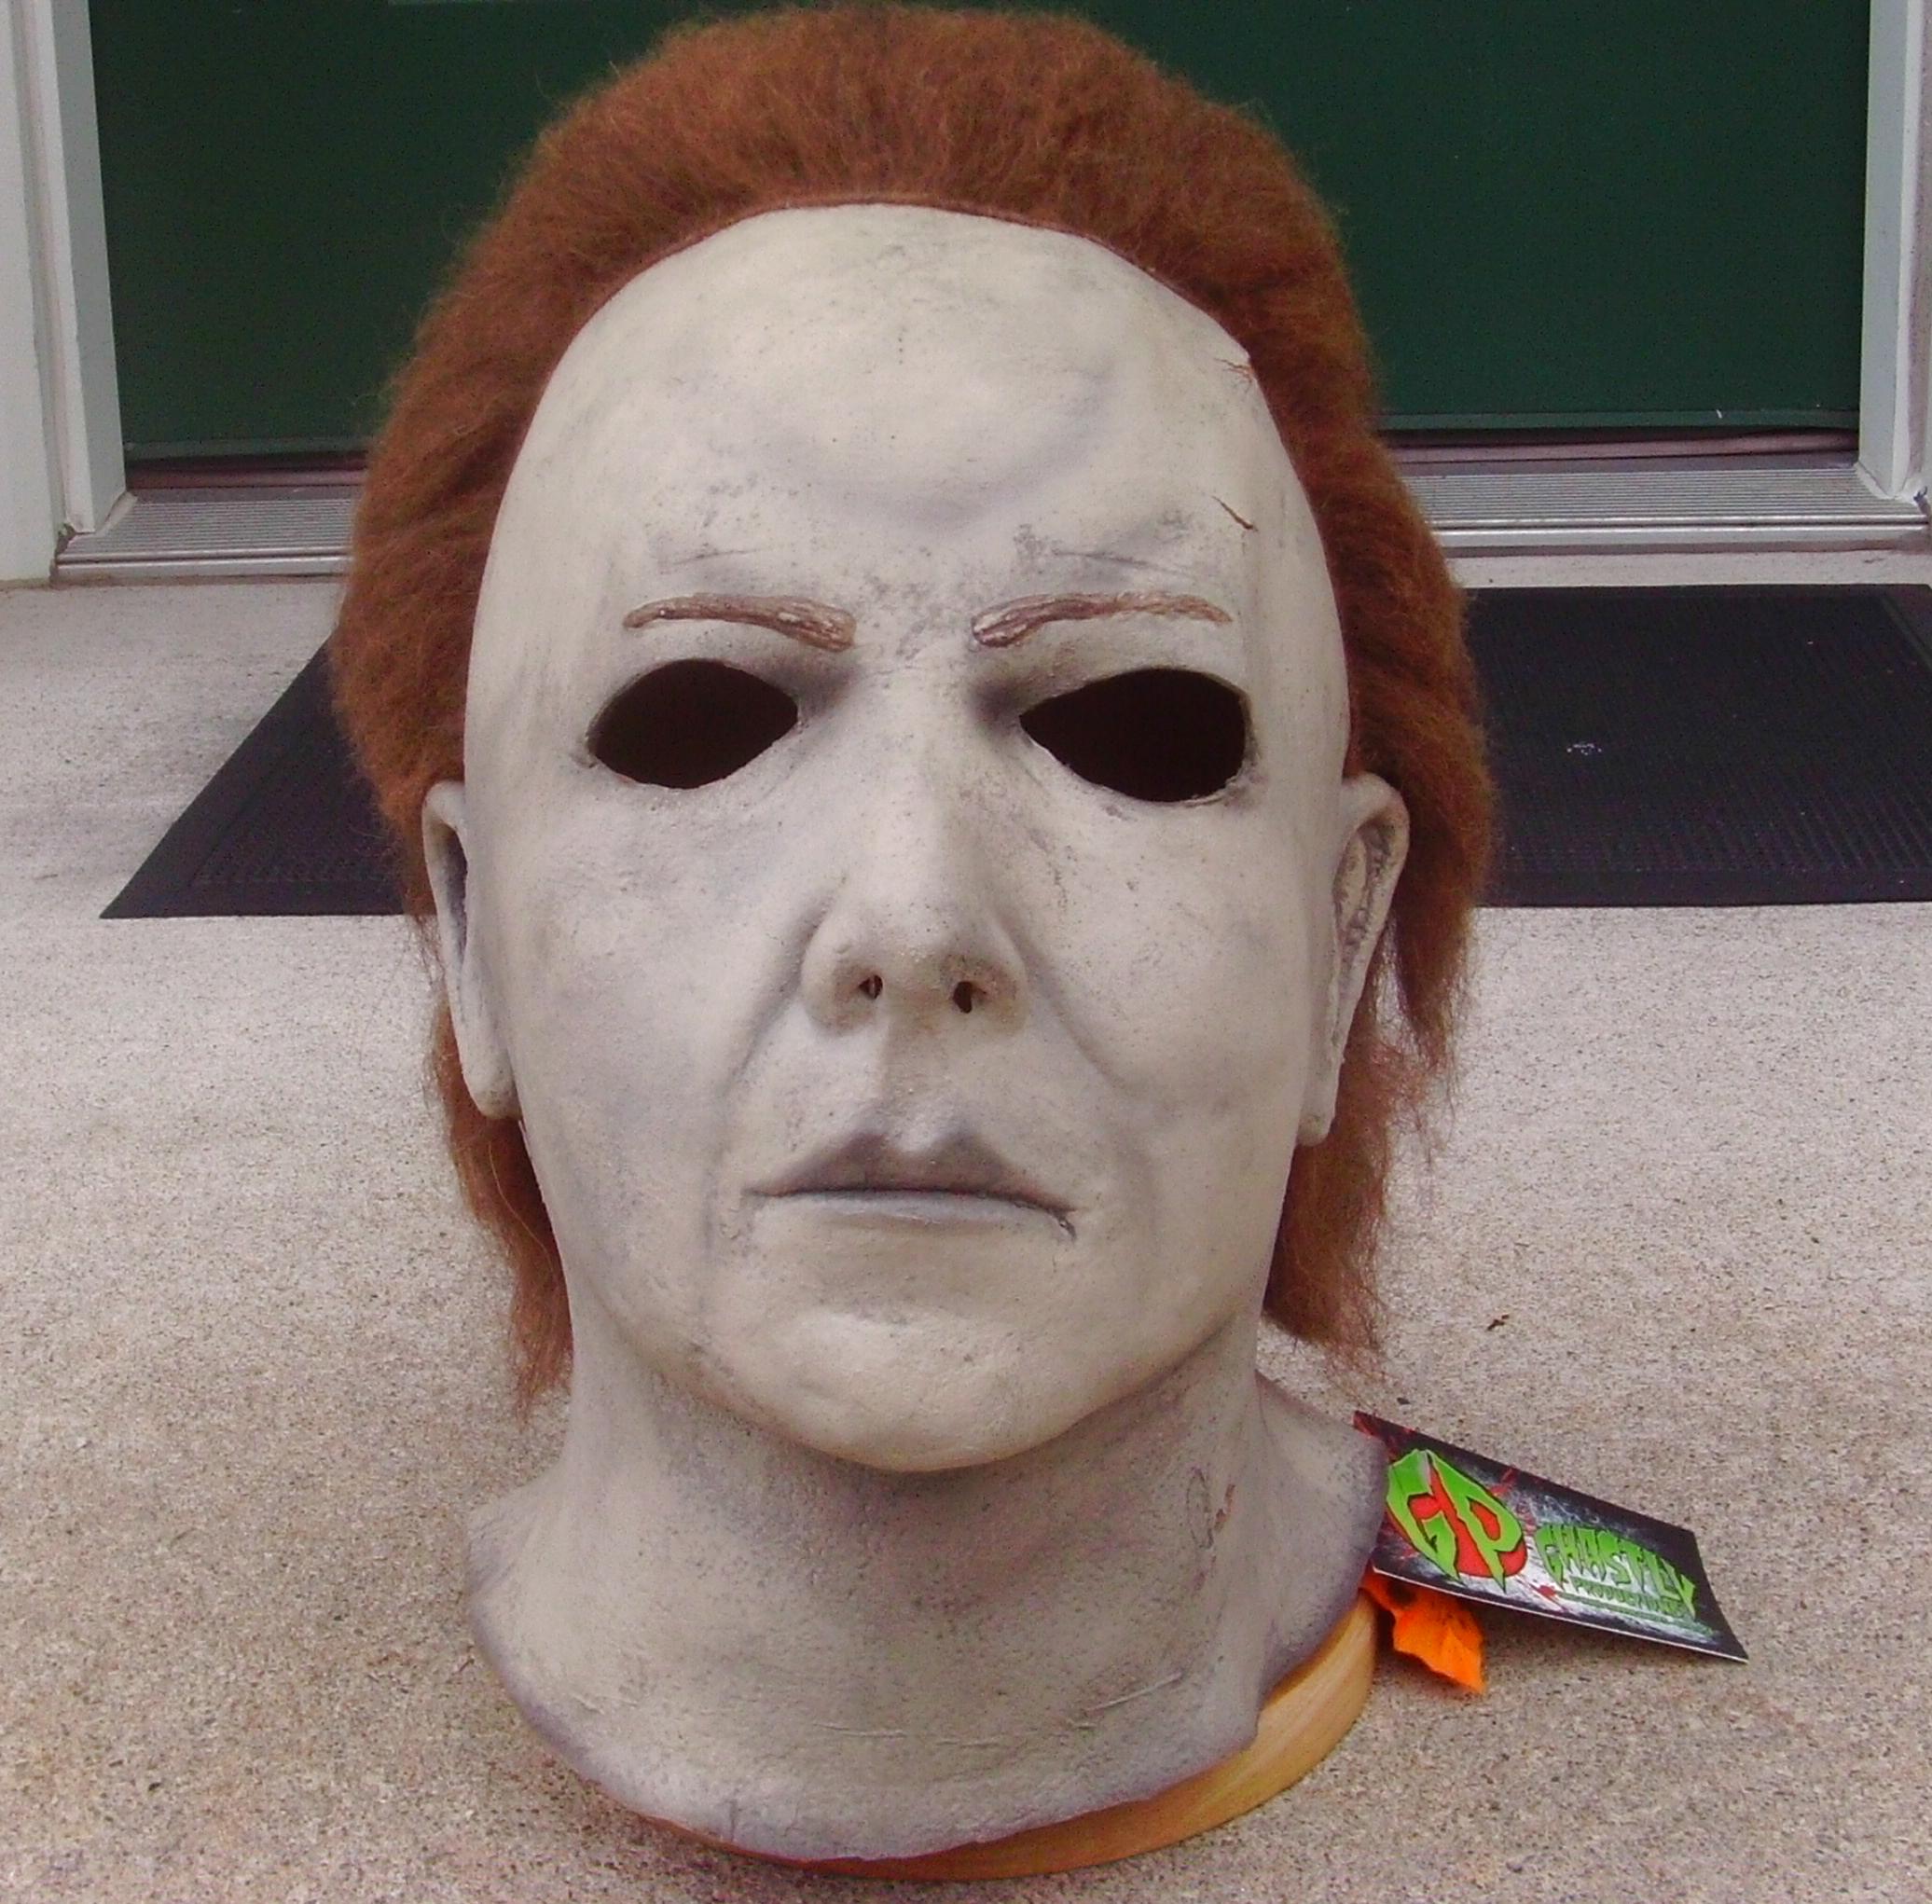
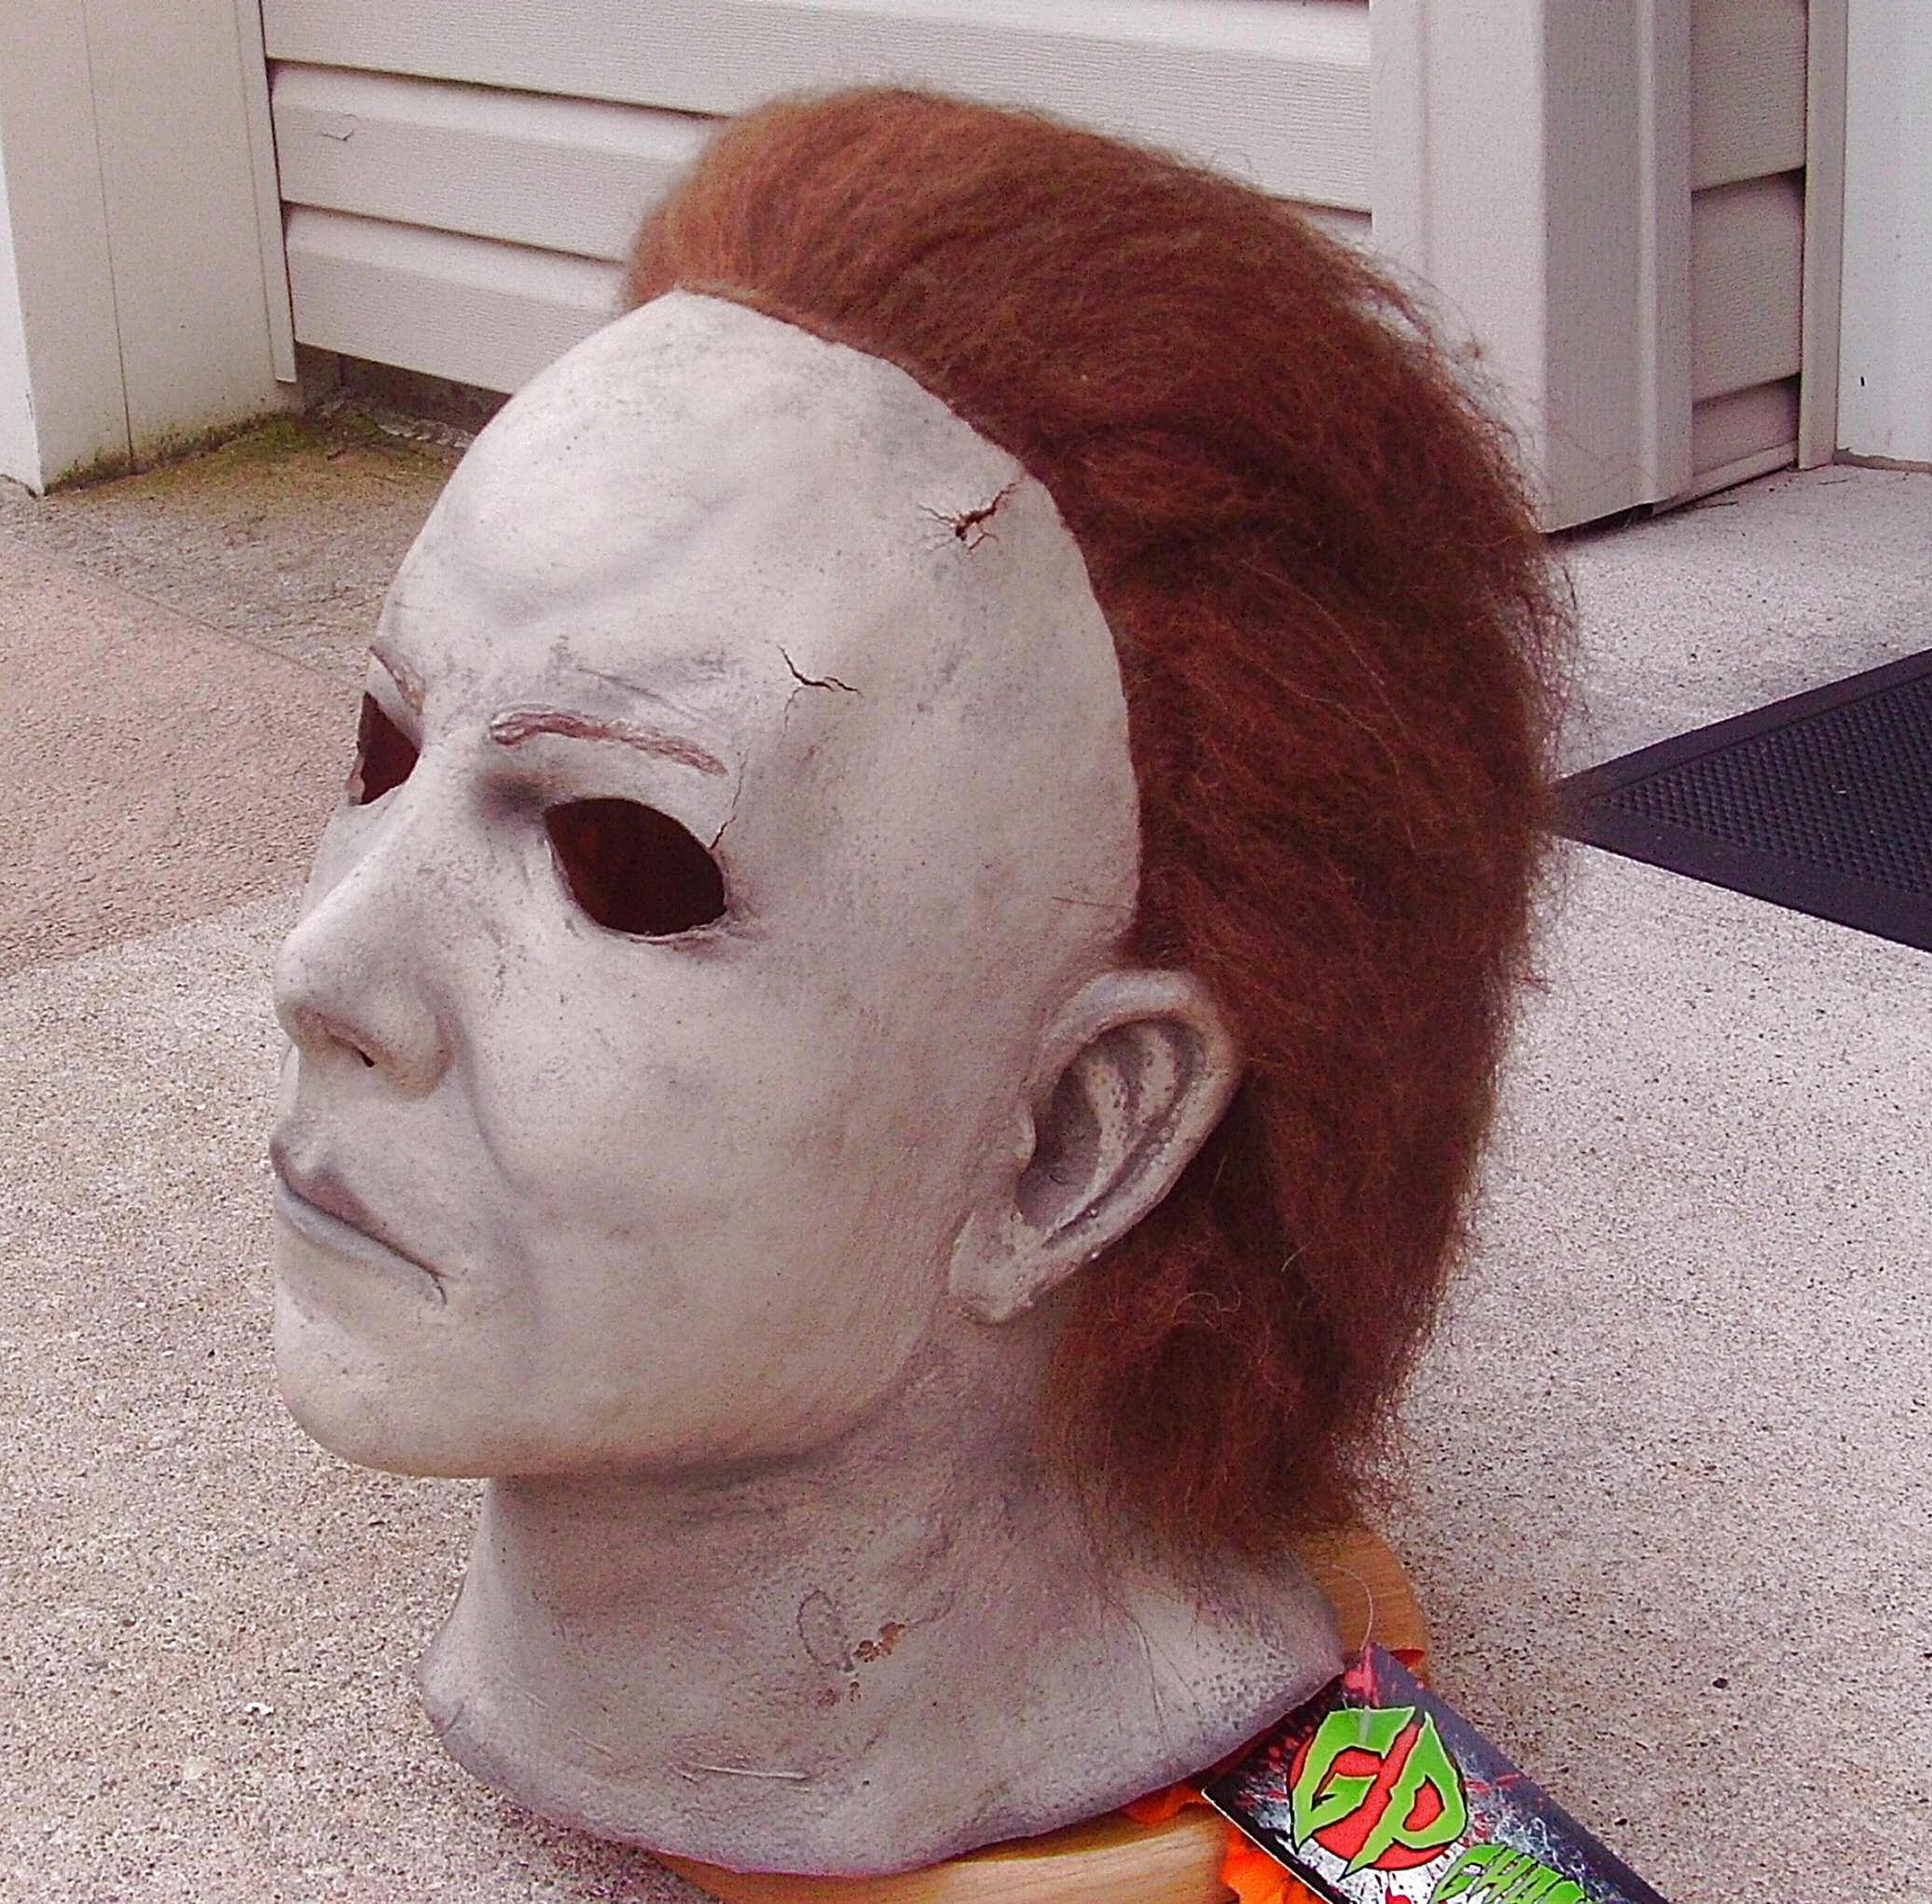
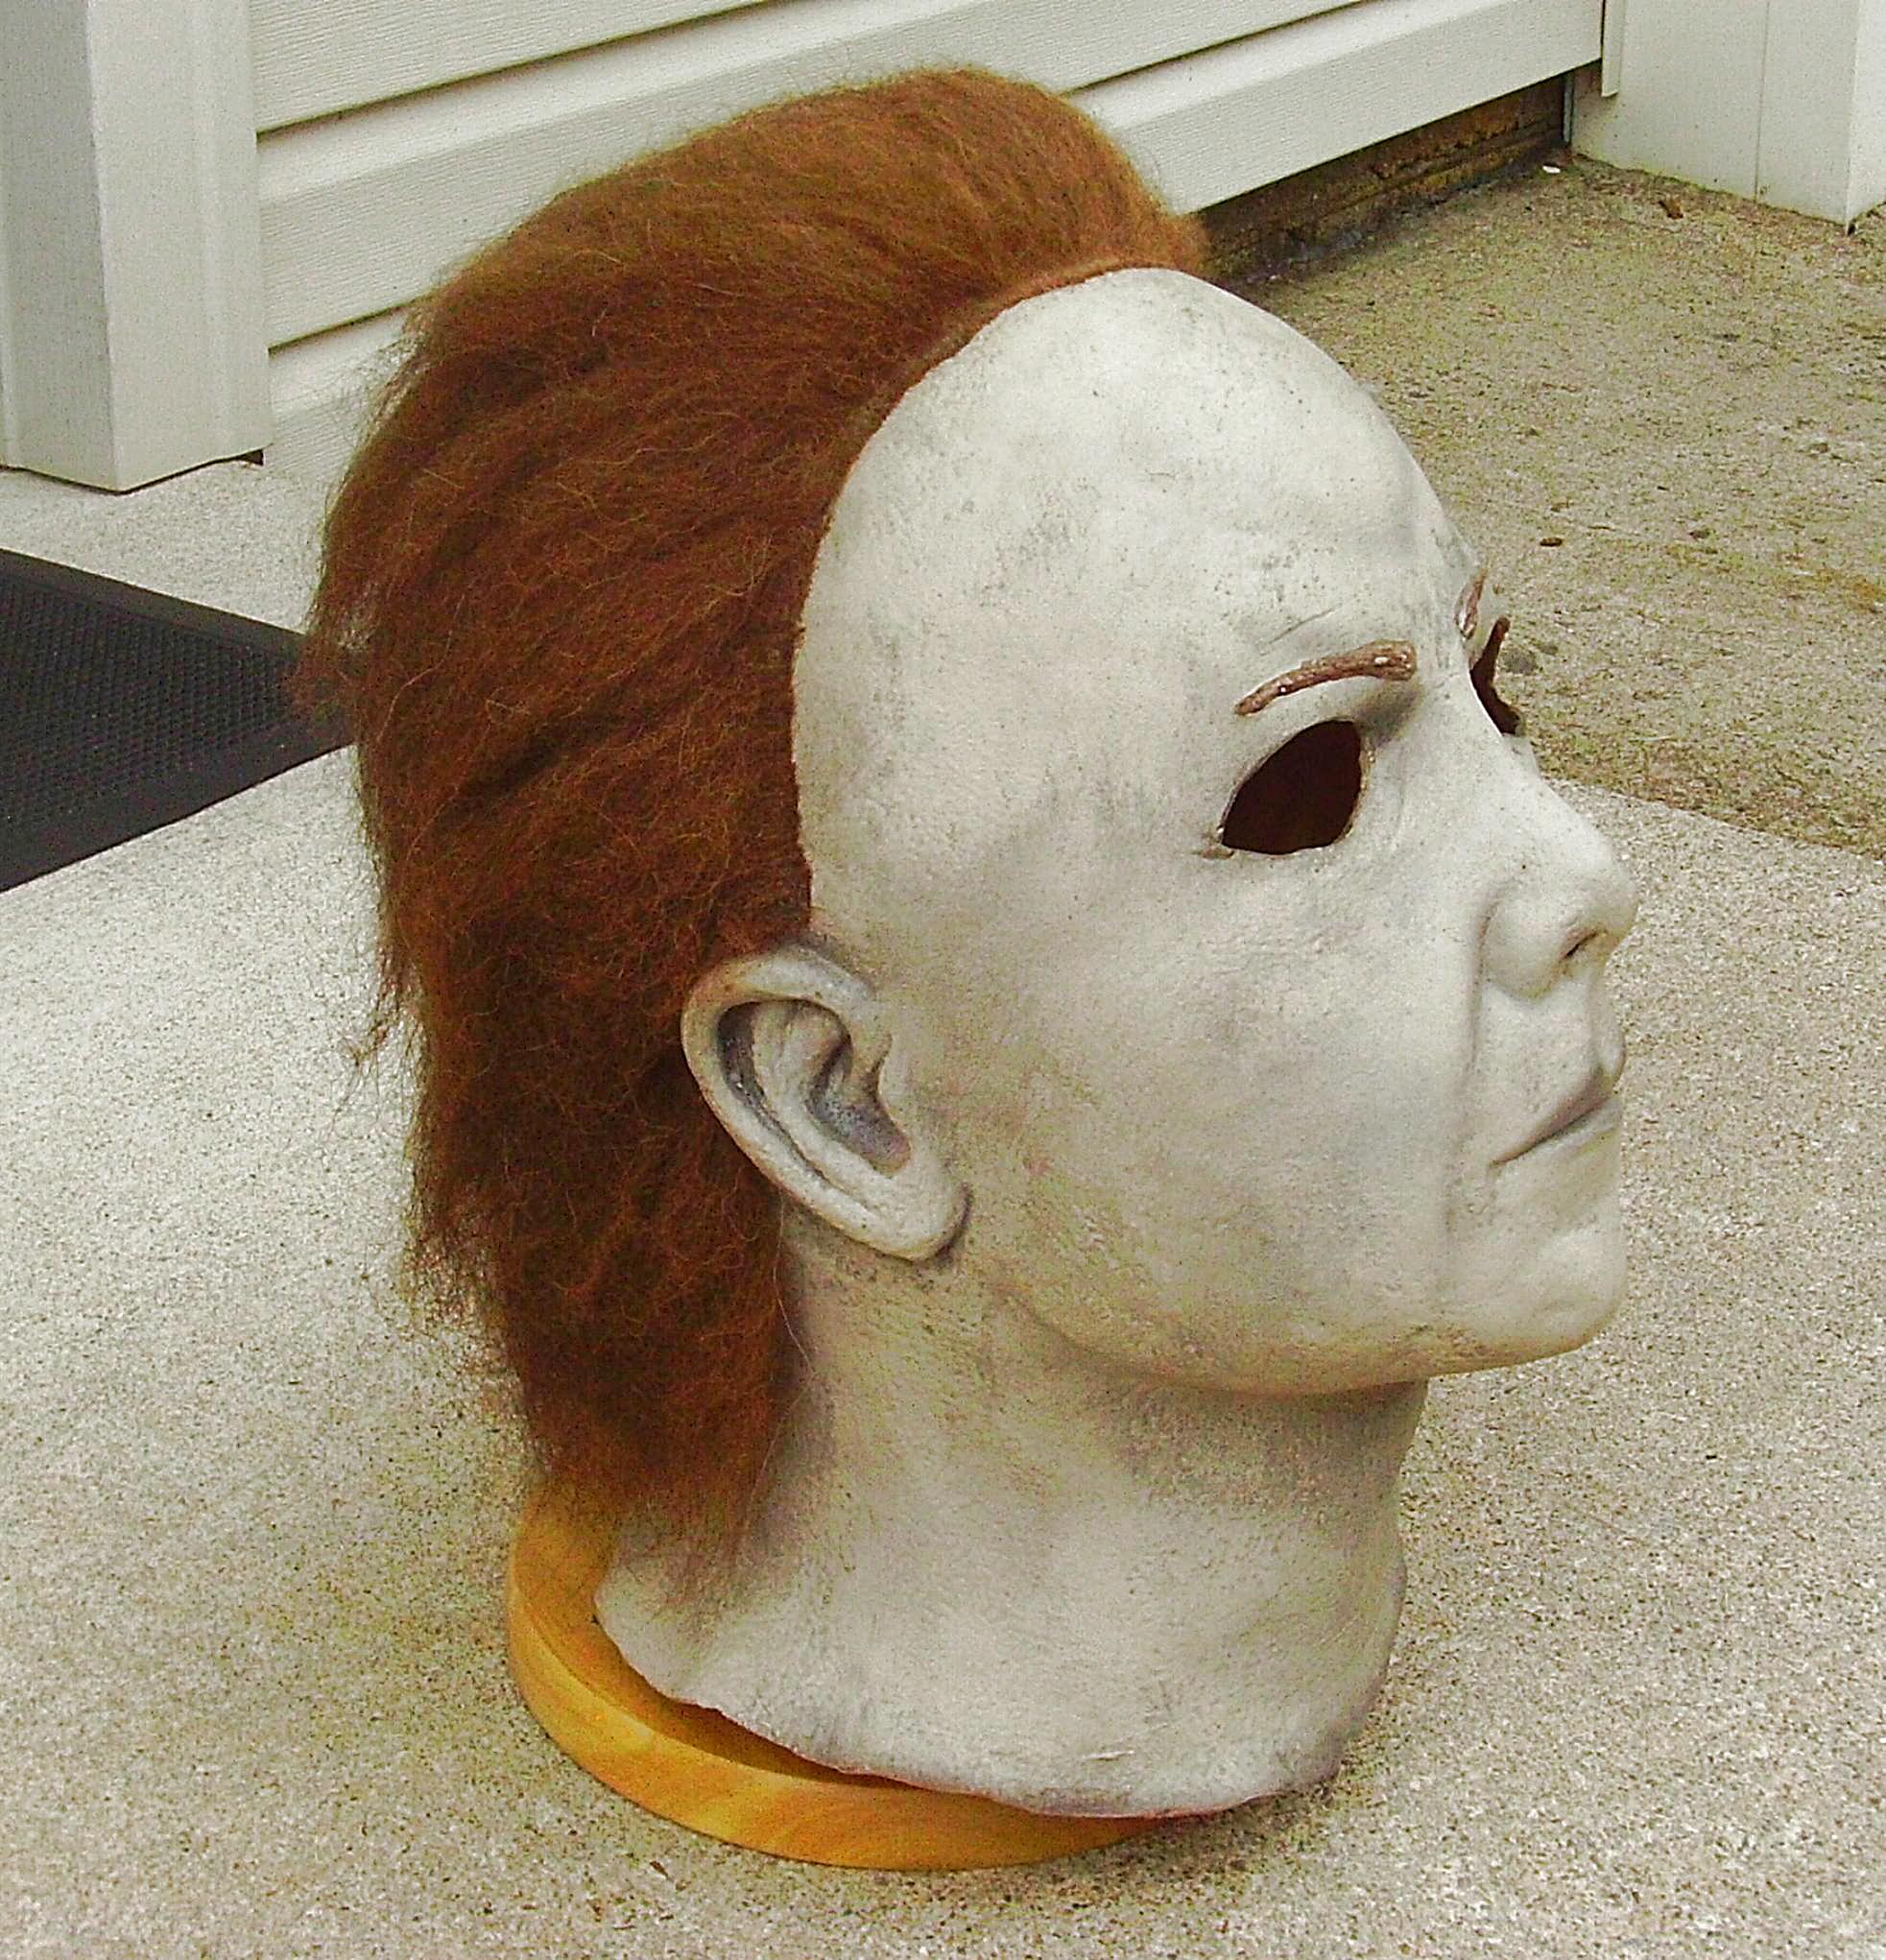
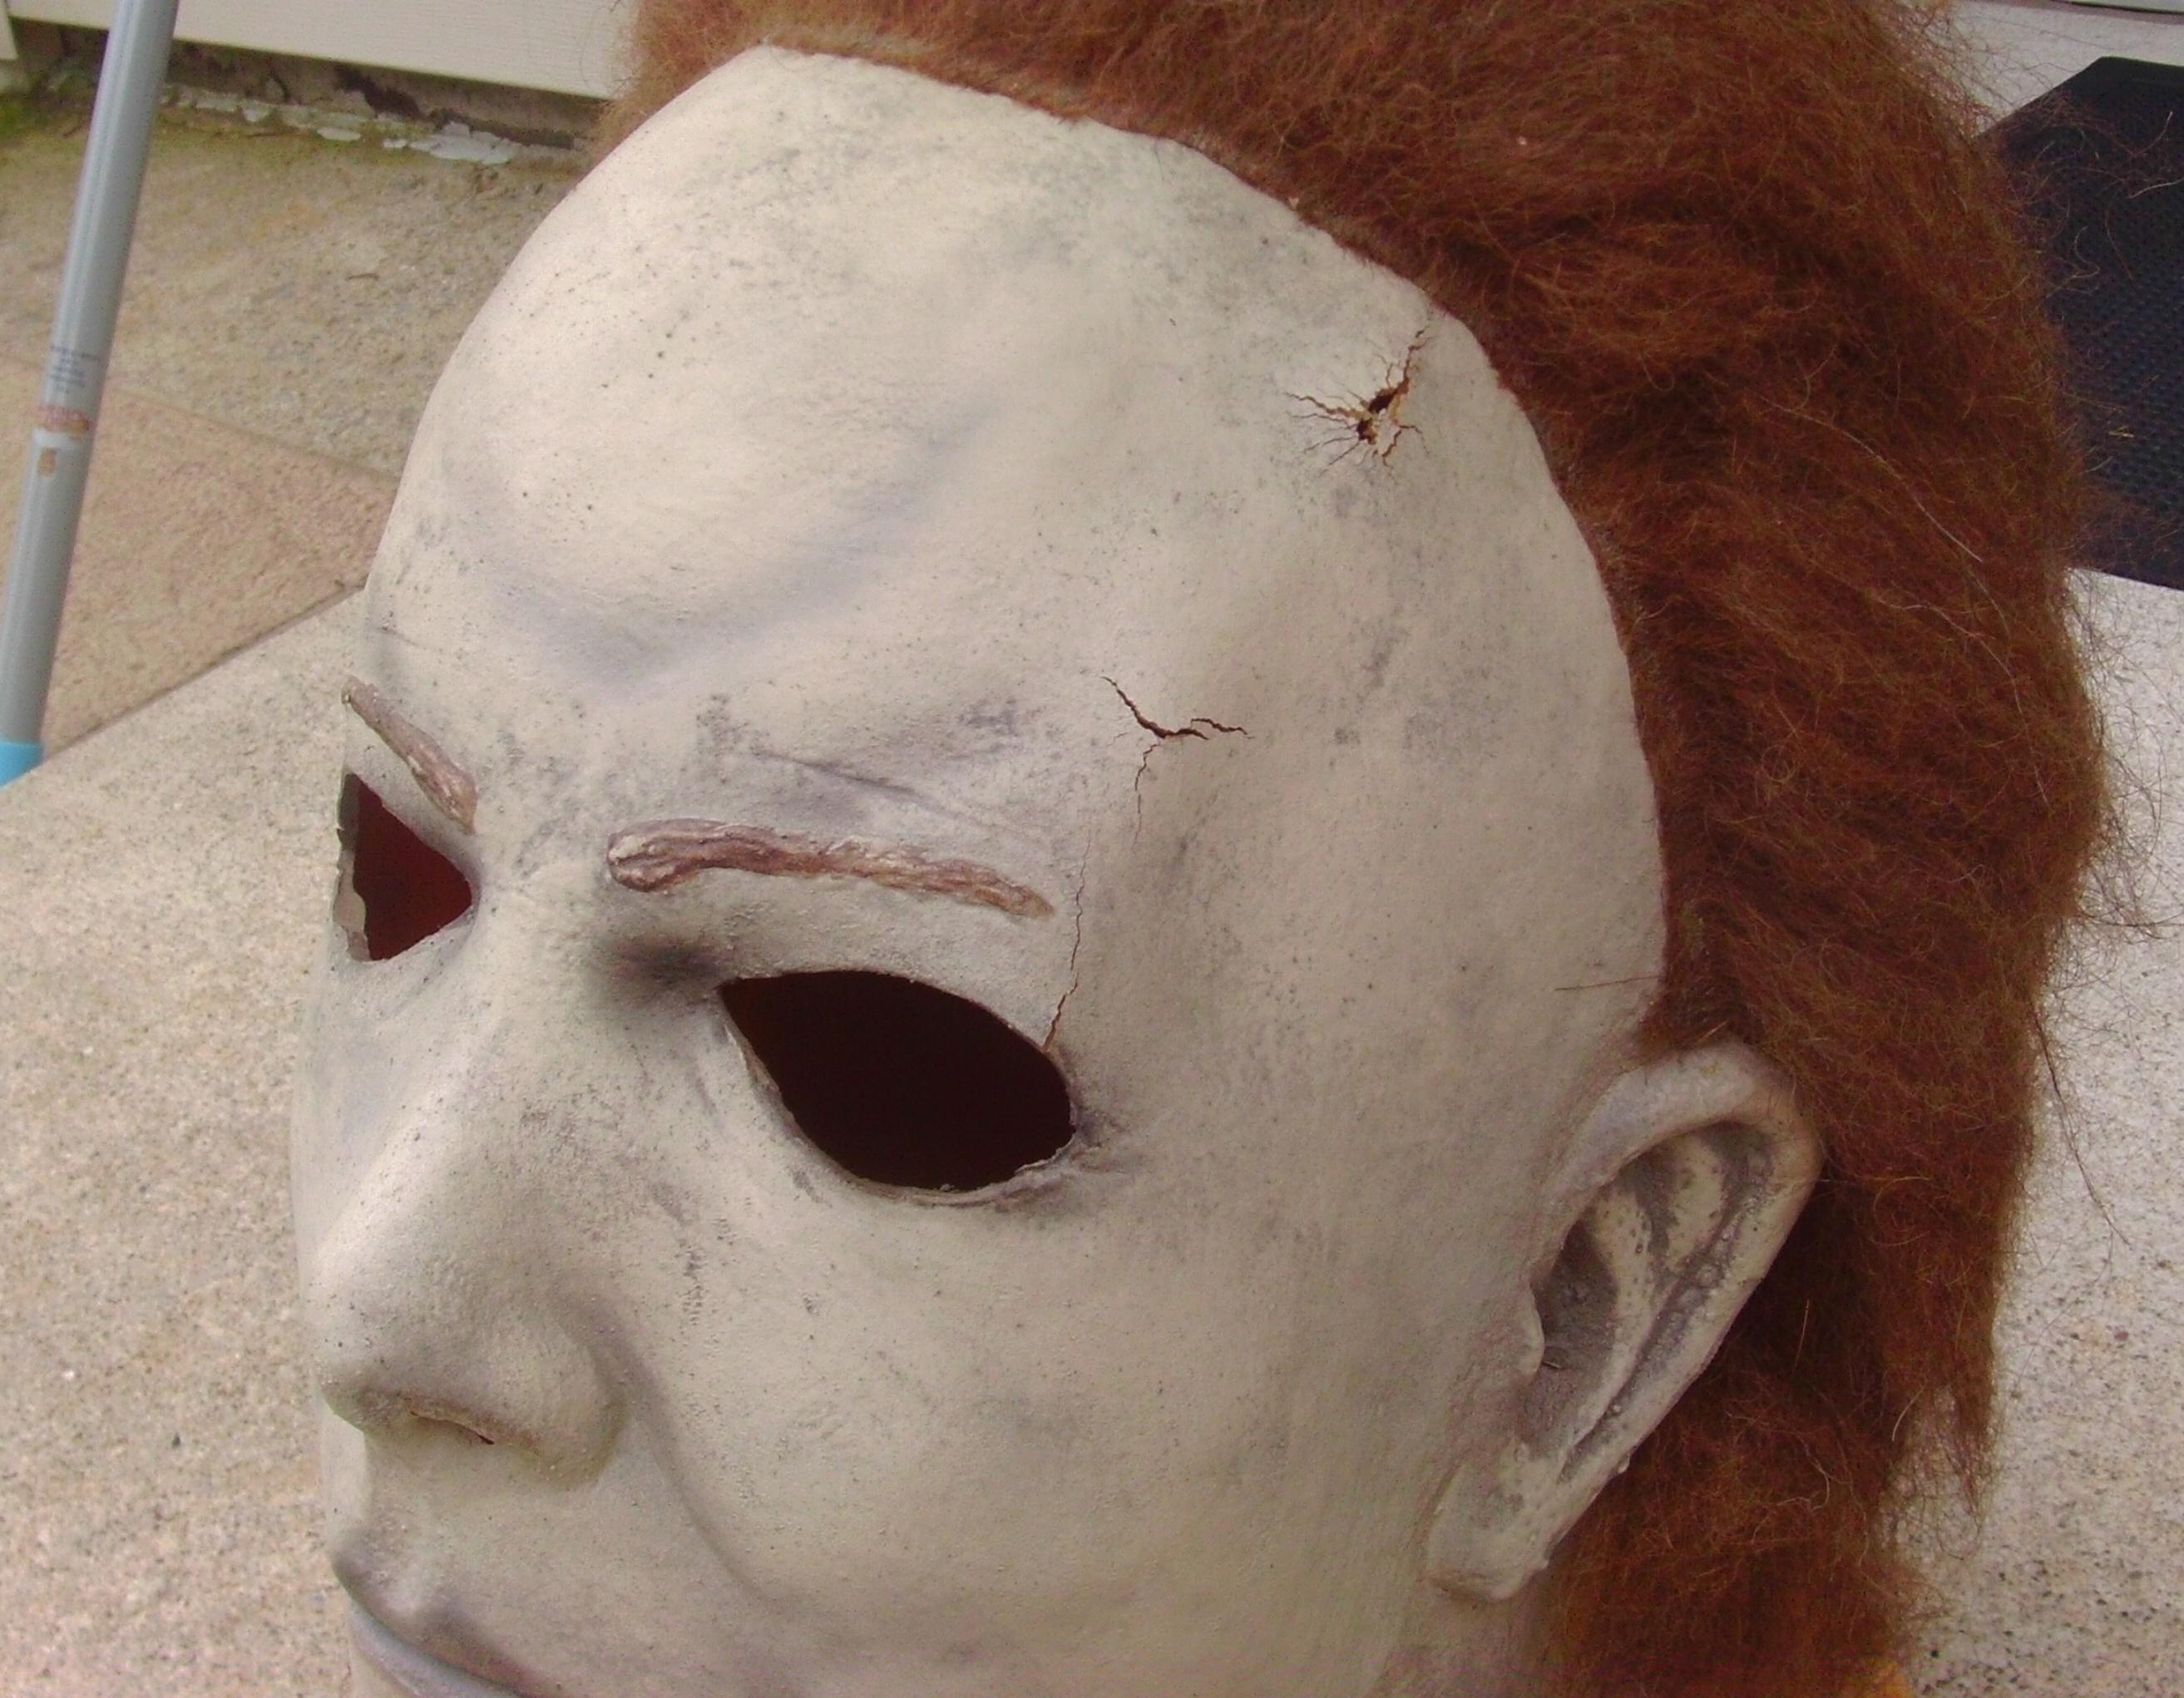
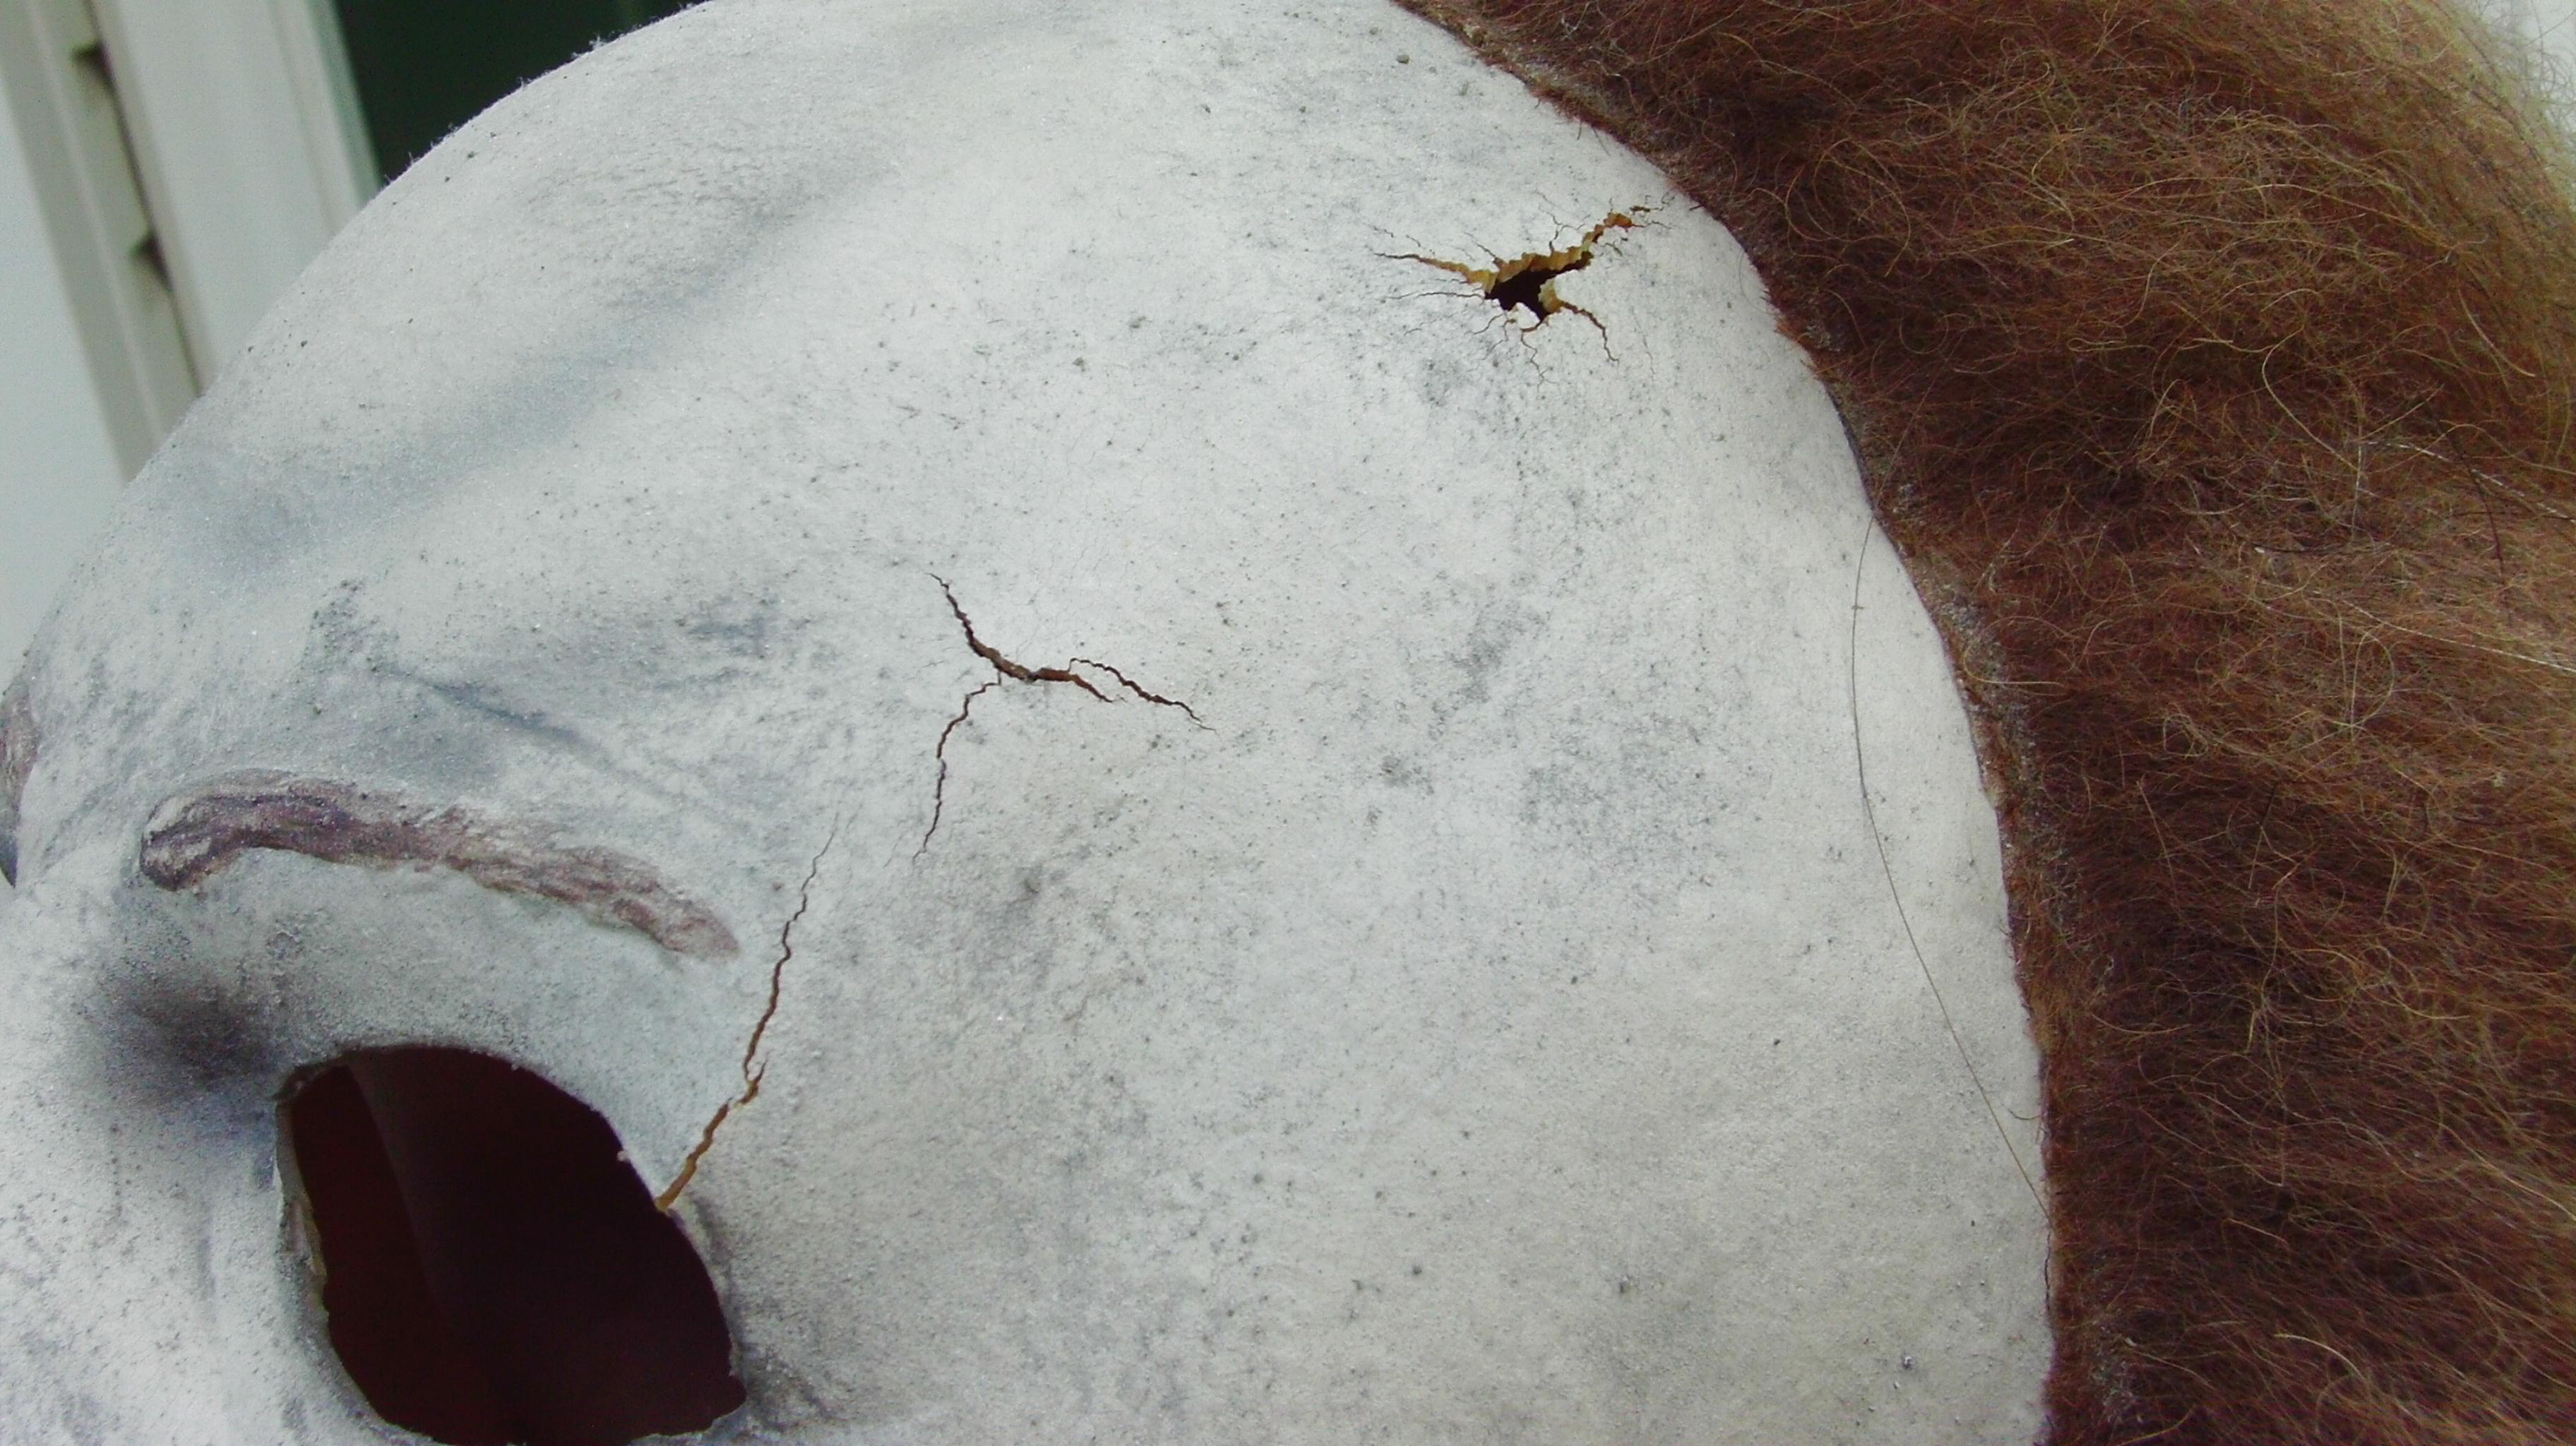
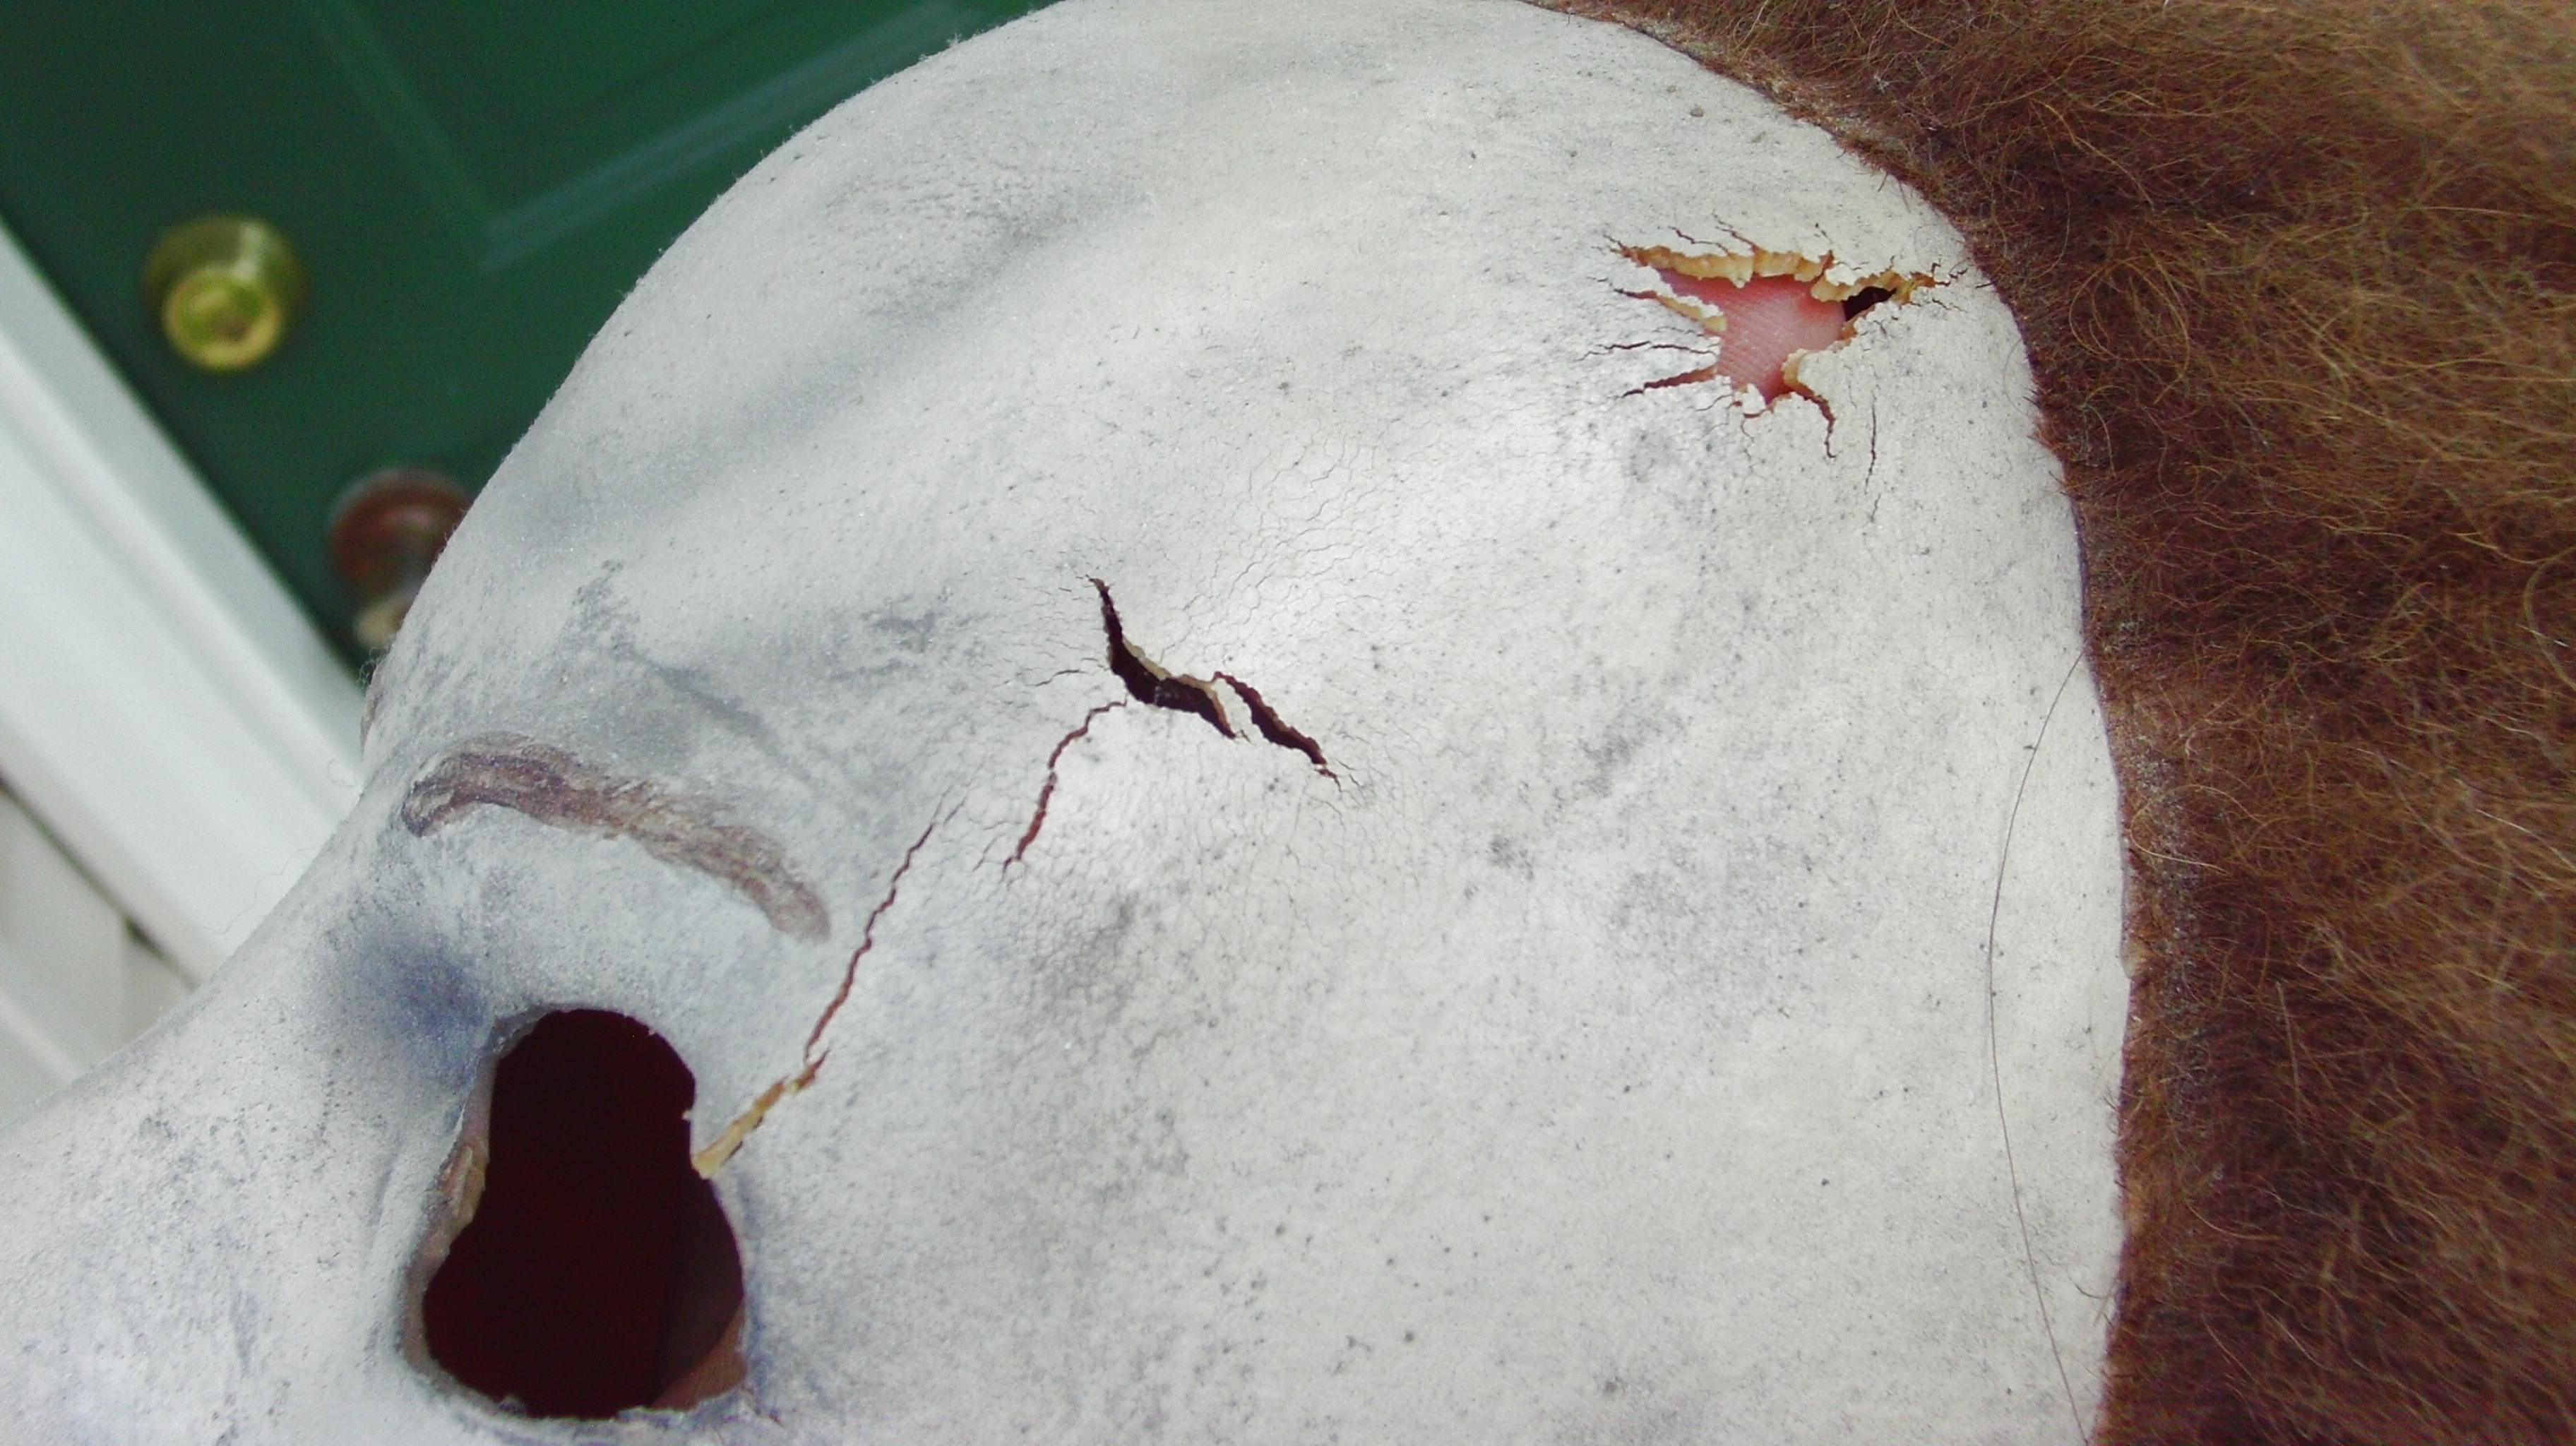
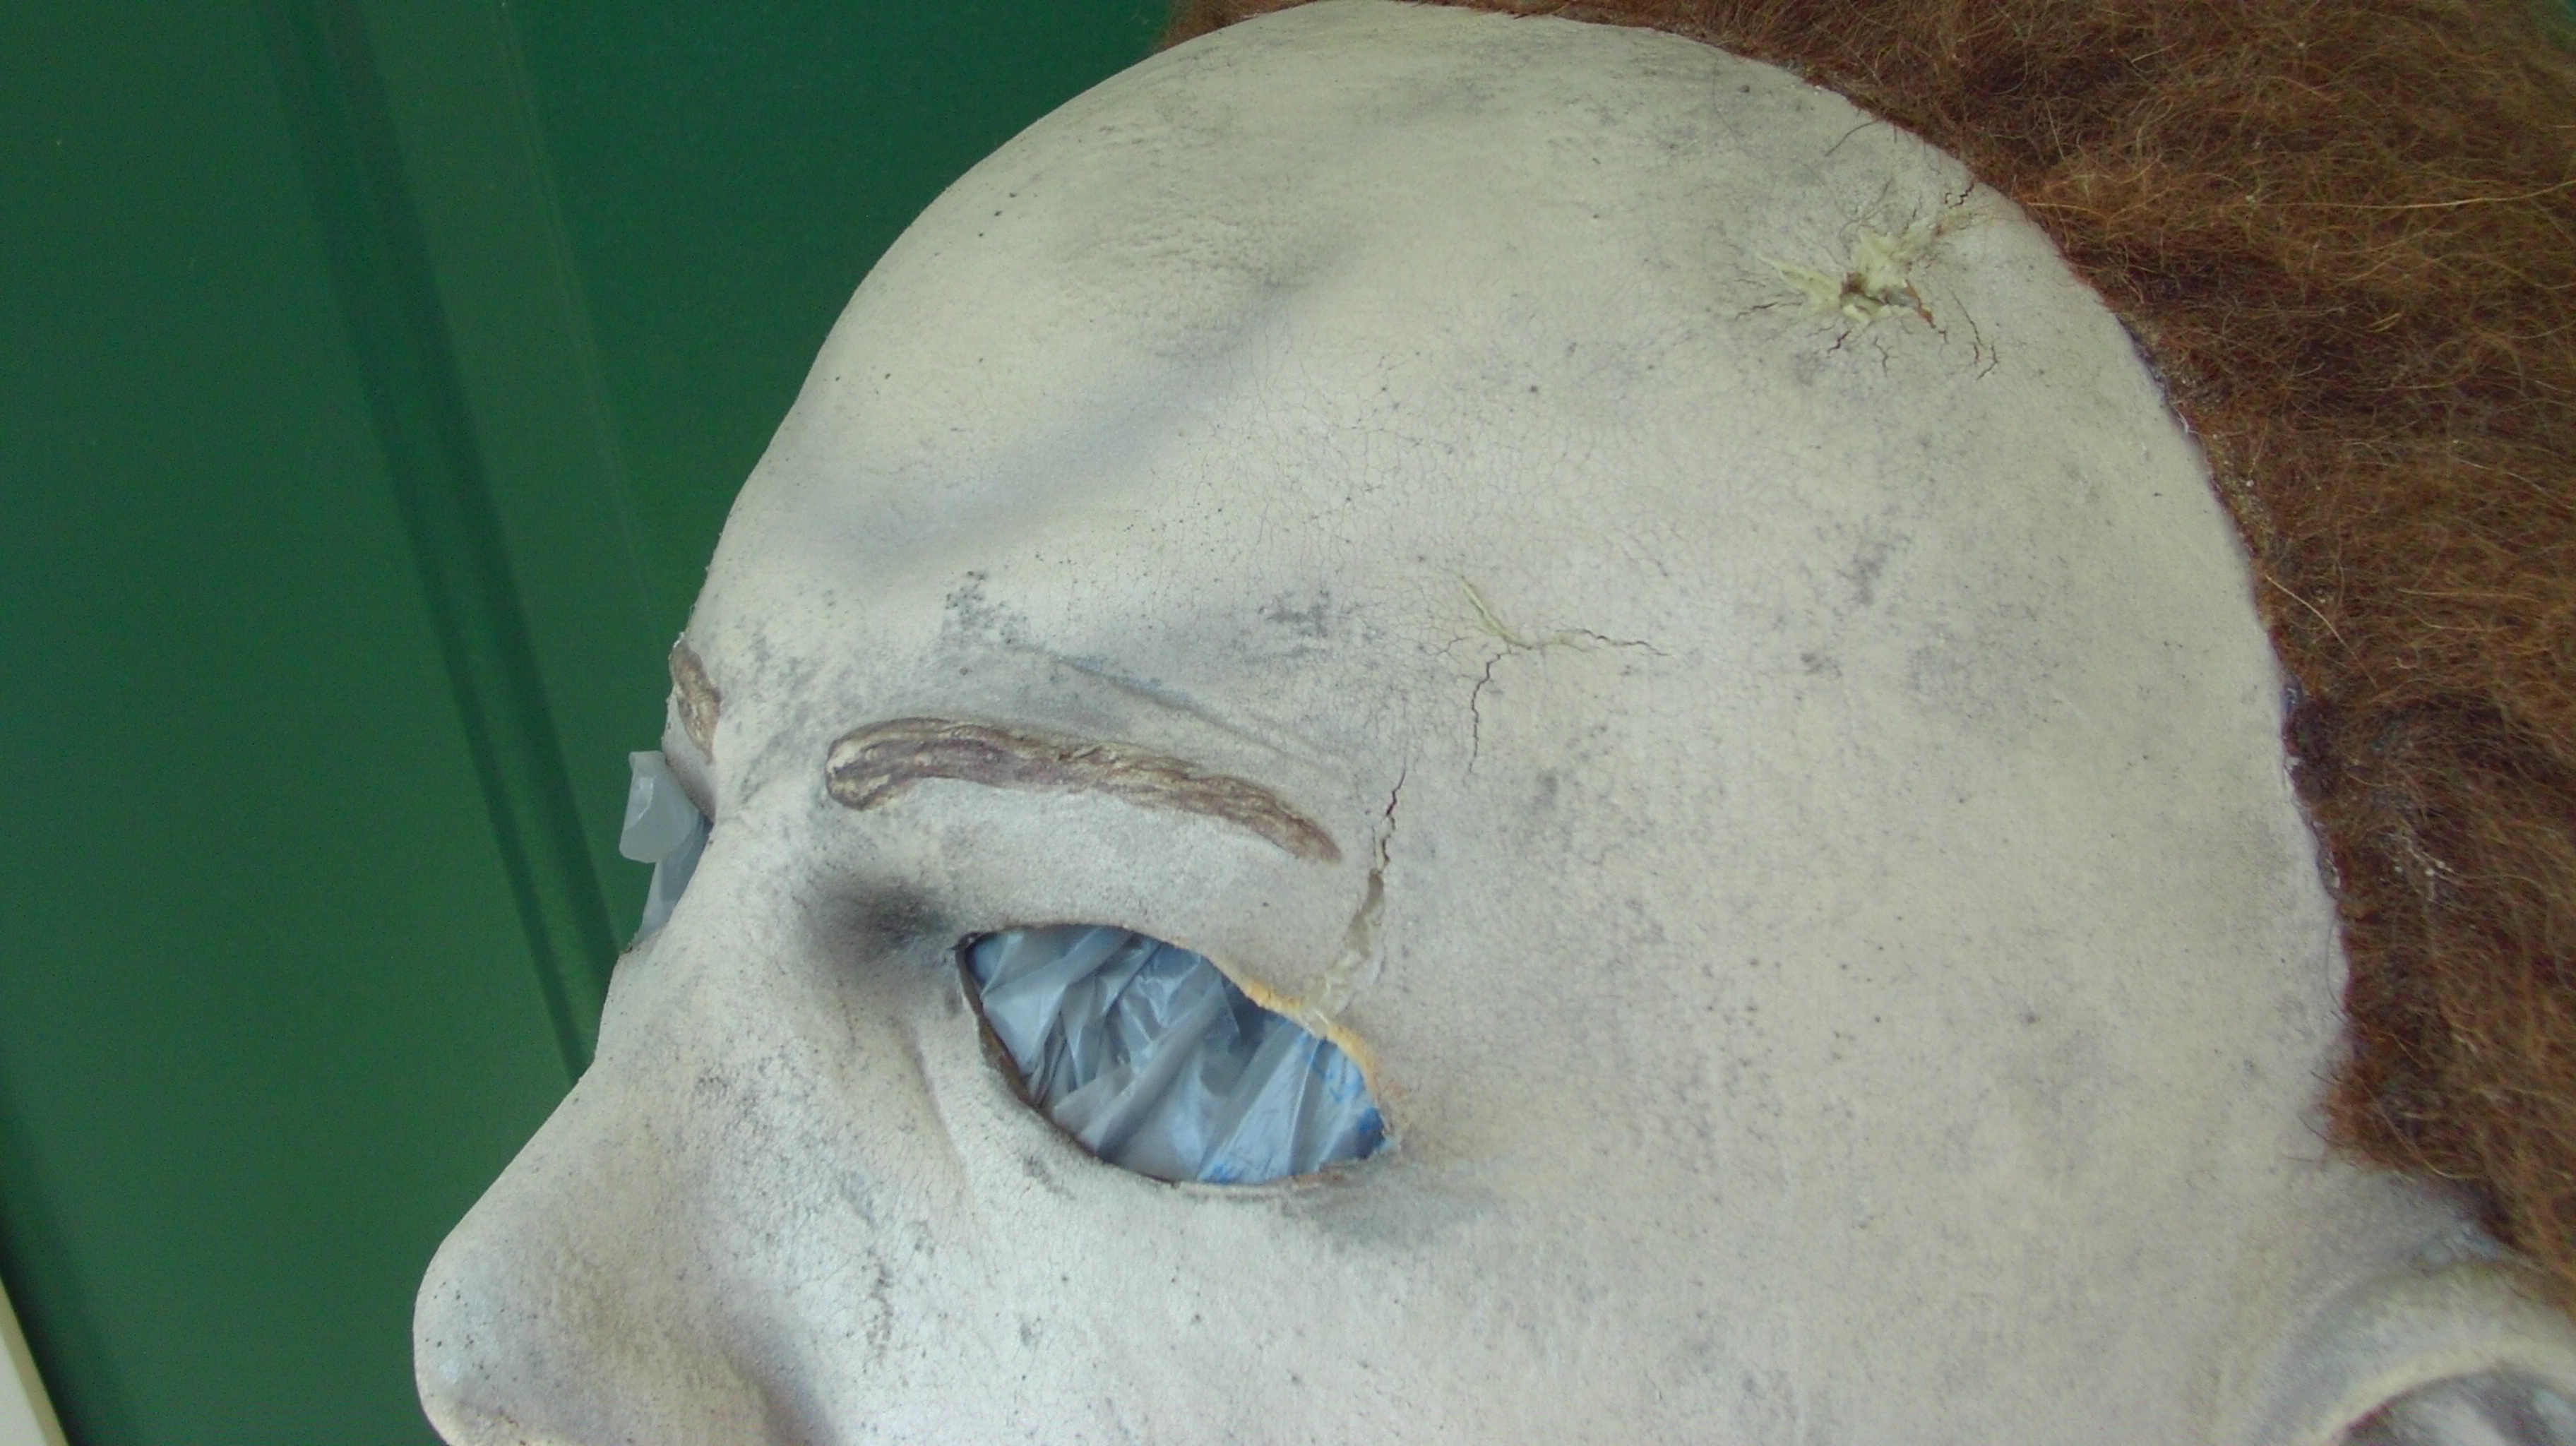
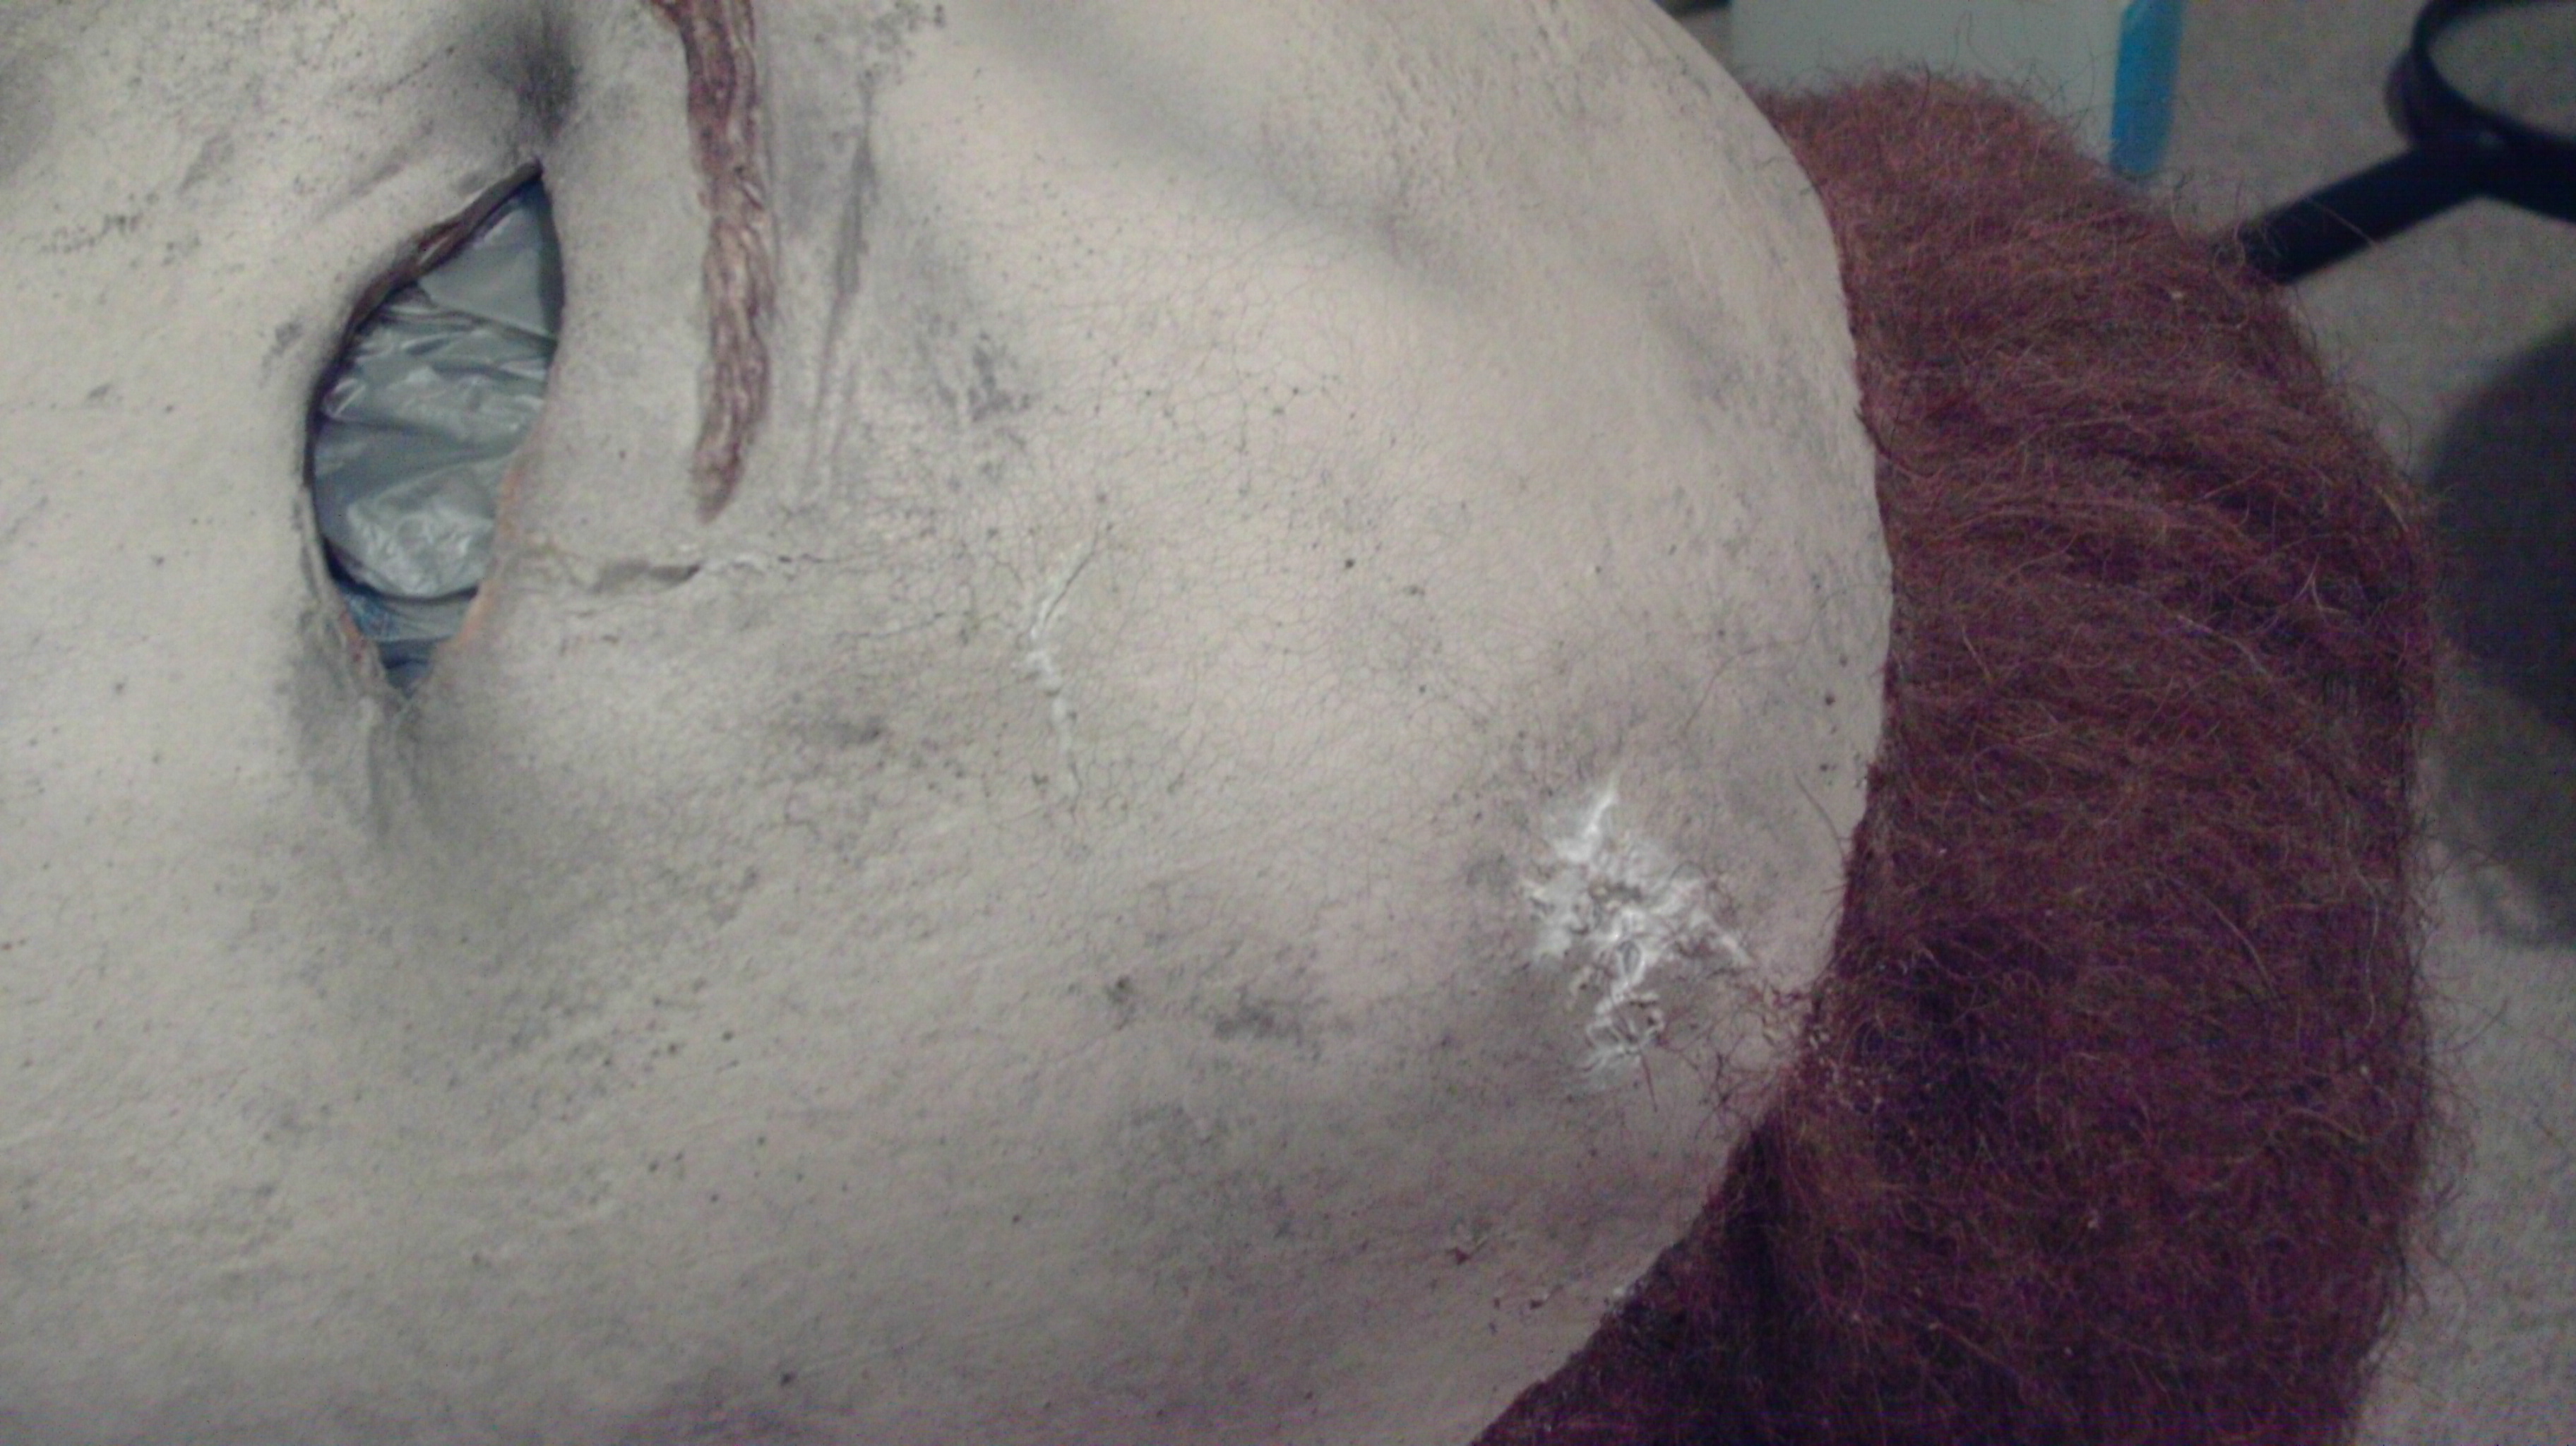
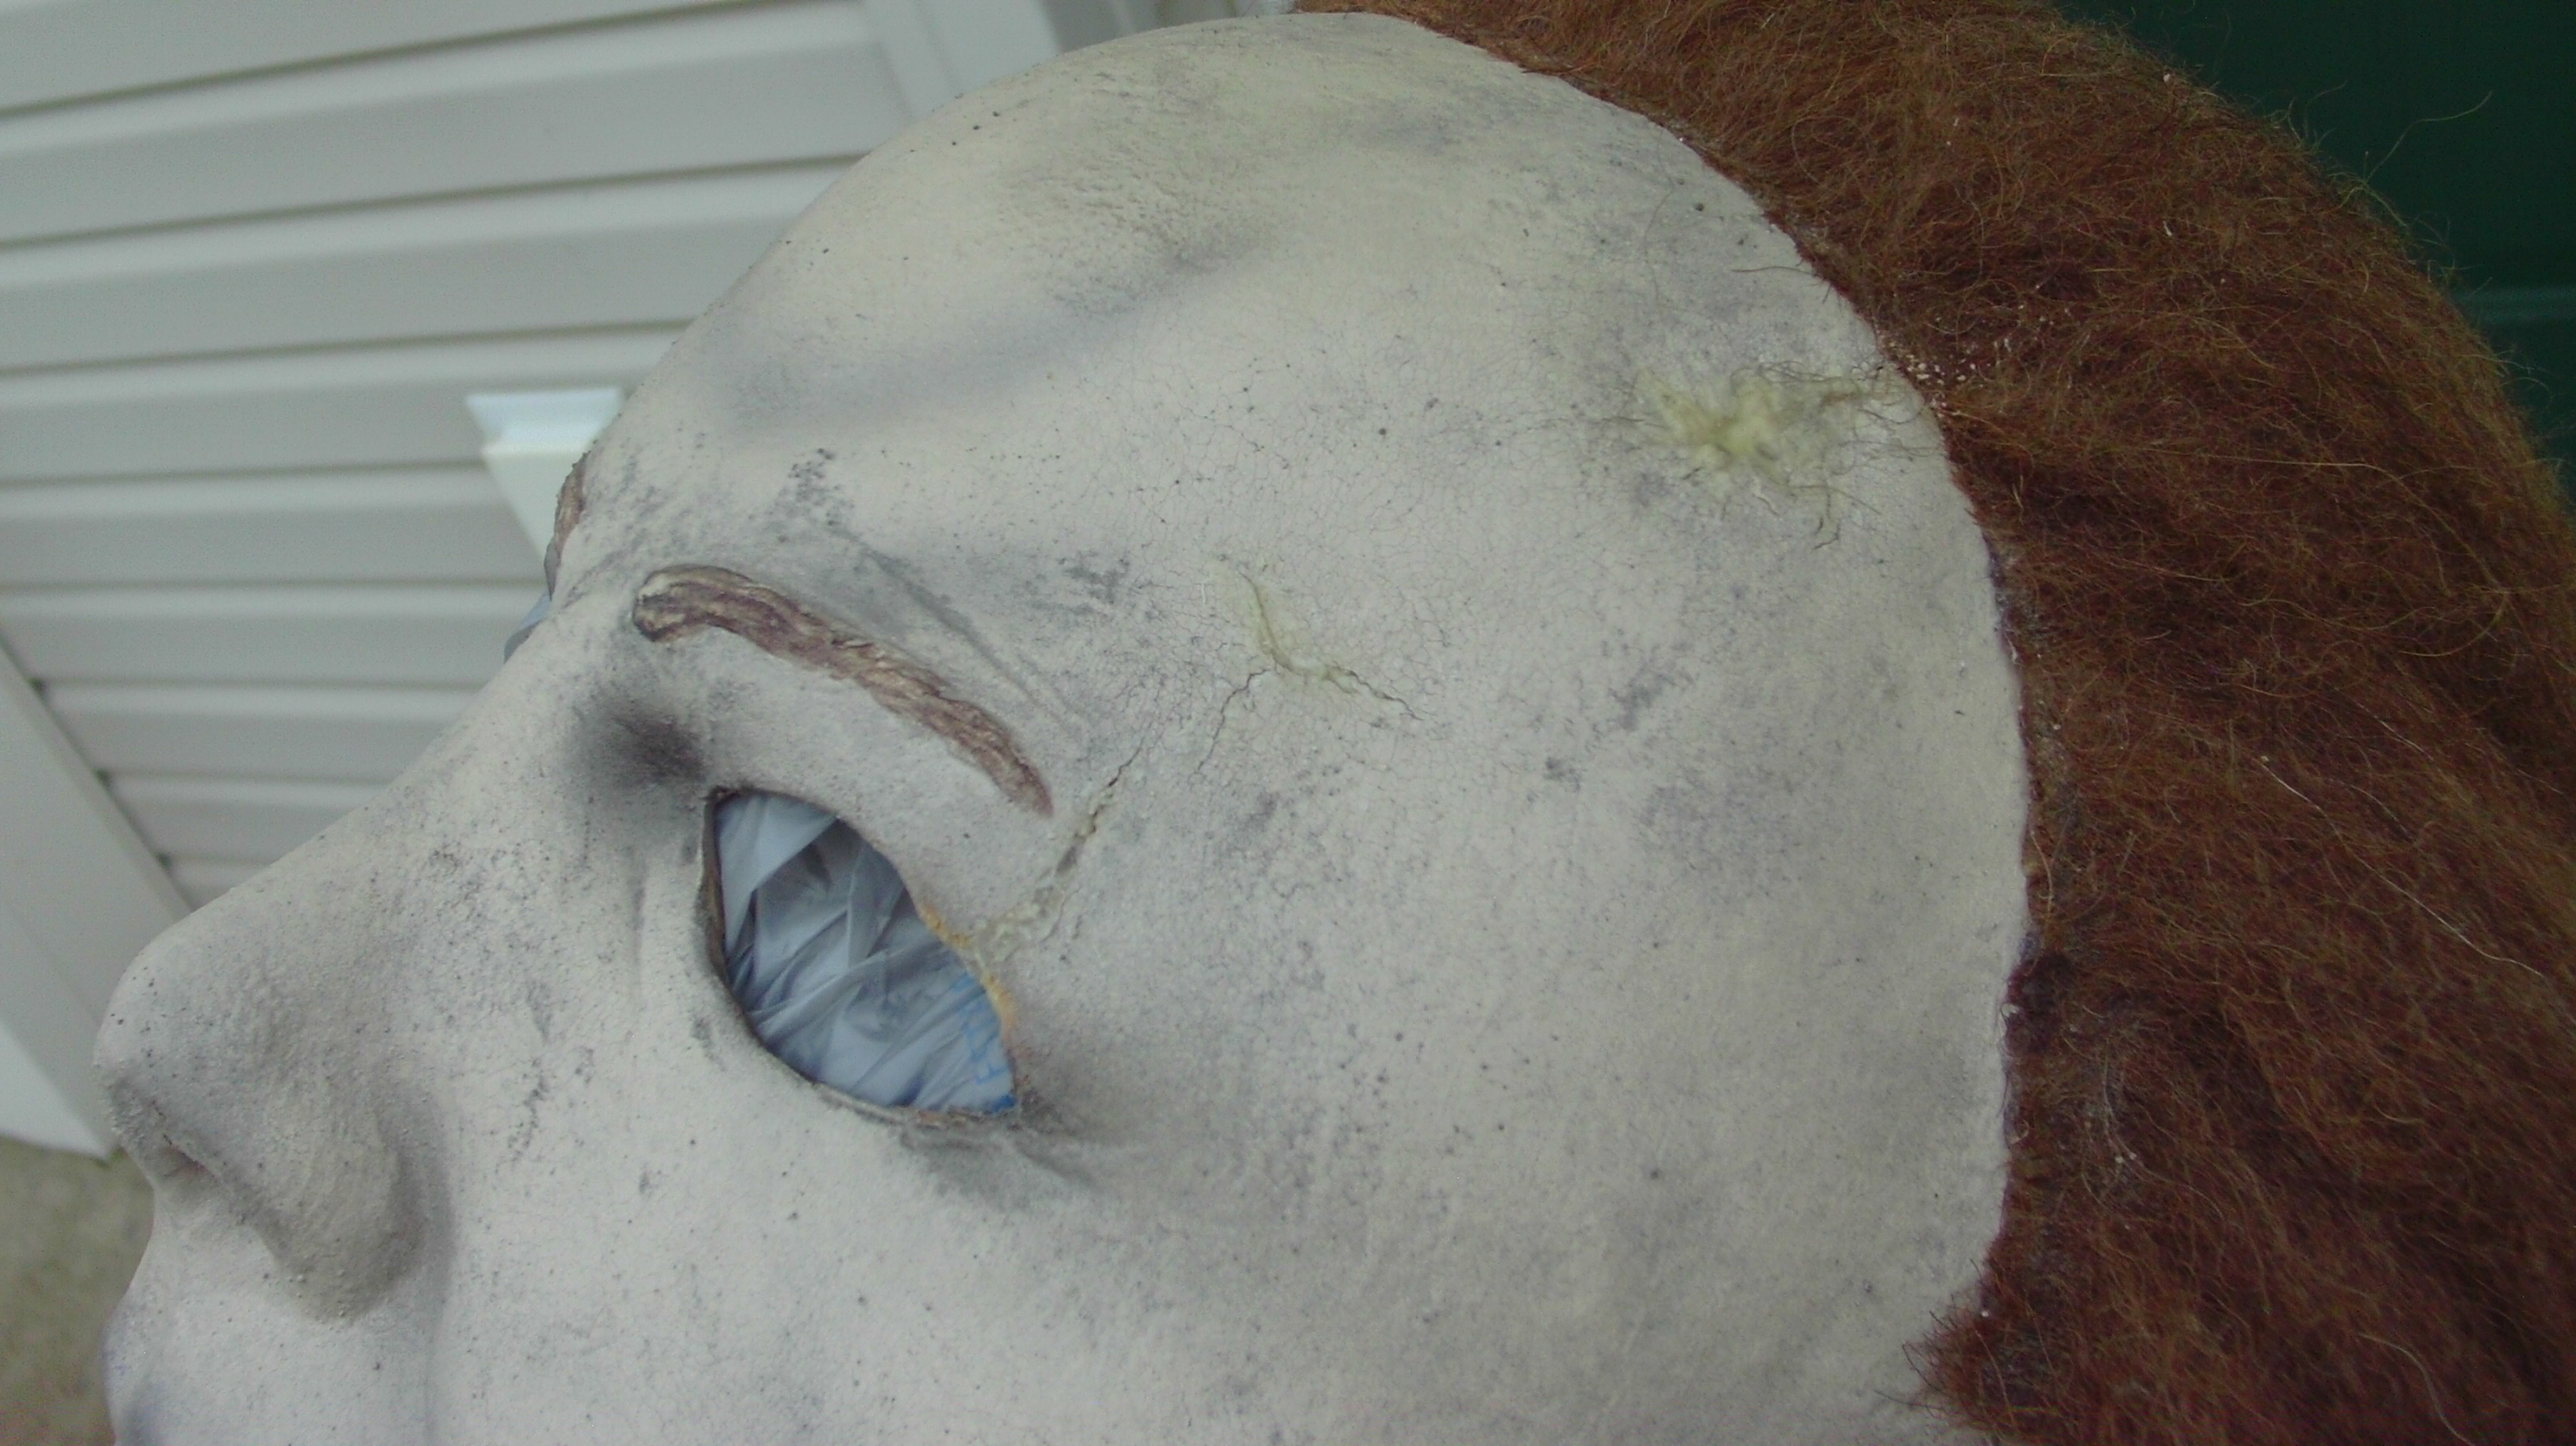
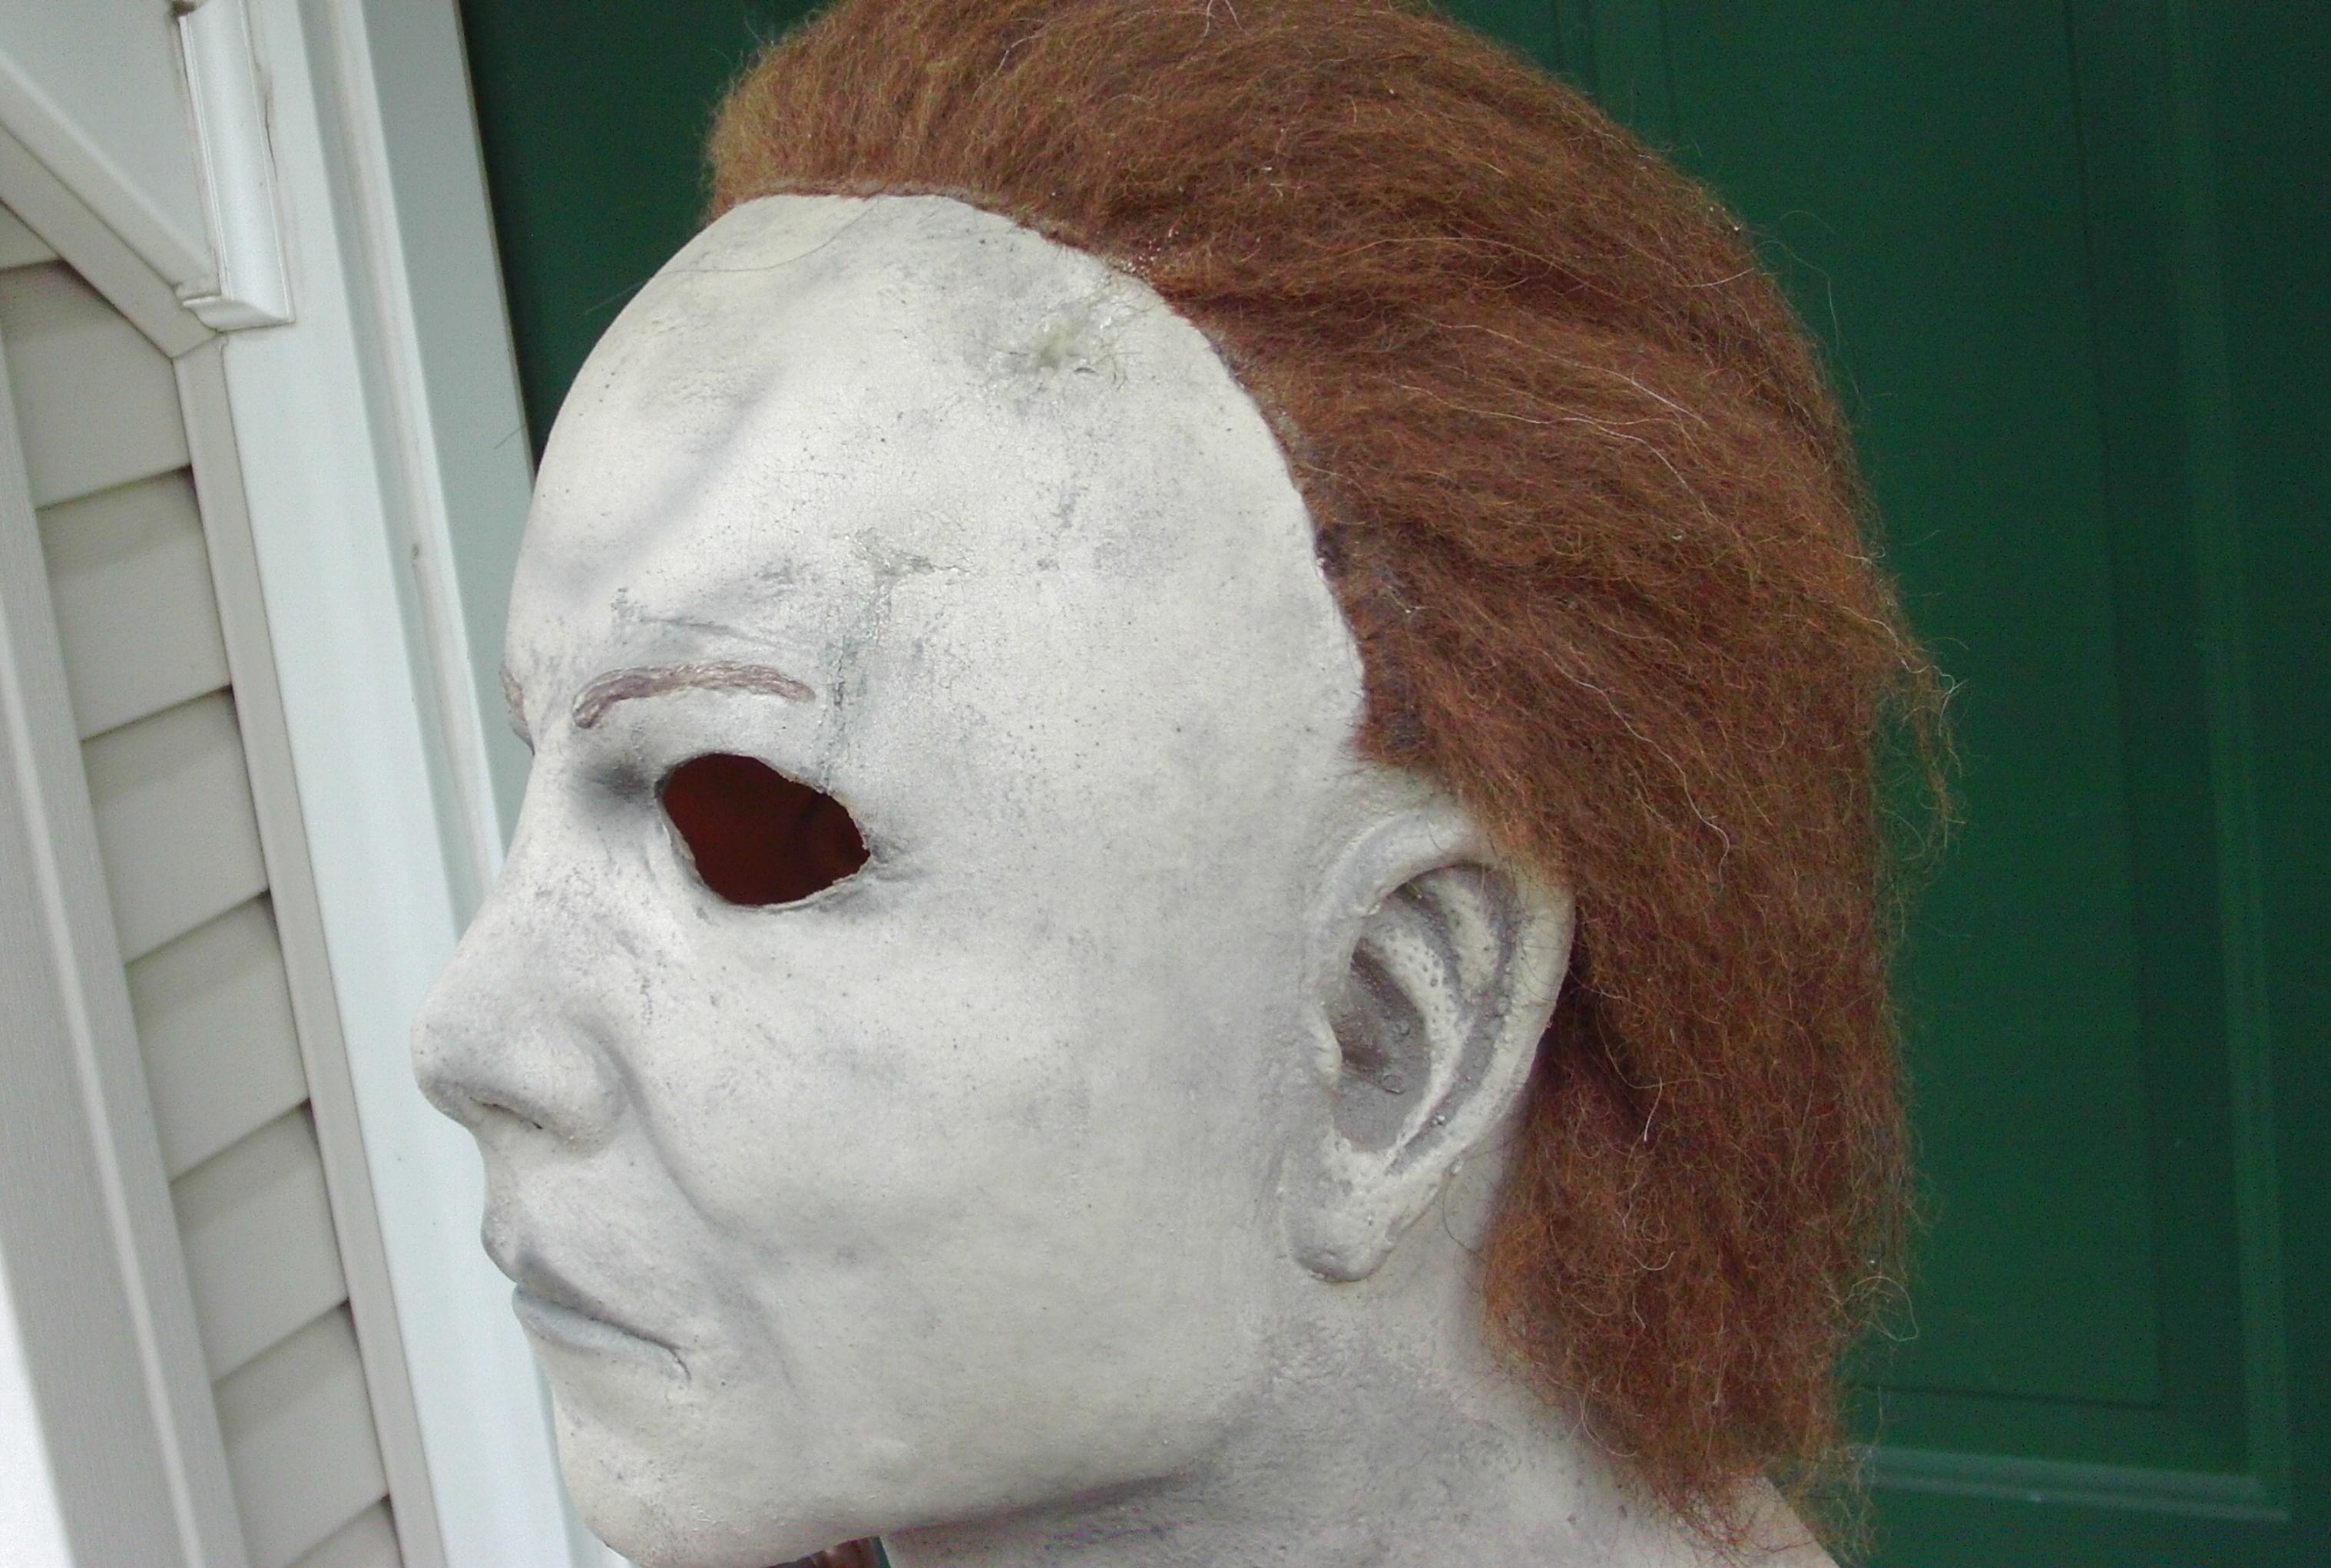
I posted this “Halloween 5: The Revenge of Michael Myers” mask restoration 2 years ago showing some of the restoration process for Don Shanks. Even more amazing is how I got back my original Ghastly Productions Michael Myers mask as seen in my last post above that I sold to someone who had it for two years, and for some reason it started to dry-rot in the same area on the upper left head and cracked around the eye. But that was the only spots really, but I never had that happen to any mask. But I am now restoring it much in the same way using custom made latex patches inside, and then touching up the outside.
It might not even need painted as the yellowish tint blends pretty well with the mask, and makes it just look like an aged spot or possibly a gunshot or stab wound. So it kinda adds to the look of the mask, and right now it looks like a bullet-hole to the head lol. But I want to fix it so that it lasts, as this was my favorite H5 I had, and was actually made big enough for me to wear personally, and I will post before and after pics of the restoration soon!
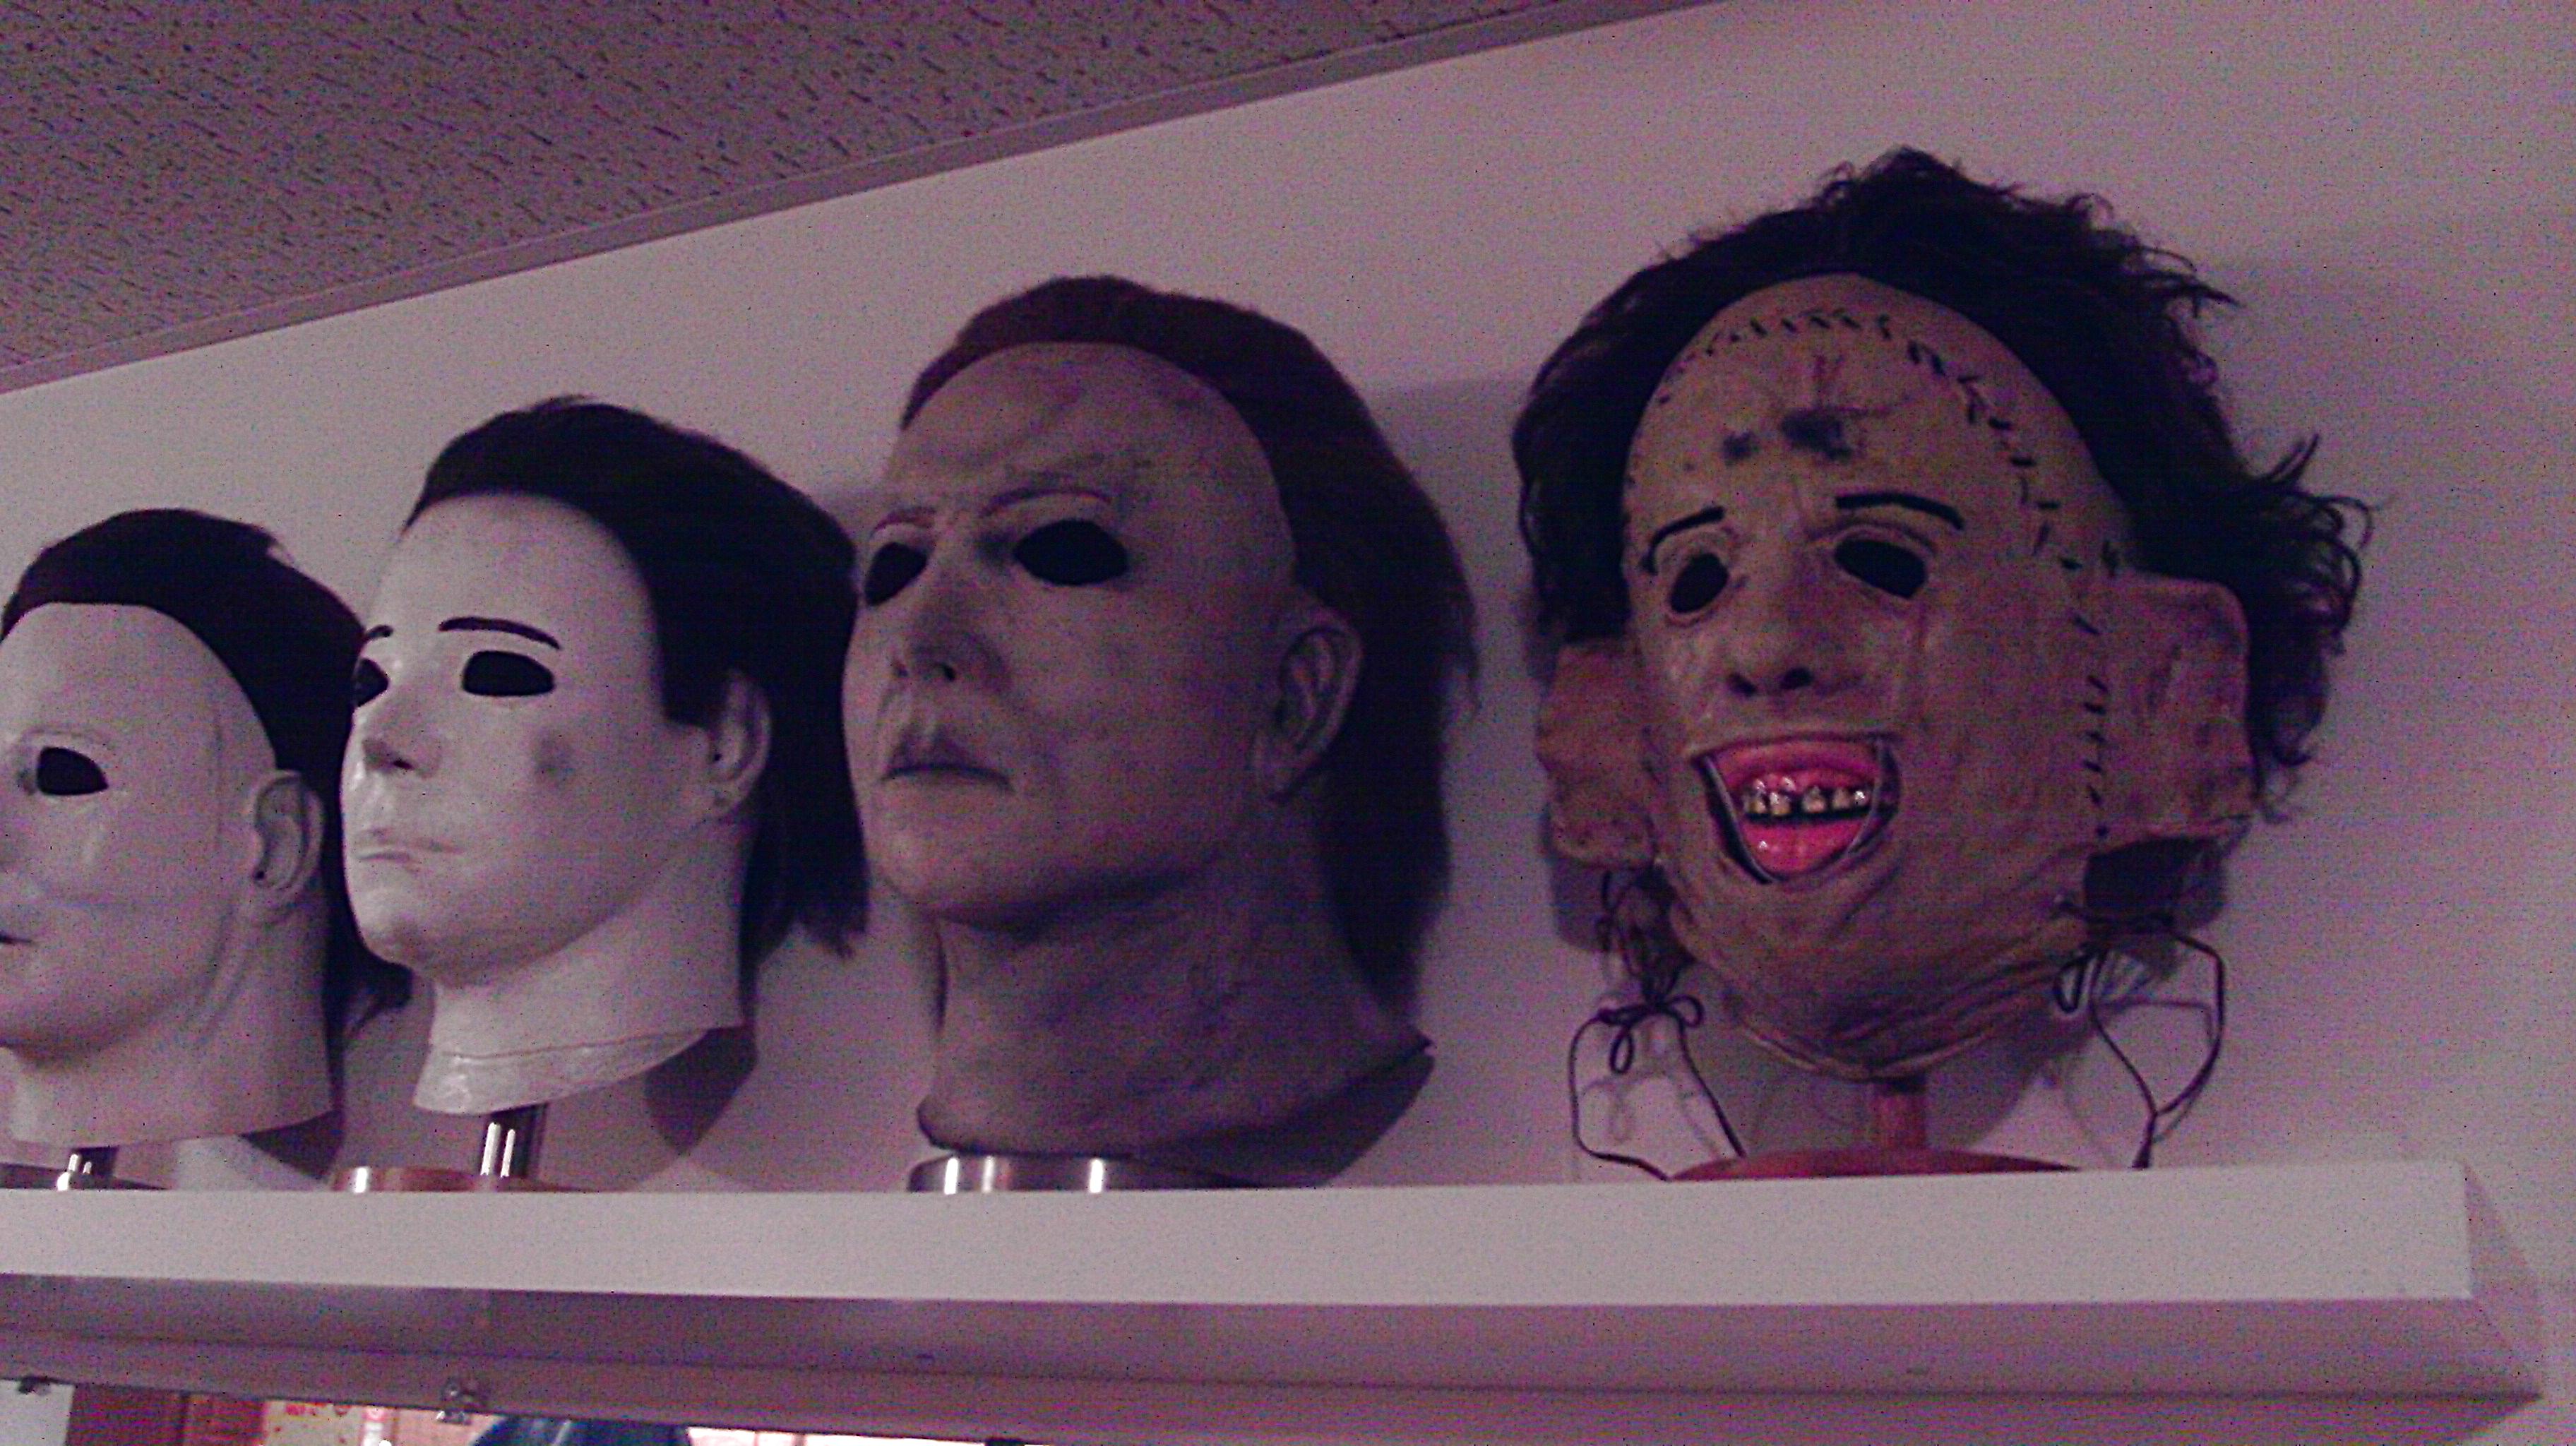
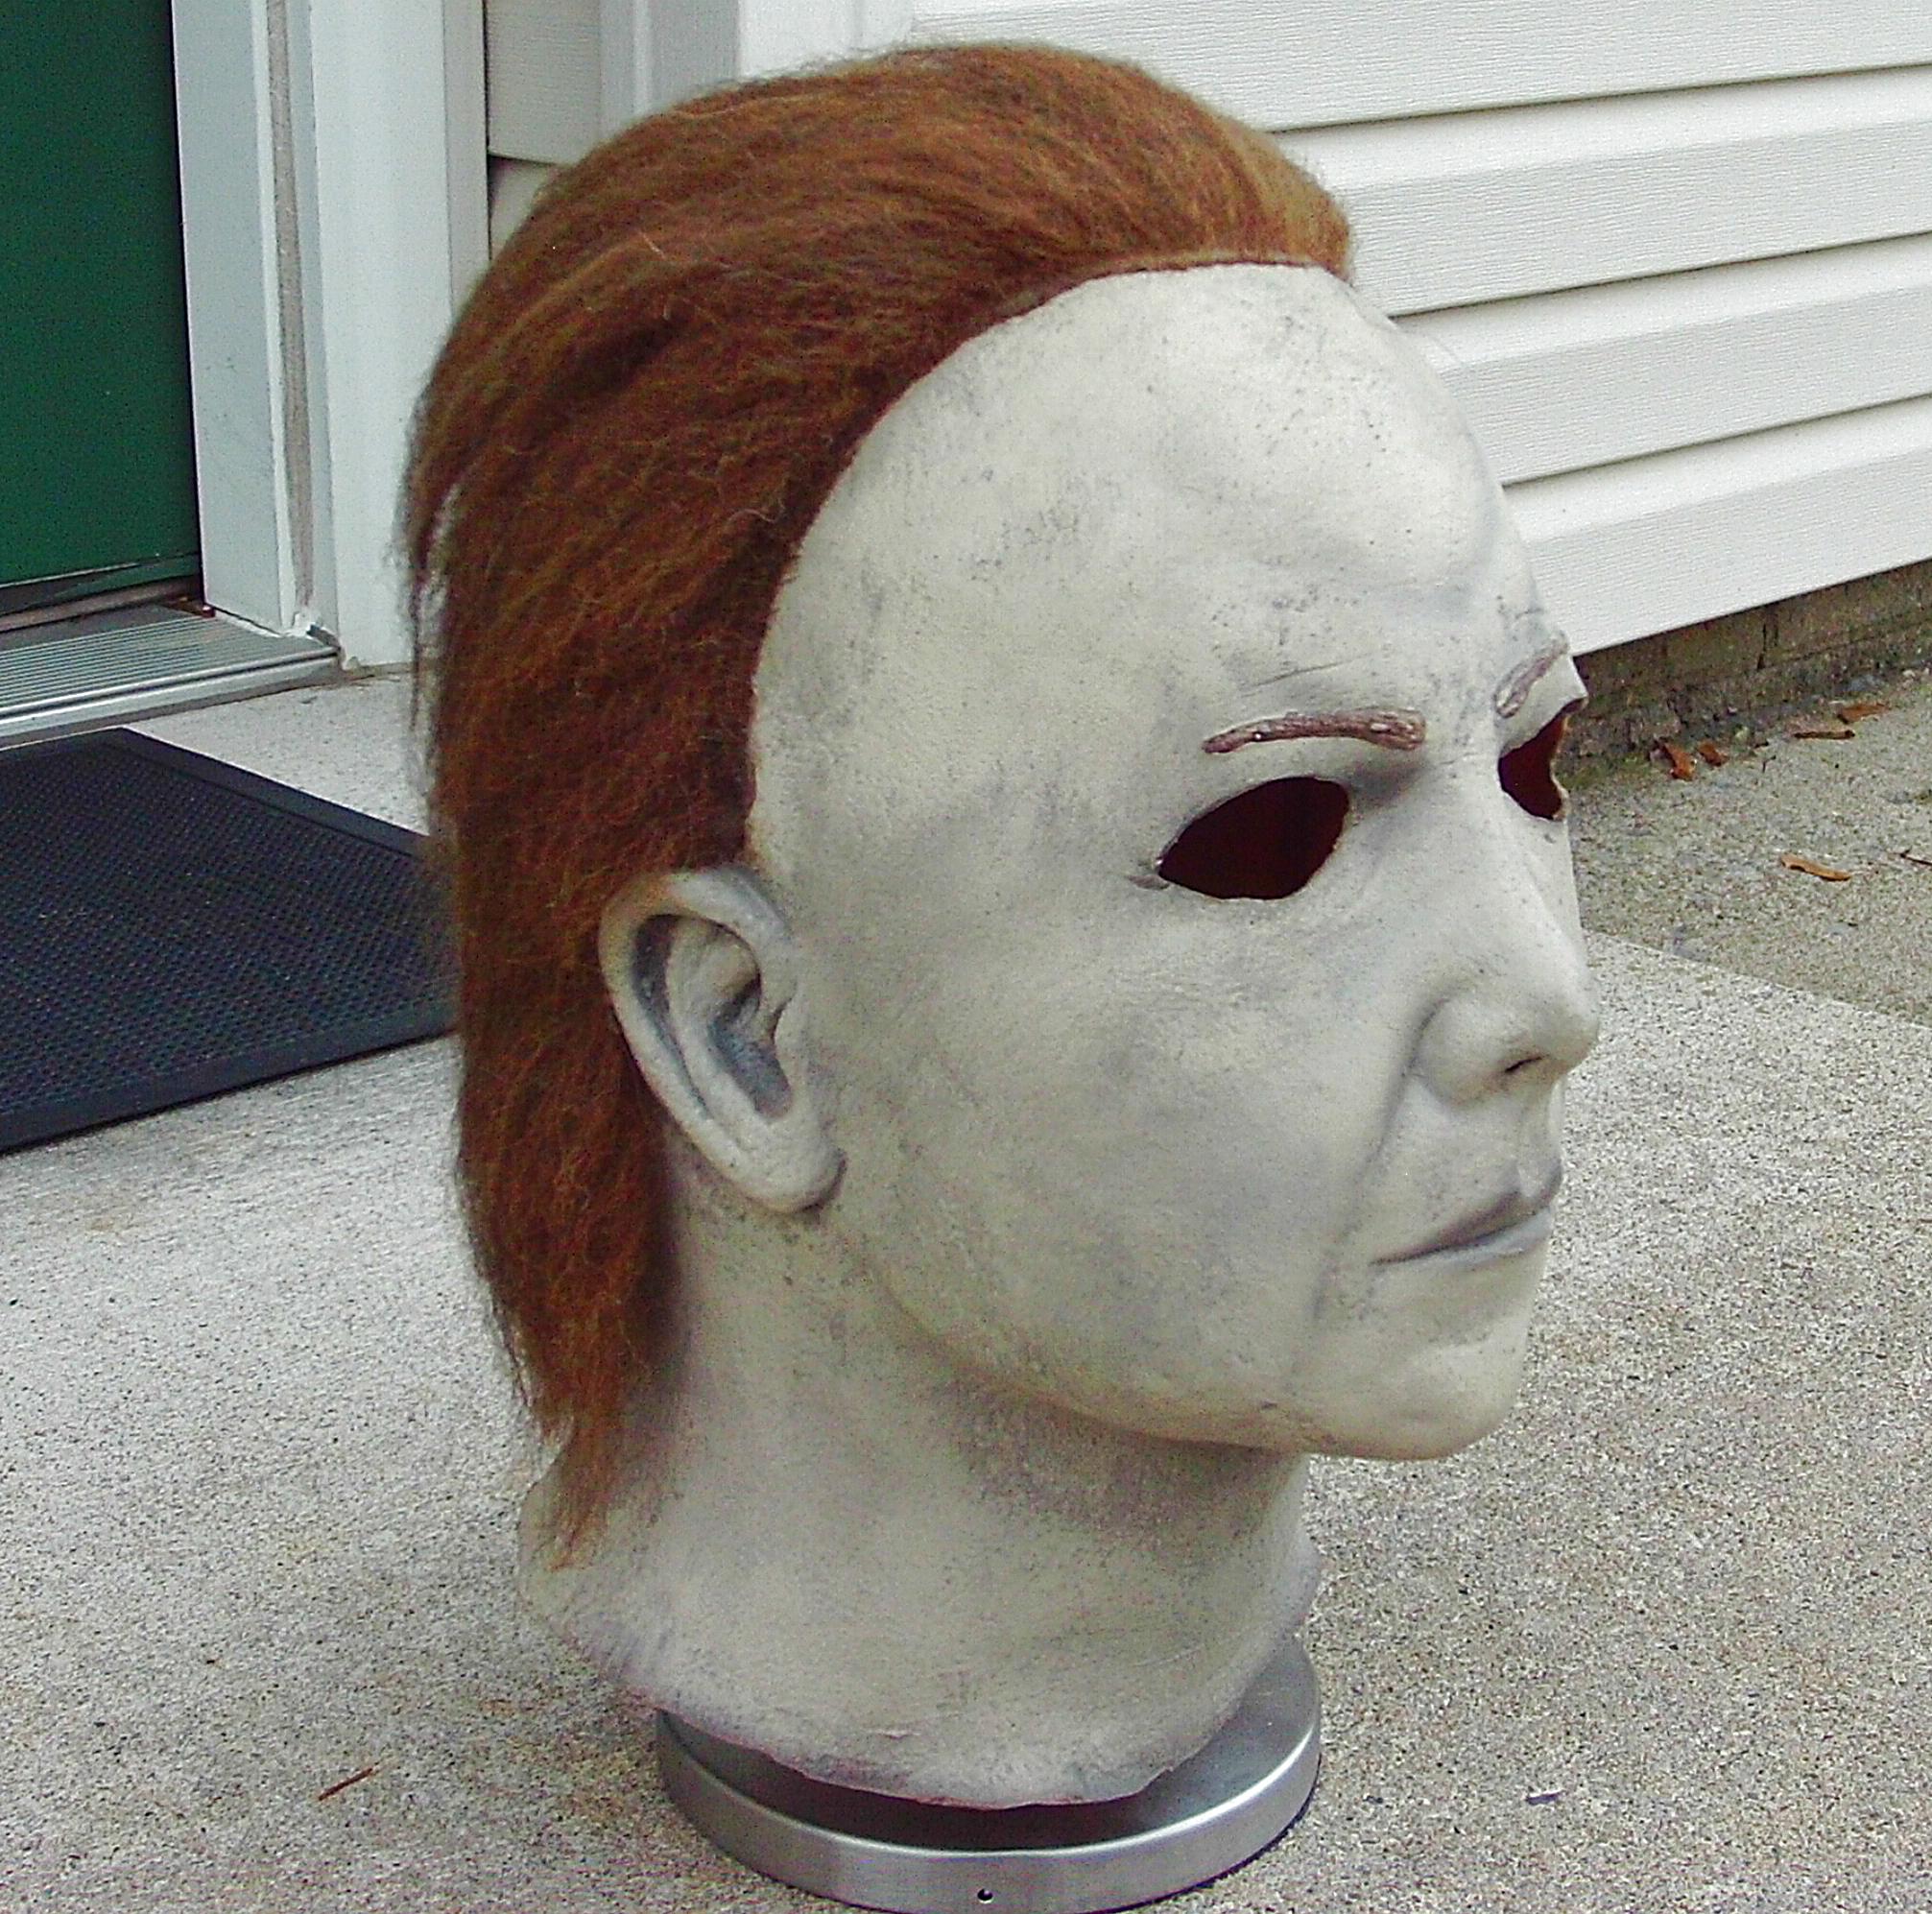
Shanks tried on Halloween 4’s mask before principal photography was set to commence, but it was decided that the mask didn not fit him quite right, so a new one was designed. The new mask (designed by Greg Nicotero and his early KNB FX team) would feature a far different look than the previous one (although it was presented in the story as being the same item as the one seen in Halloween 4). The mask features a ghastlier look and more defined expression, with a far wider neck.
Two of the more noticeable features on the mask were the long, pulled-back hair, and teardrop shaped eyes. The shape of the lips and eyebrows also gave the mask an angrier look, instead of the blank expression of its predecessors. The mask also had a slightly thicker rubber than the others, which is evident in its appearance. more noticeable features on the mask were the long, pulled-back hair, and teardrop shaped eyes. The shape of the lips and eyebrows also gave the mask an angrier look, instead of the blank expression of its predecessors.
The mask also had a slightly thicker rubber than the others, which is evident in its appearance. Shanks has also confirmed that the mask was held together with Velcro, which made it extremely tough to breathe in. During the filming of the beating sequence in the third act, Shanks received a fractured septum from a wooden plank, swung by actor Donald Pleasence. Because of this, a new nose application had to be grafted onto the mask in order to accommodate Shanks’ bandaged nose. The updated mask can be visible in many portions of the film.
While some applauded the mask for being more expressive than its predecessor, it would receive a negative reaction overall. Fans and critics expressed displeasure over the lack of continuity between masks seen in Halloween 4 and 5. Many also felt it looked more unkempt and shoddy than the others. Those with more positive reactions also found the mask to be more “ghost” or “phantom”-like in appearance. https://www.tomspinadesigns.com/restoration/horror-movie-props/original-michael-myers-mask-prop-restoration/?fbclid=IwAR3ZwgSos4CTp11BZbltjC_WBMHbCHcRSPMwdZGblTuiBWdfiHl8HExJ480
Some before pics.
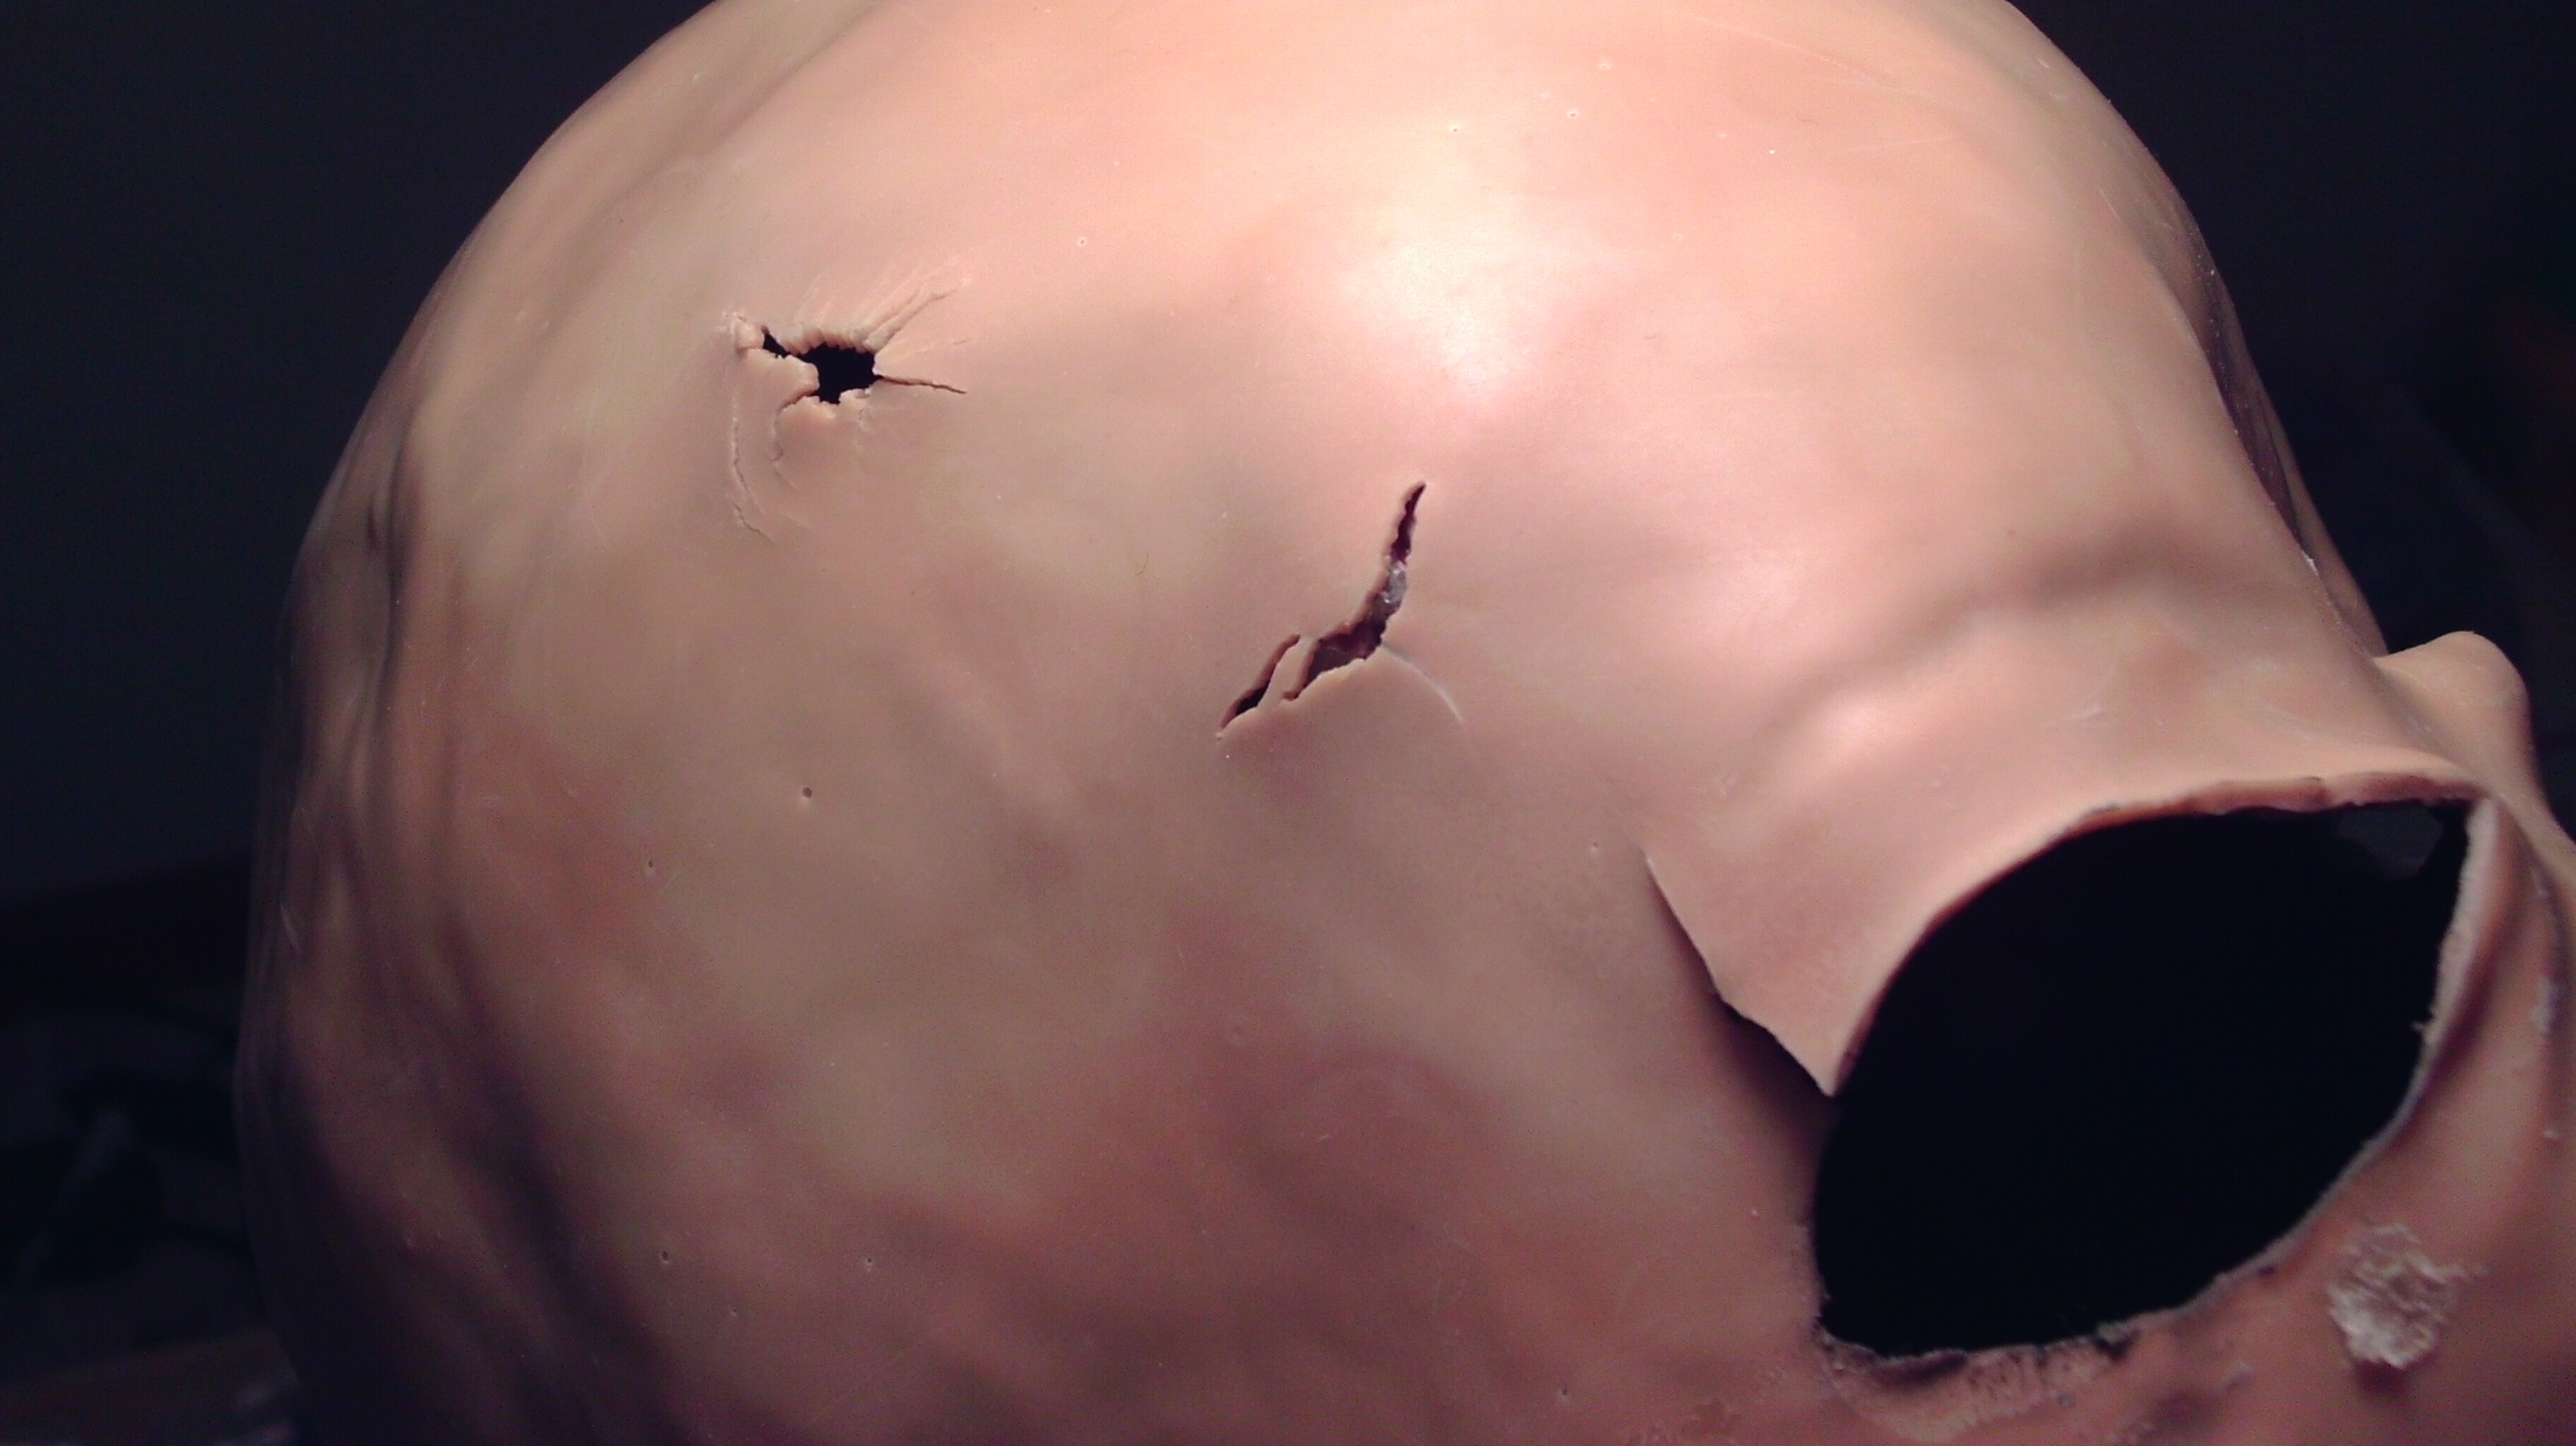
First step is to clean the edges with alcohol and a dremel for a clean surface, then add some latex to the edges and let them close together to start the sealing process.
Turning the mask inside out. First step is to clean the edges with alcohol and a dremel for a clean surface, then add some latex to the edges and let them close together to start the sealing process.
Very cool Brad! H5 mask has always been one of the creepiest looking imo
Yeah I know many do not like the mask but I love it, and always thought it was the meanest and scariest mask overall.
Patches that I made out of toilet tissue and latex hot glued into place. I tried latex only but it was not holding really well so I went with thin layers of hot glue which I used for repairs before successfully. I tried to keep them as thin as possible for flexibility but also thick enough to hold, so far they seem perfect! I also made the eye patch slightly longer since the crack was all the way through into the hole, which I will then trim.
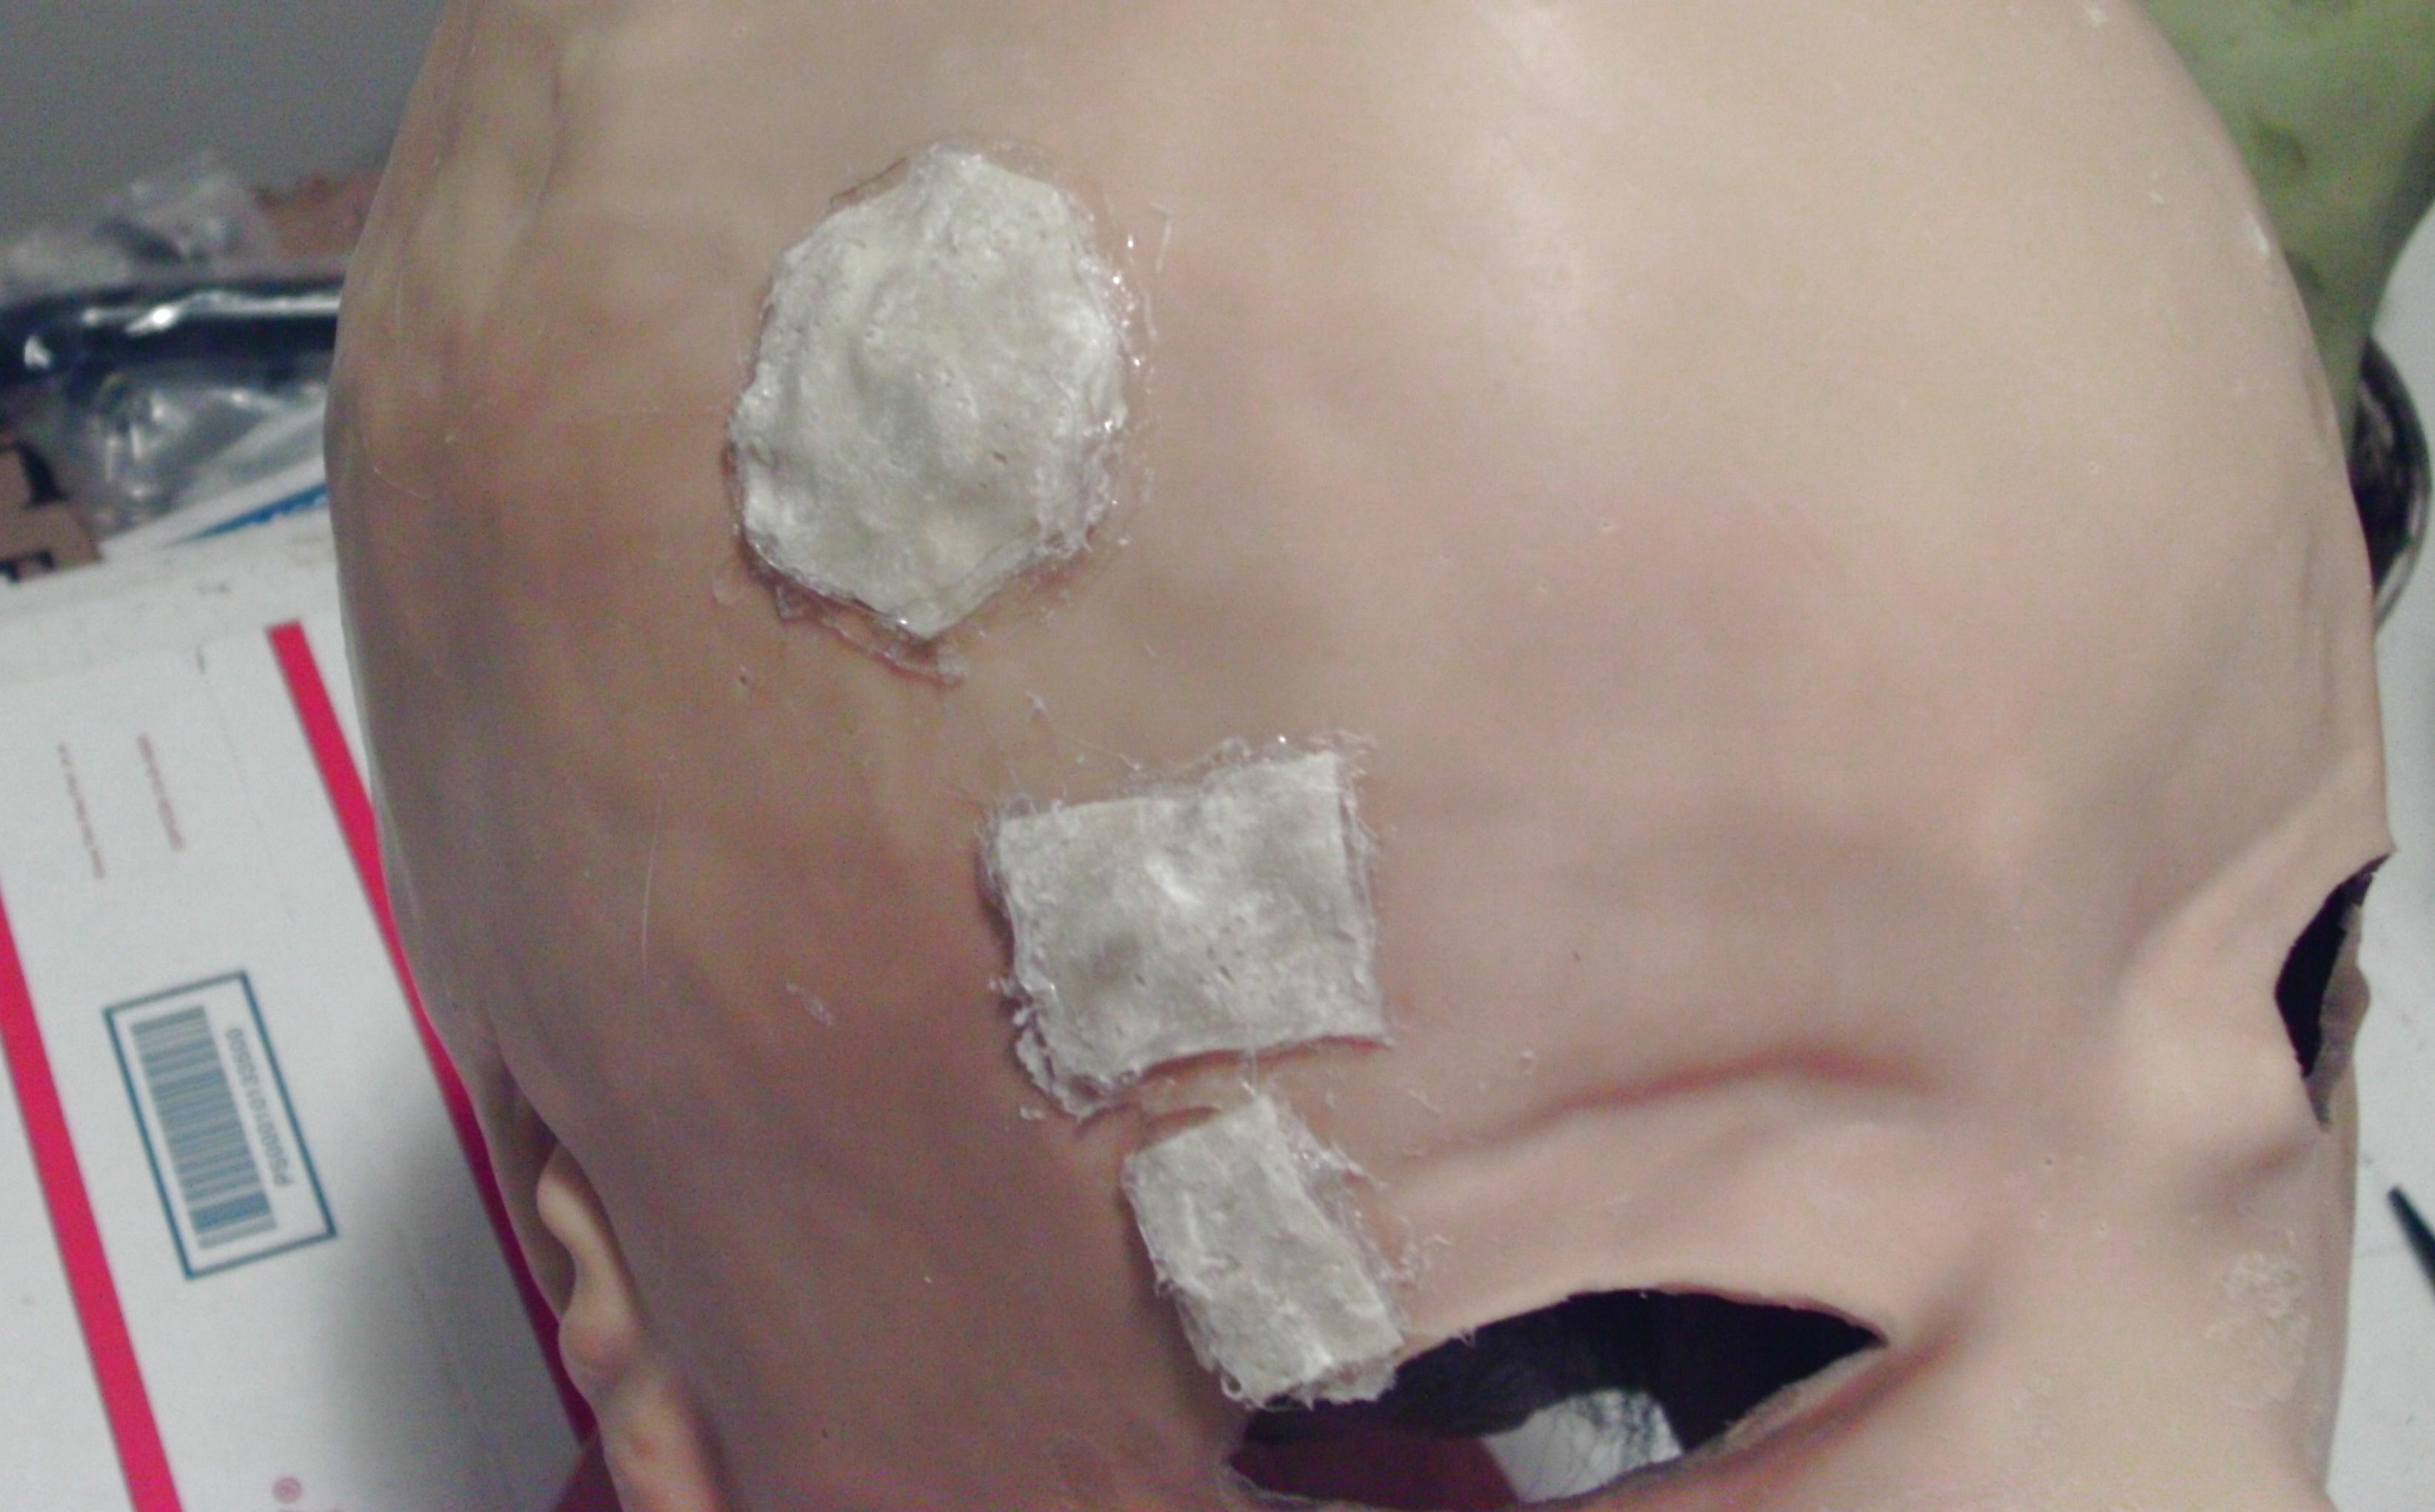
Another pic of the patches.
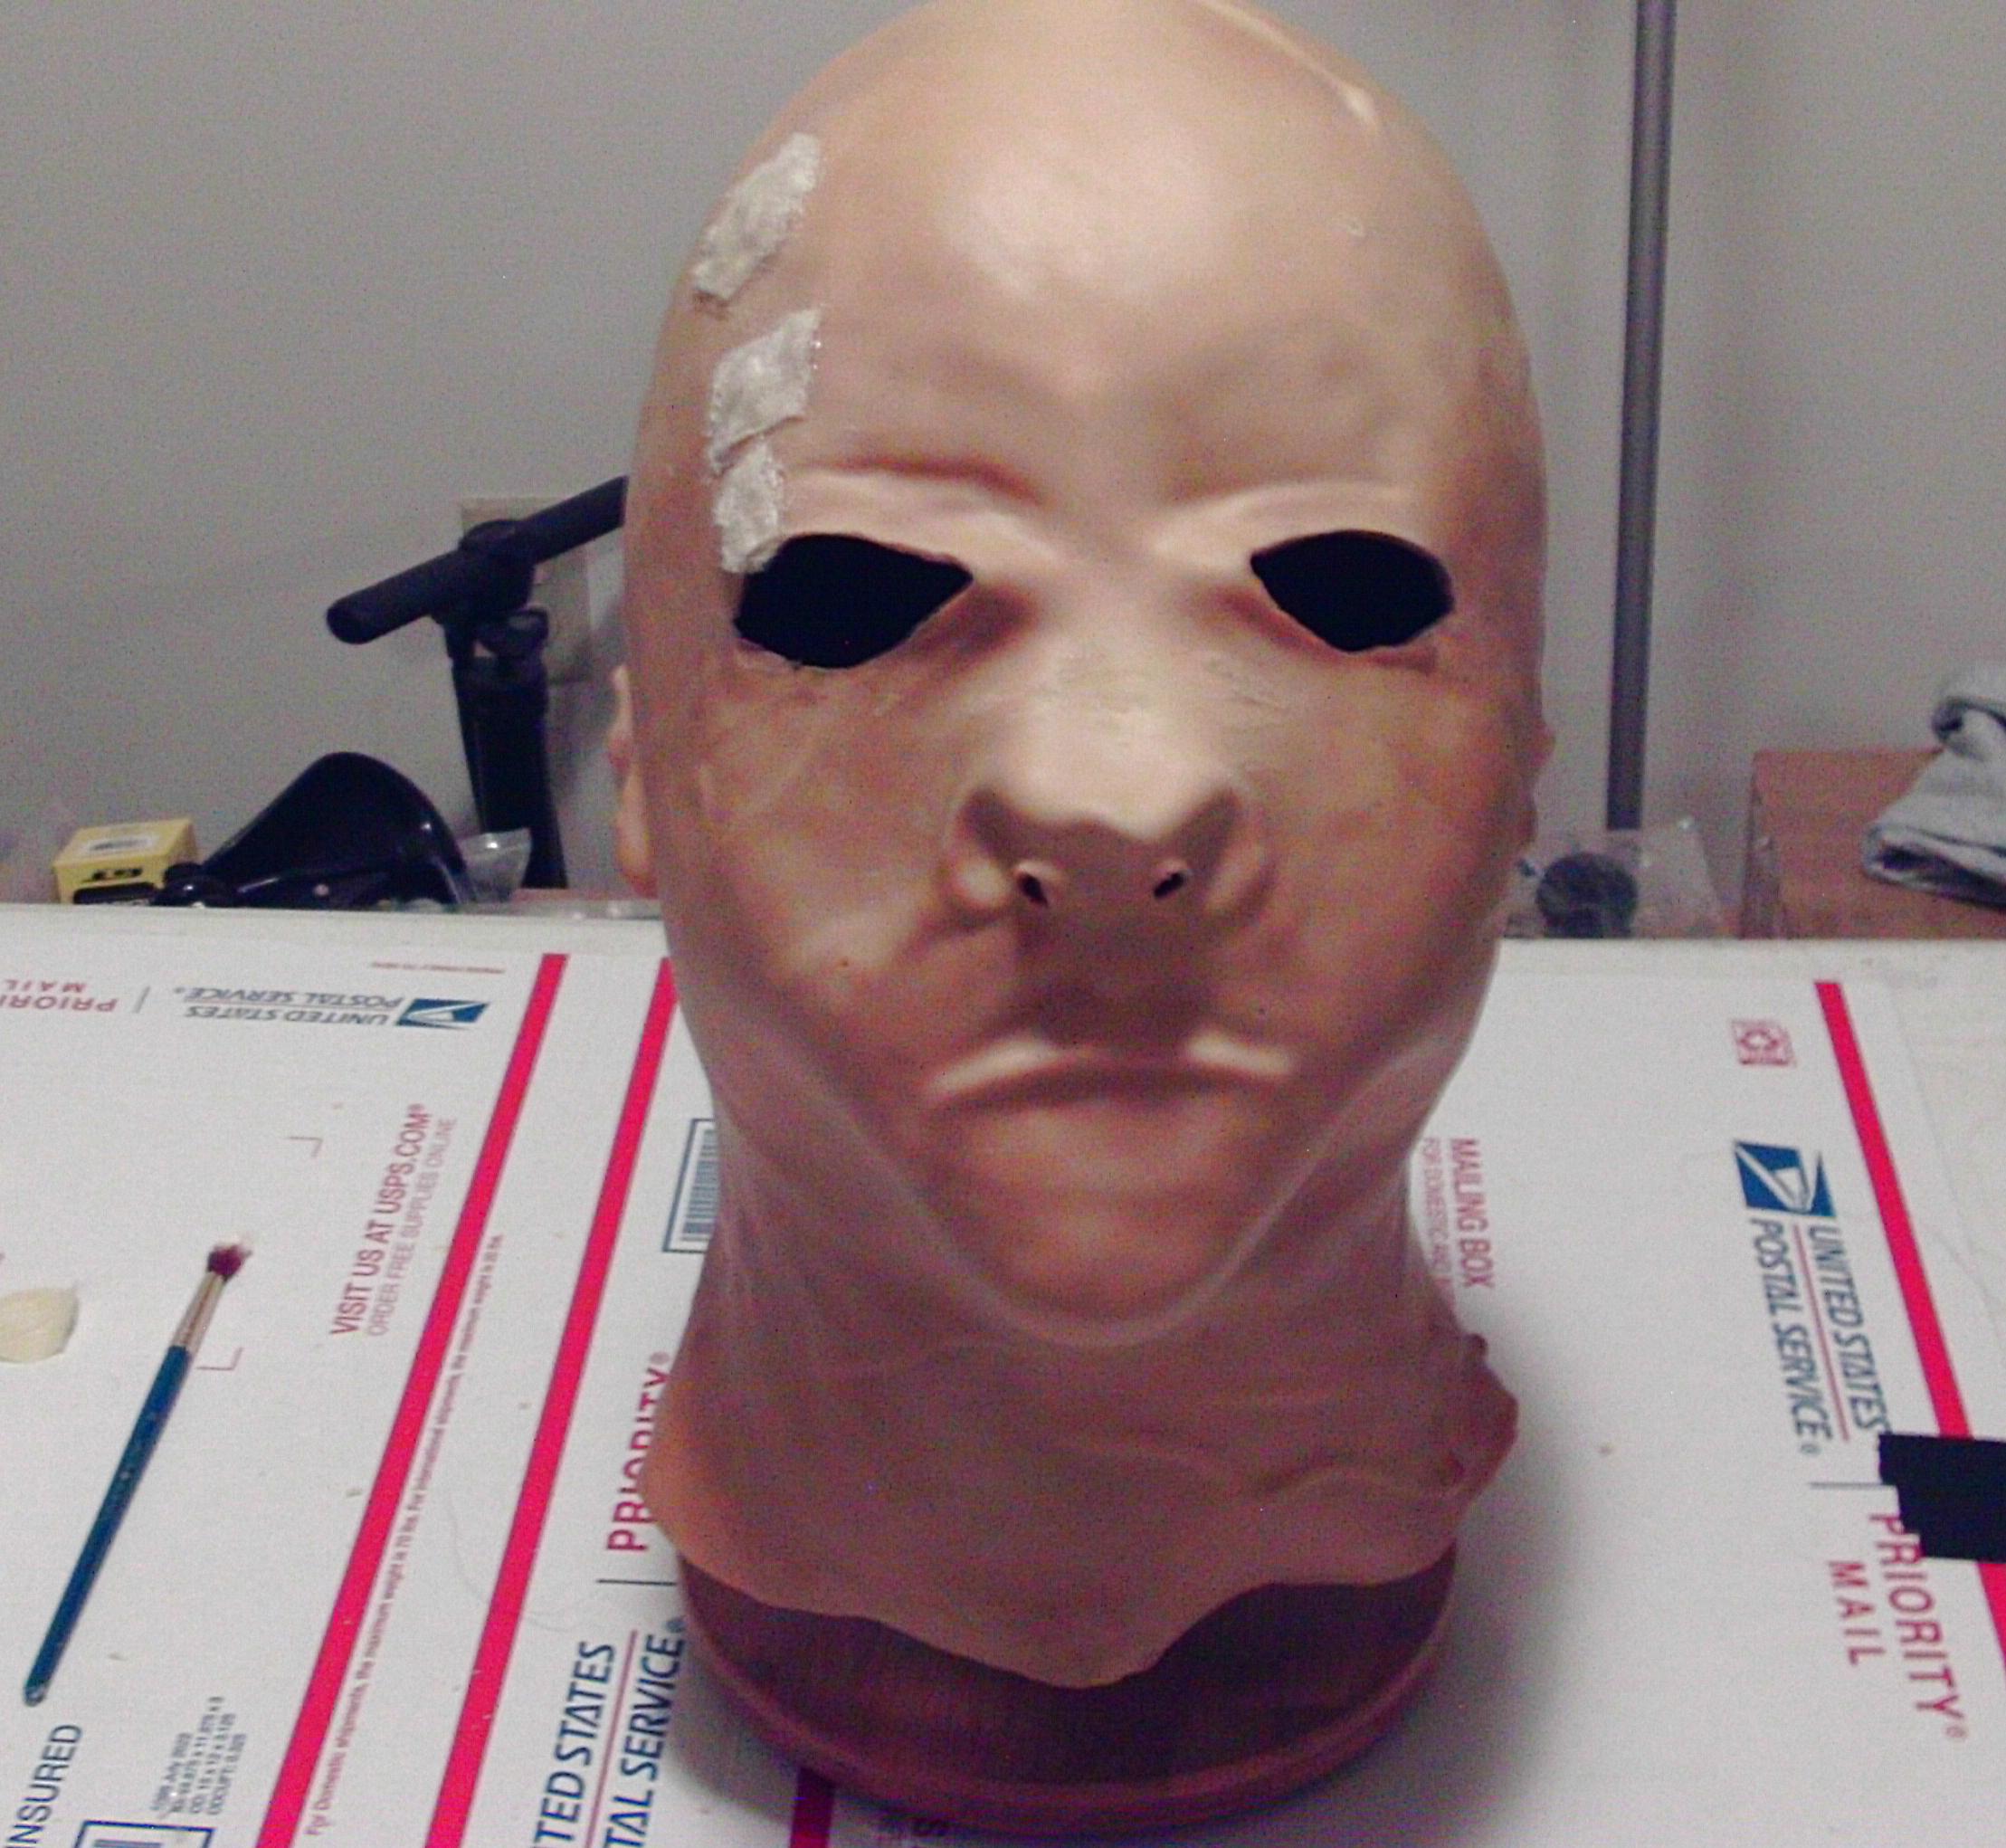
Patches are dry and mask turned right side out! Also as expected the hole is now slightly concave due to gluing it inside out, so then when you turn it back right side out the glue will pull it slightly inward. That is why I made the latex patch as thin as possible and used a thin layer of hot glue, so that it could be heated up to soften it then reshape it back to normal. So the next step will be to heat it up with a hair dryer, then stuff it tightly in that area with plastic bags and leave it like that a few days or a few weeks possibly. Then will trim the excess glue on the eye and see how it all looks, and fill in the hole some with latex on the outside and touch up the paint to match the rest!
Another pic before heating and stuffing!
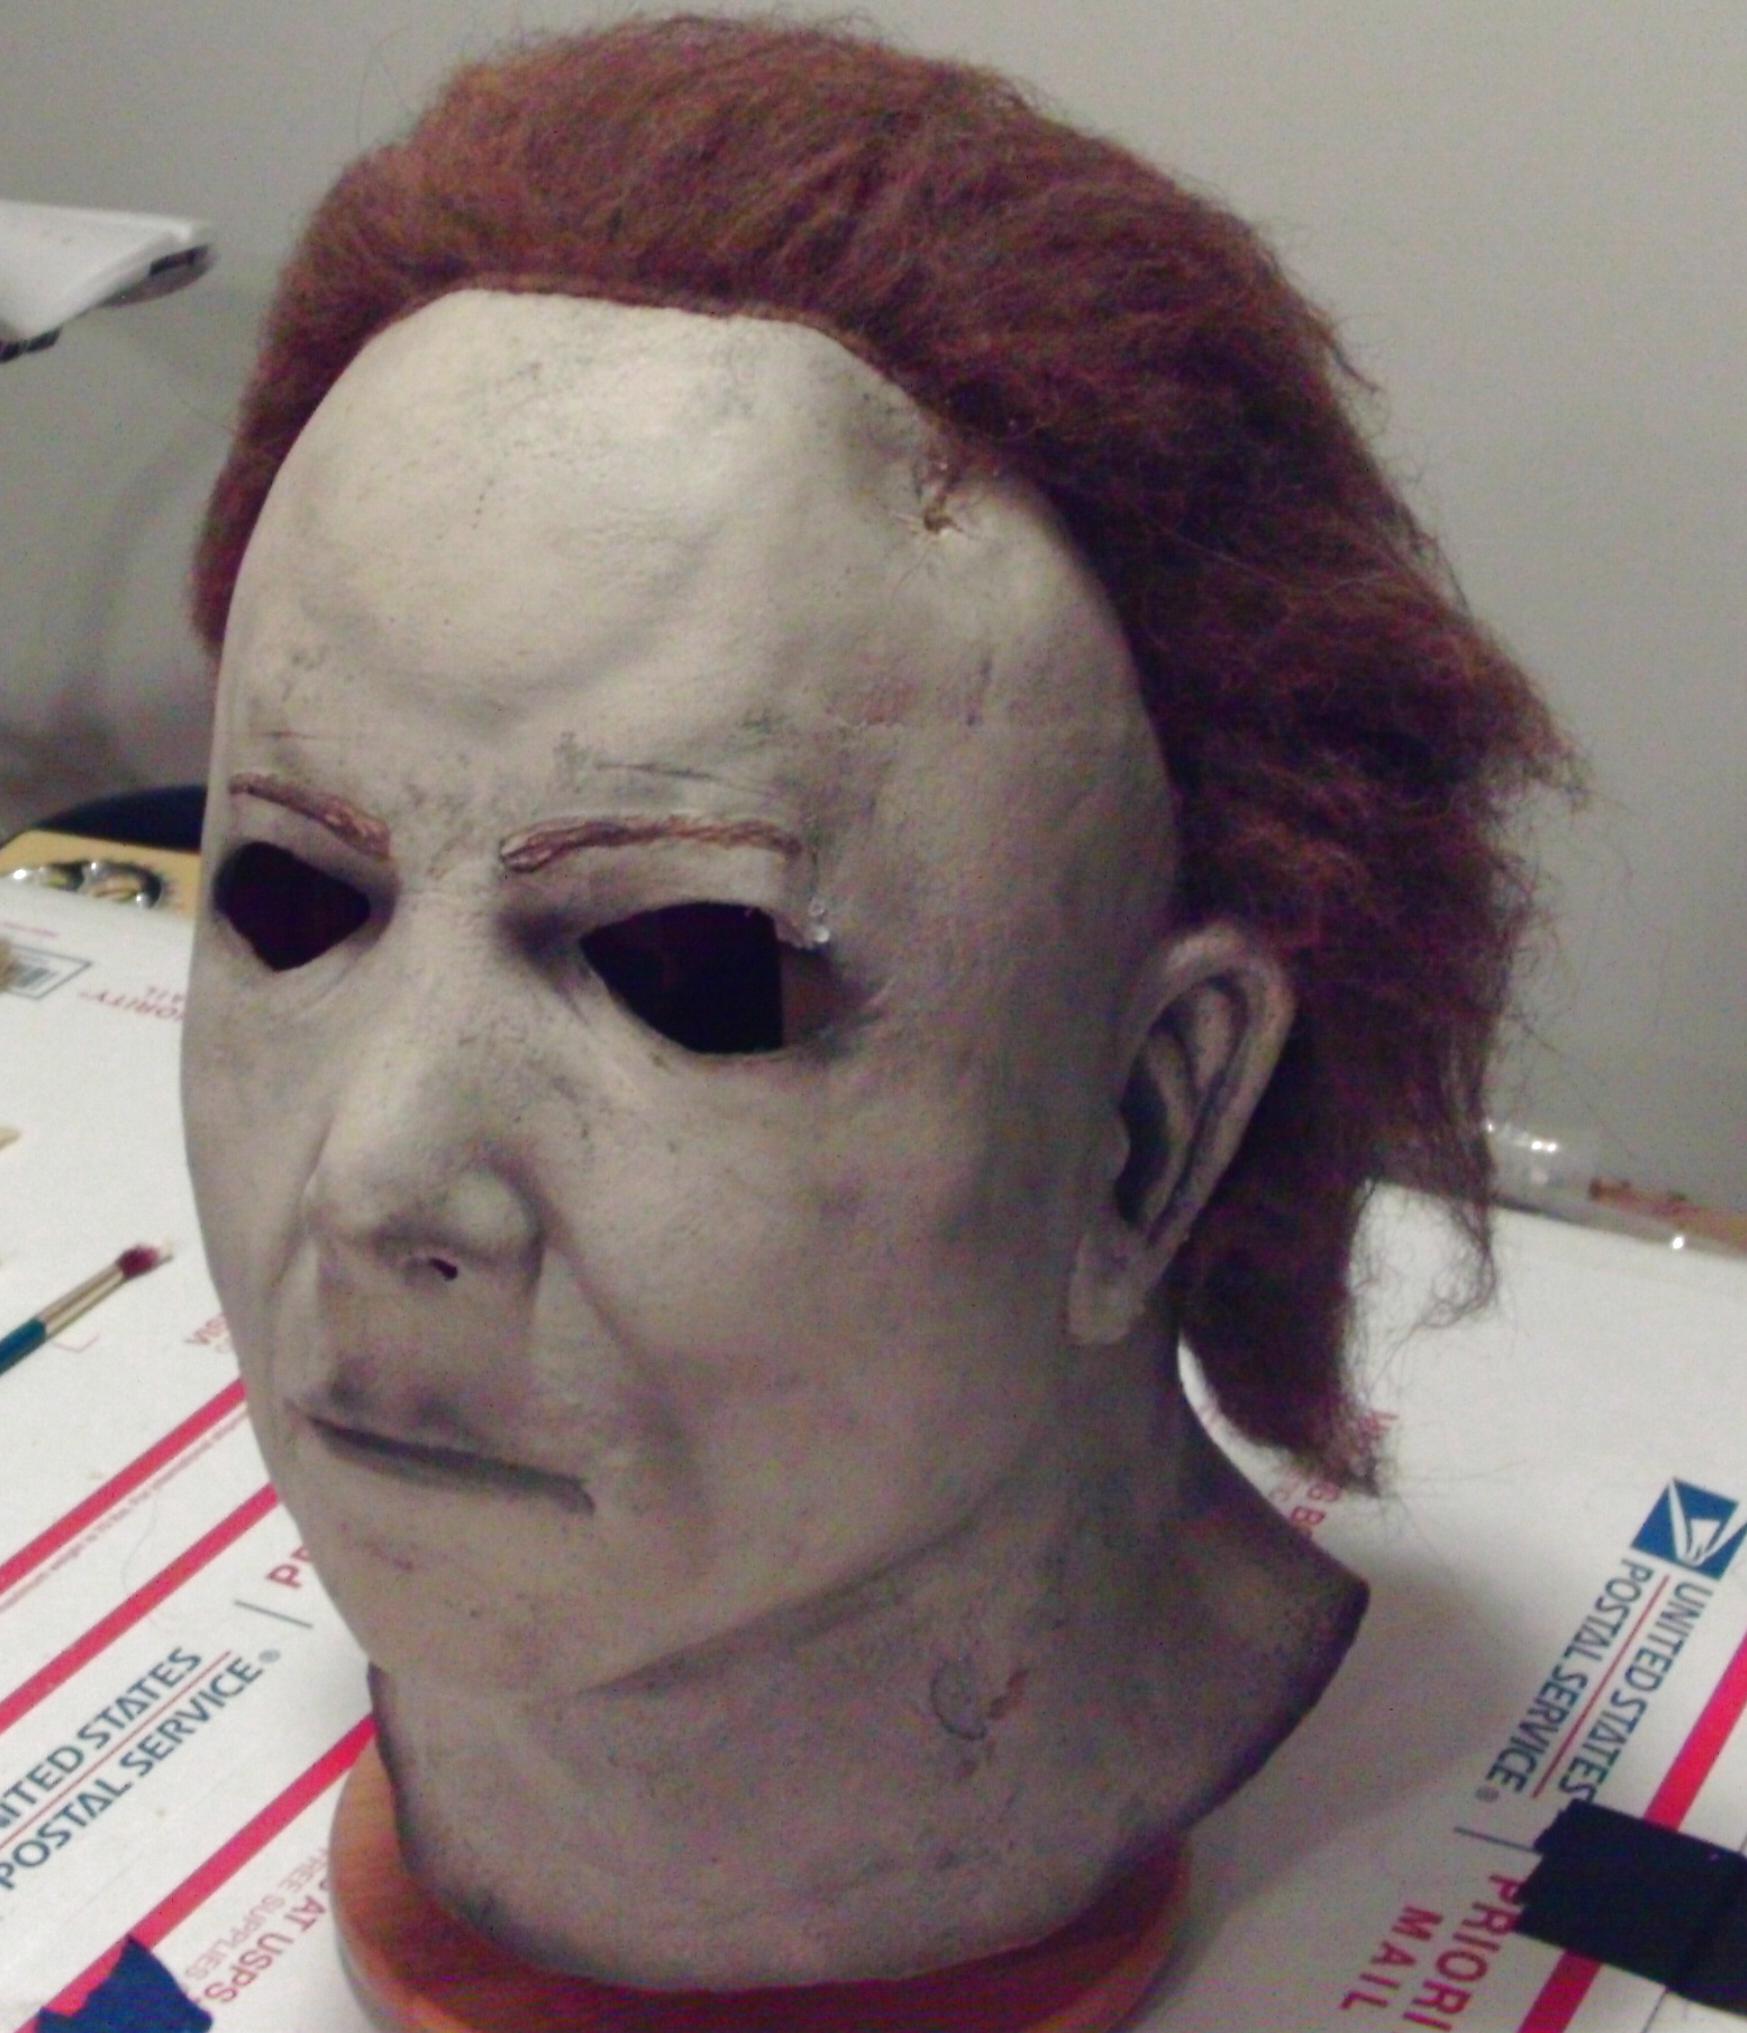
Update on the Halloween 5 Michael Myers mask restoration after heating it up and letting it sit for a few weeks the head wound is now almost flat again! Also trimmed the excess patch on eye, next step is to fill in the head wound a little more with latex then touch it up with paint!
Filling in the hole and cracks with latex!
I filled in the cracks and hole with more latex, next step is to touch up the latex and eye with paint!
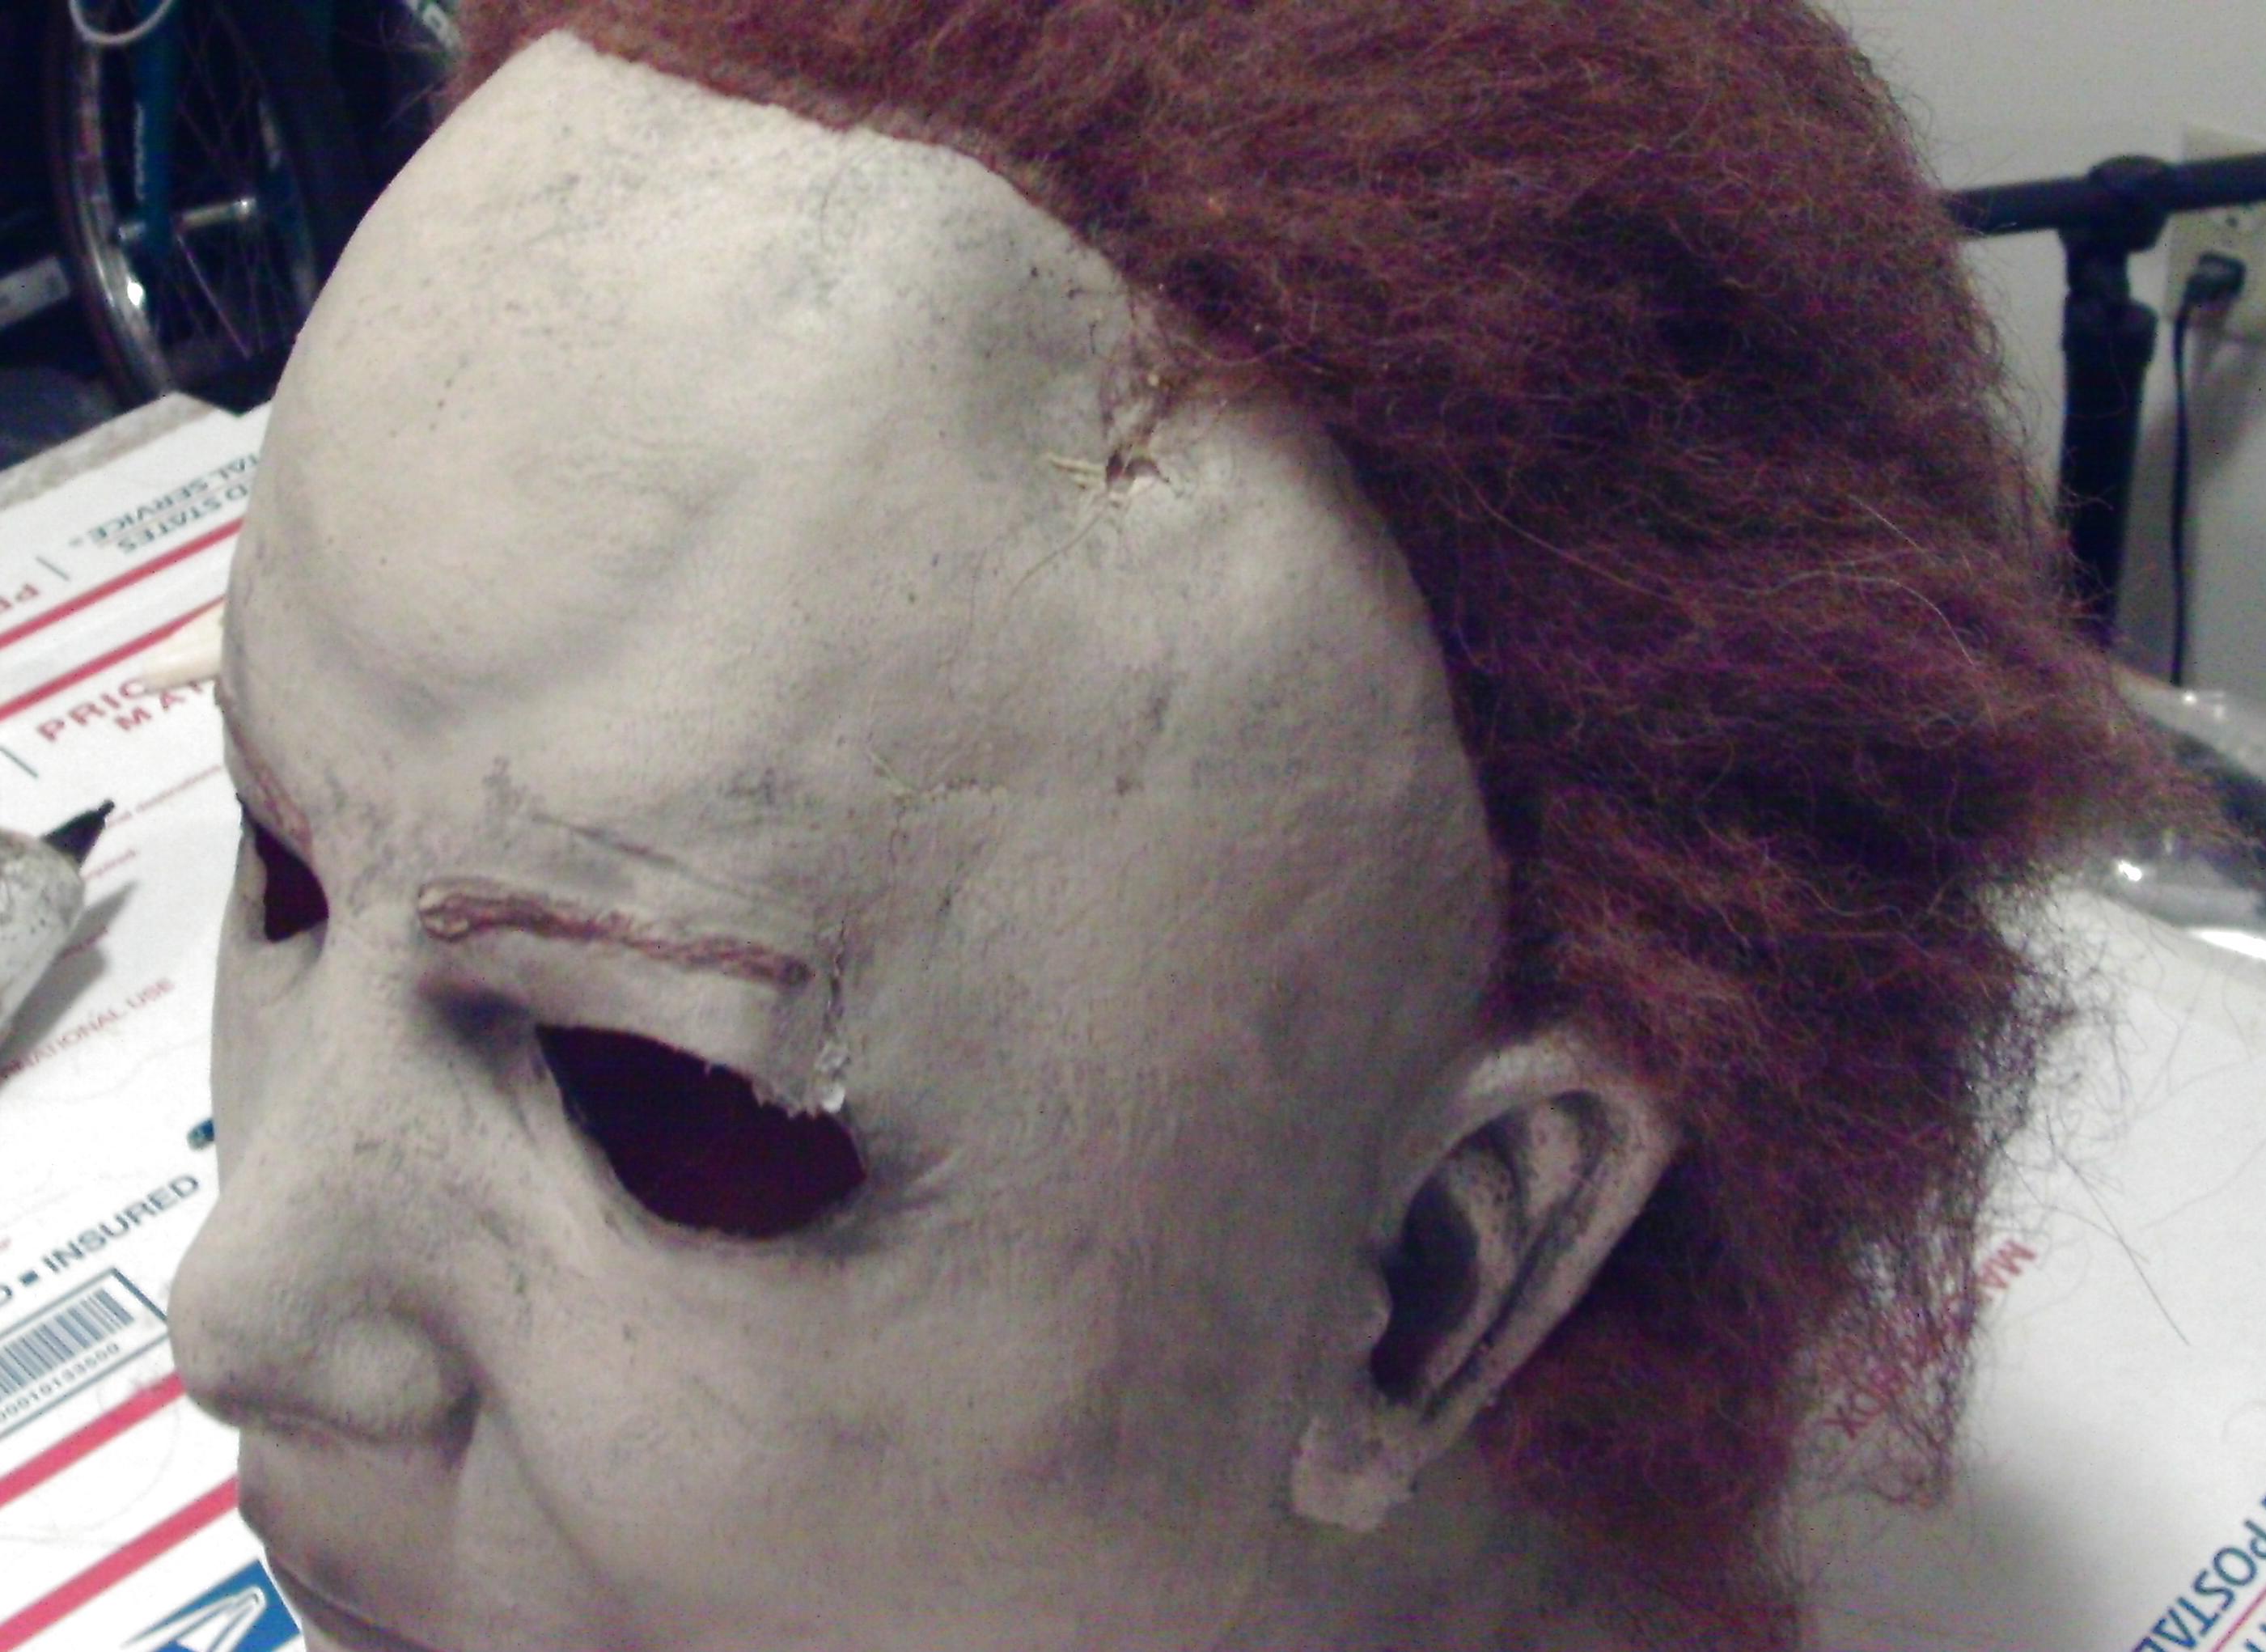
I touched up the latex and eye with paint, and matched the darker grey weathering on the cuts. So now it looks more natural and blended.
Daylight pics!
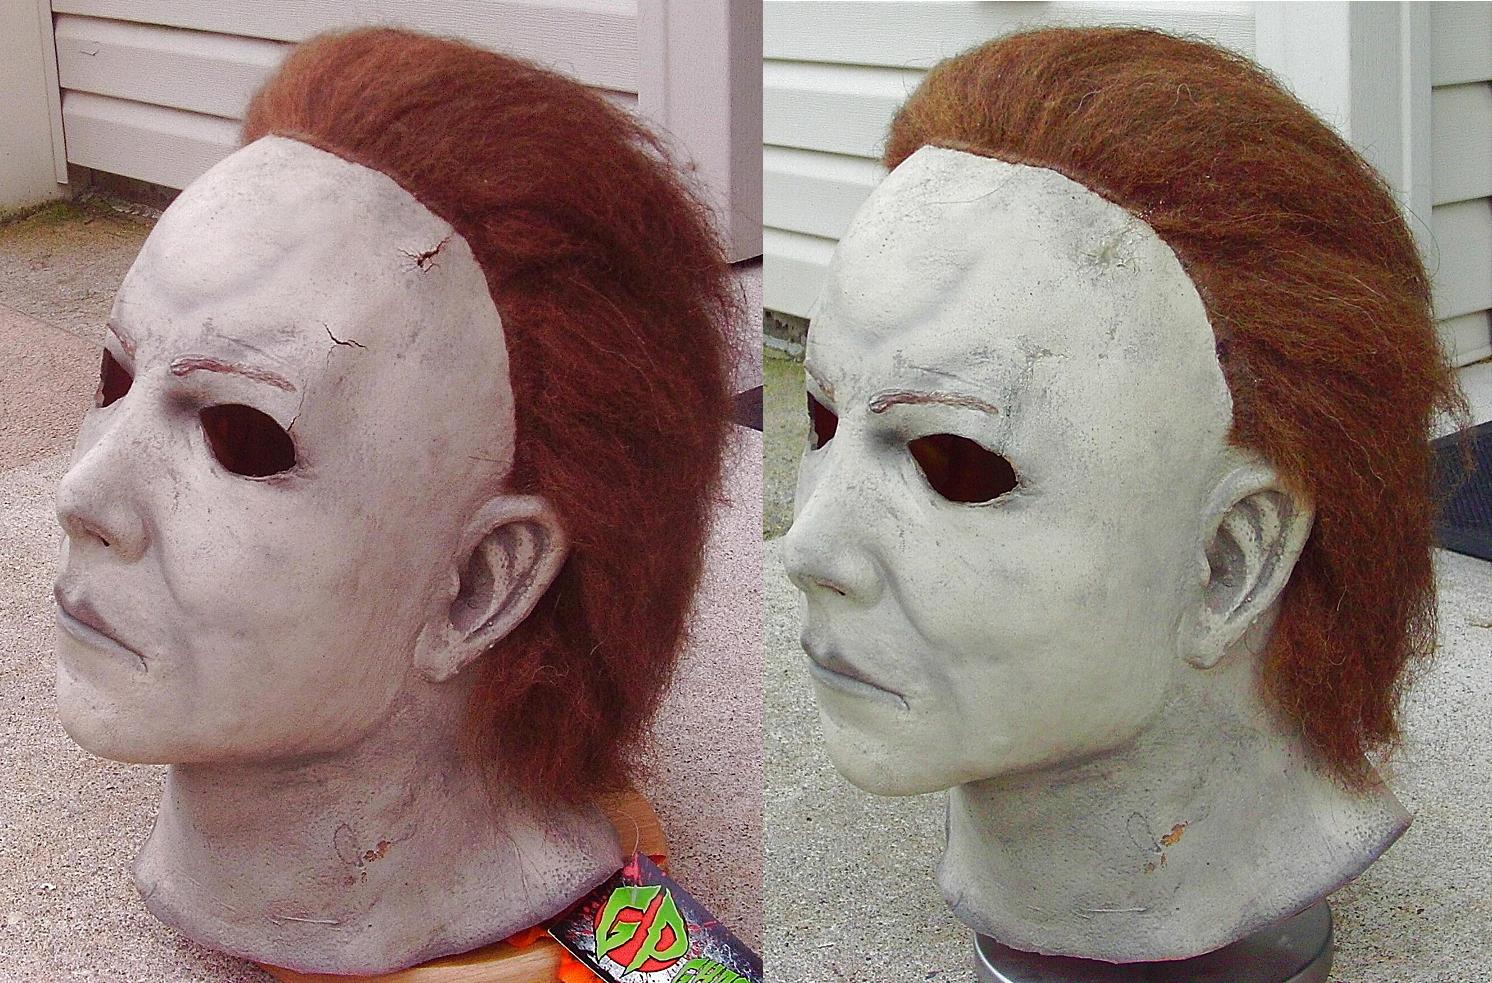
Daylight before and after pics of the mask!
Daylight pics of the finished mask all around!
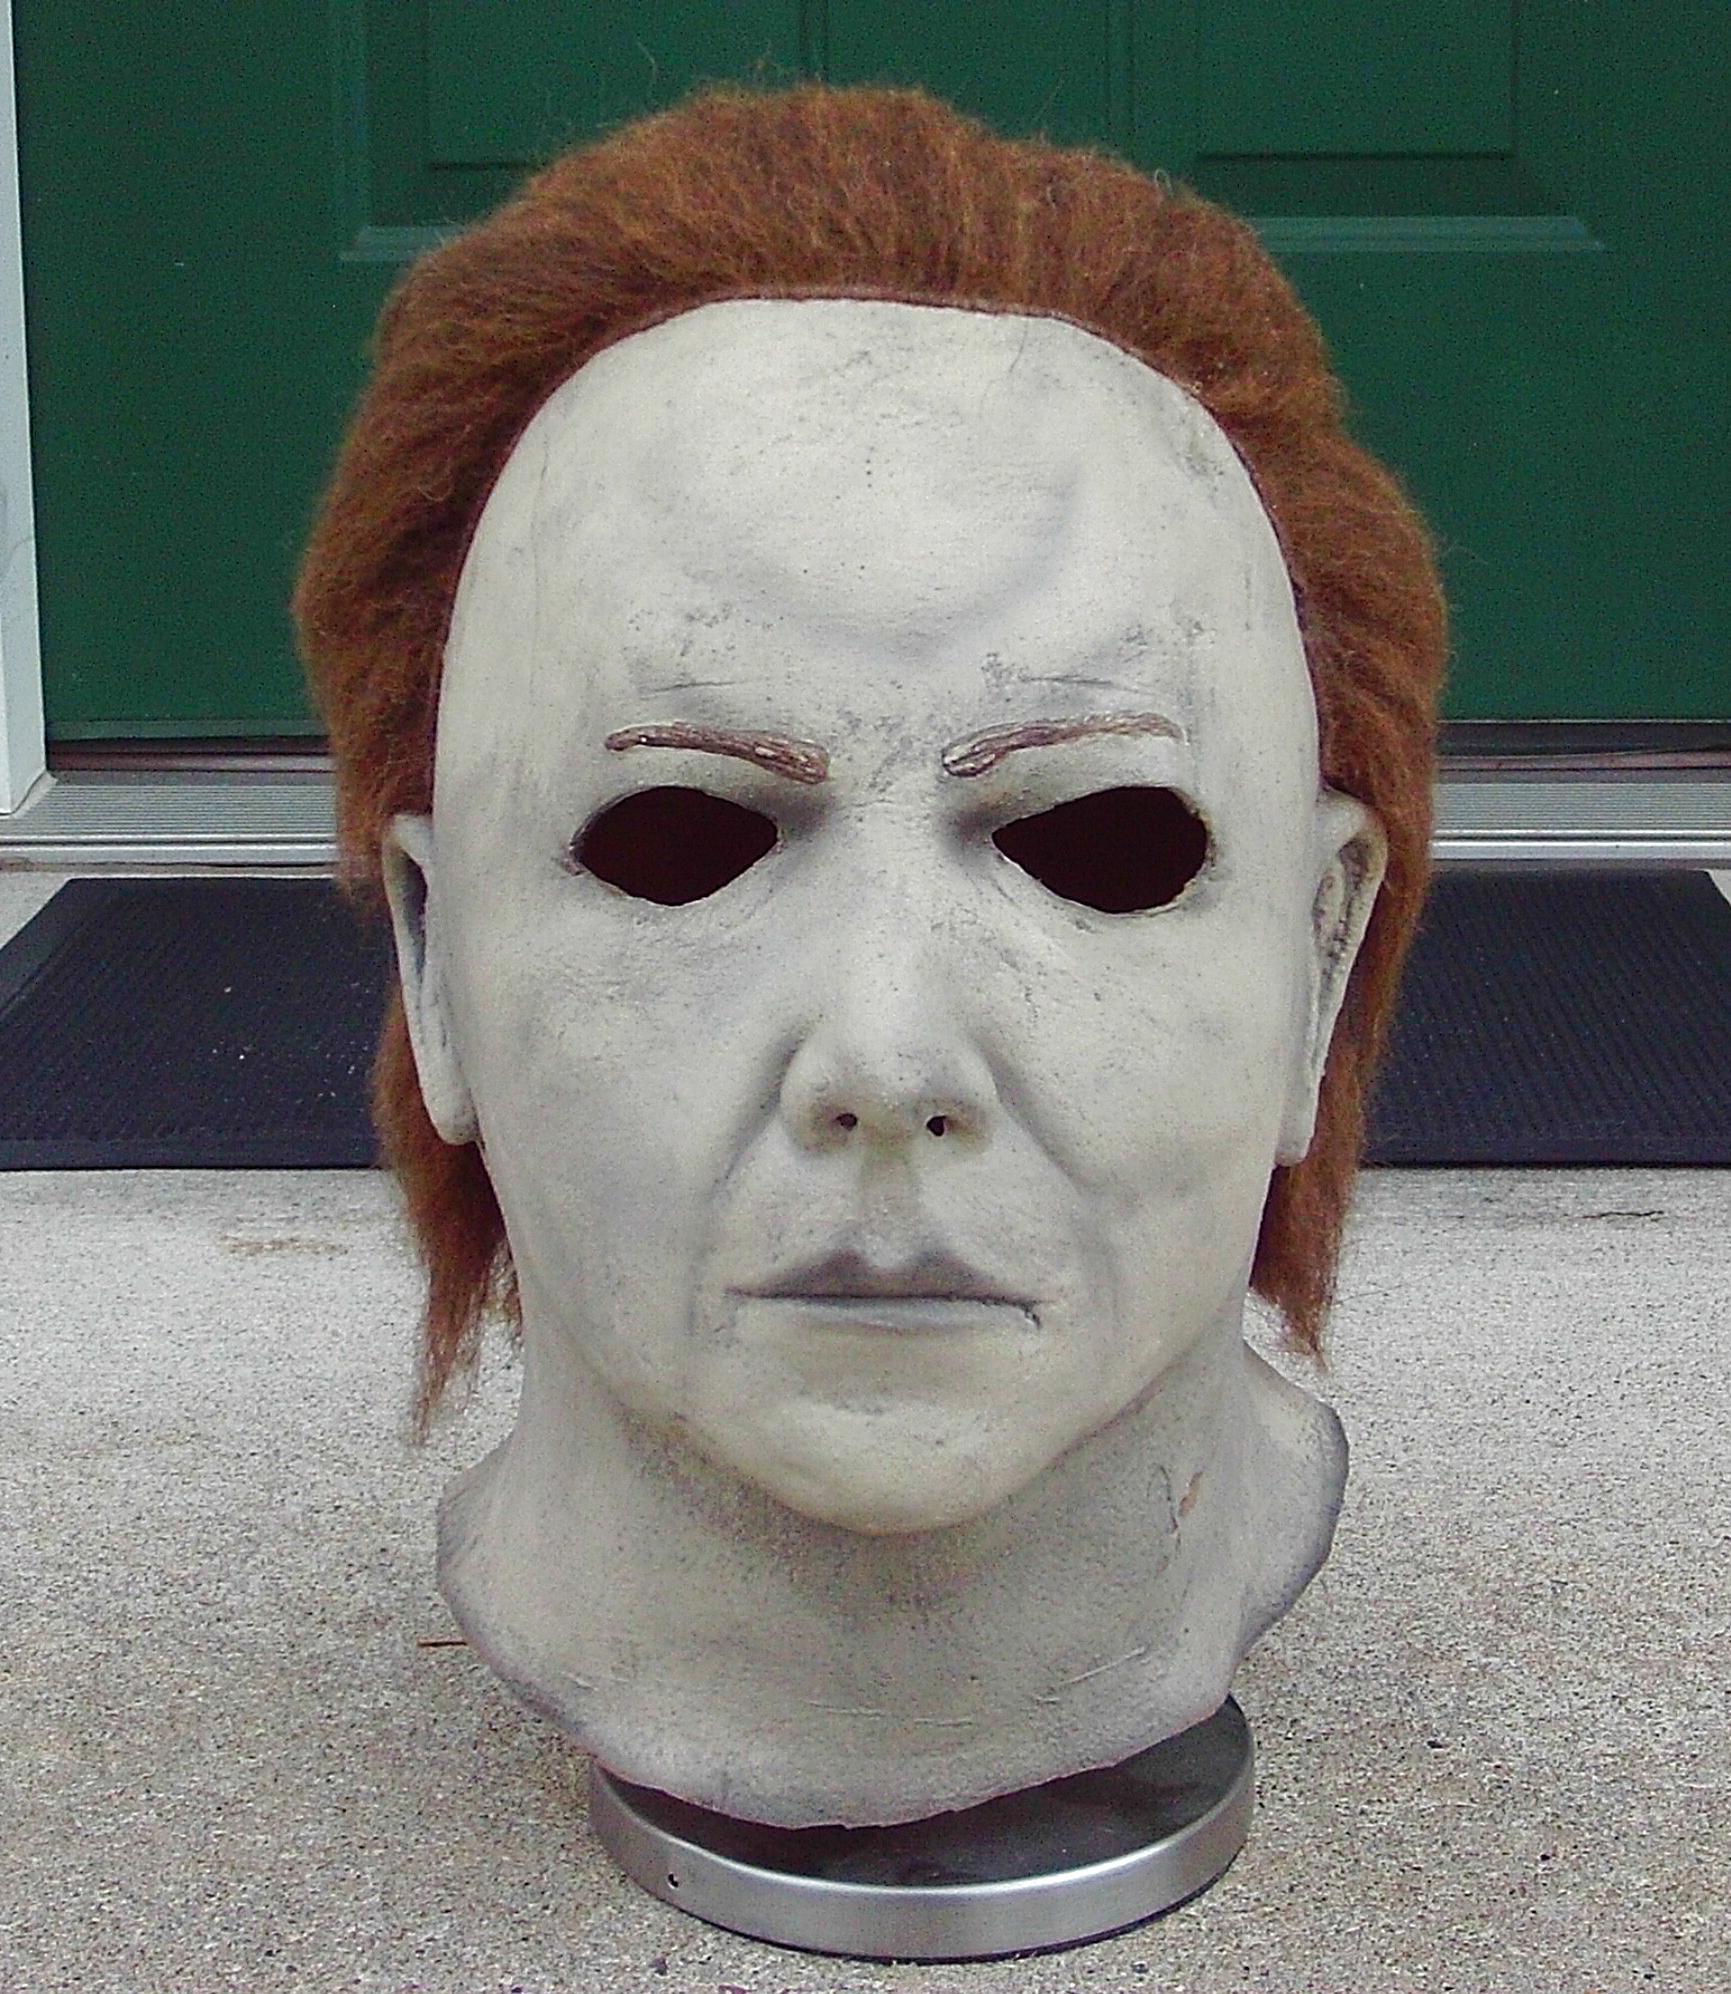
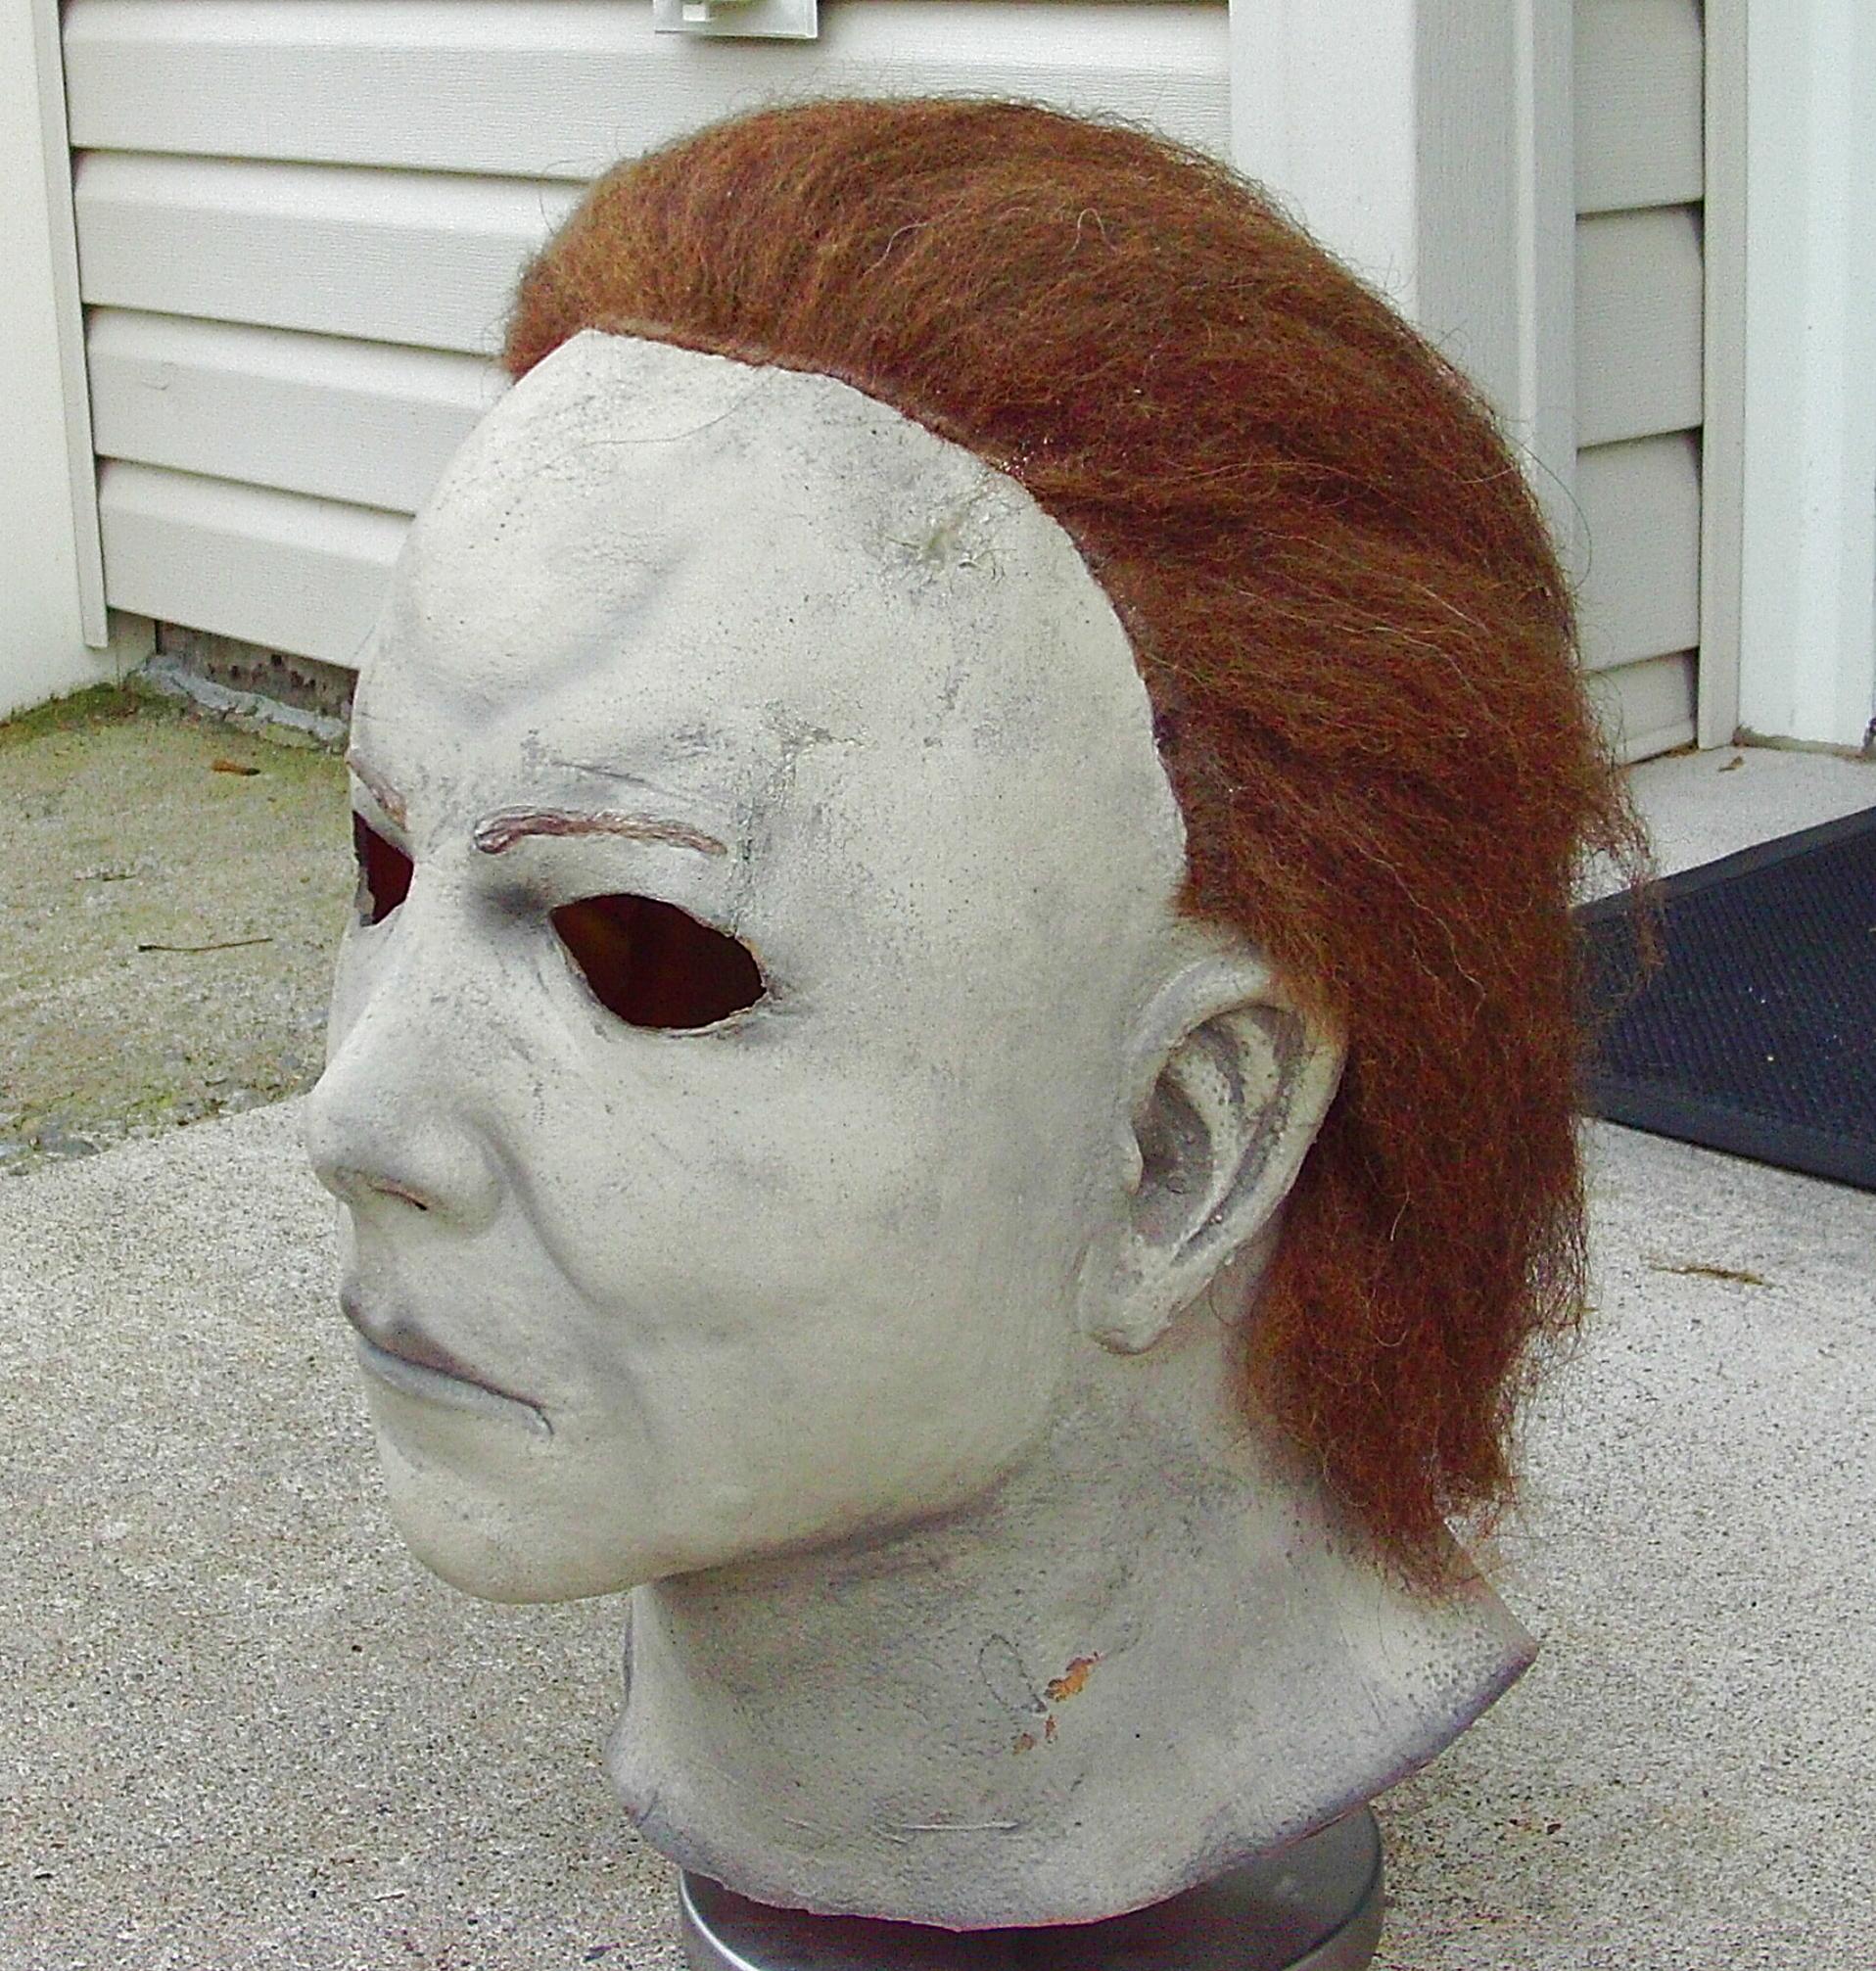
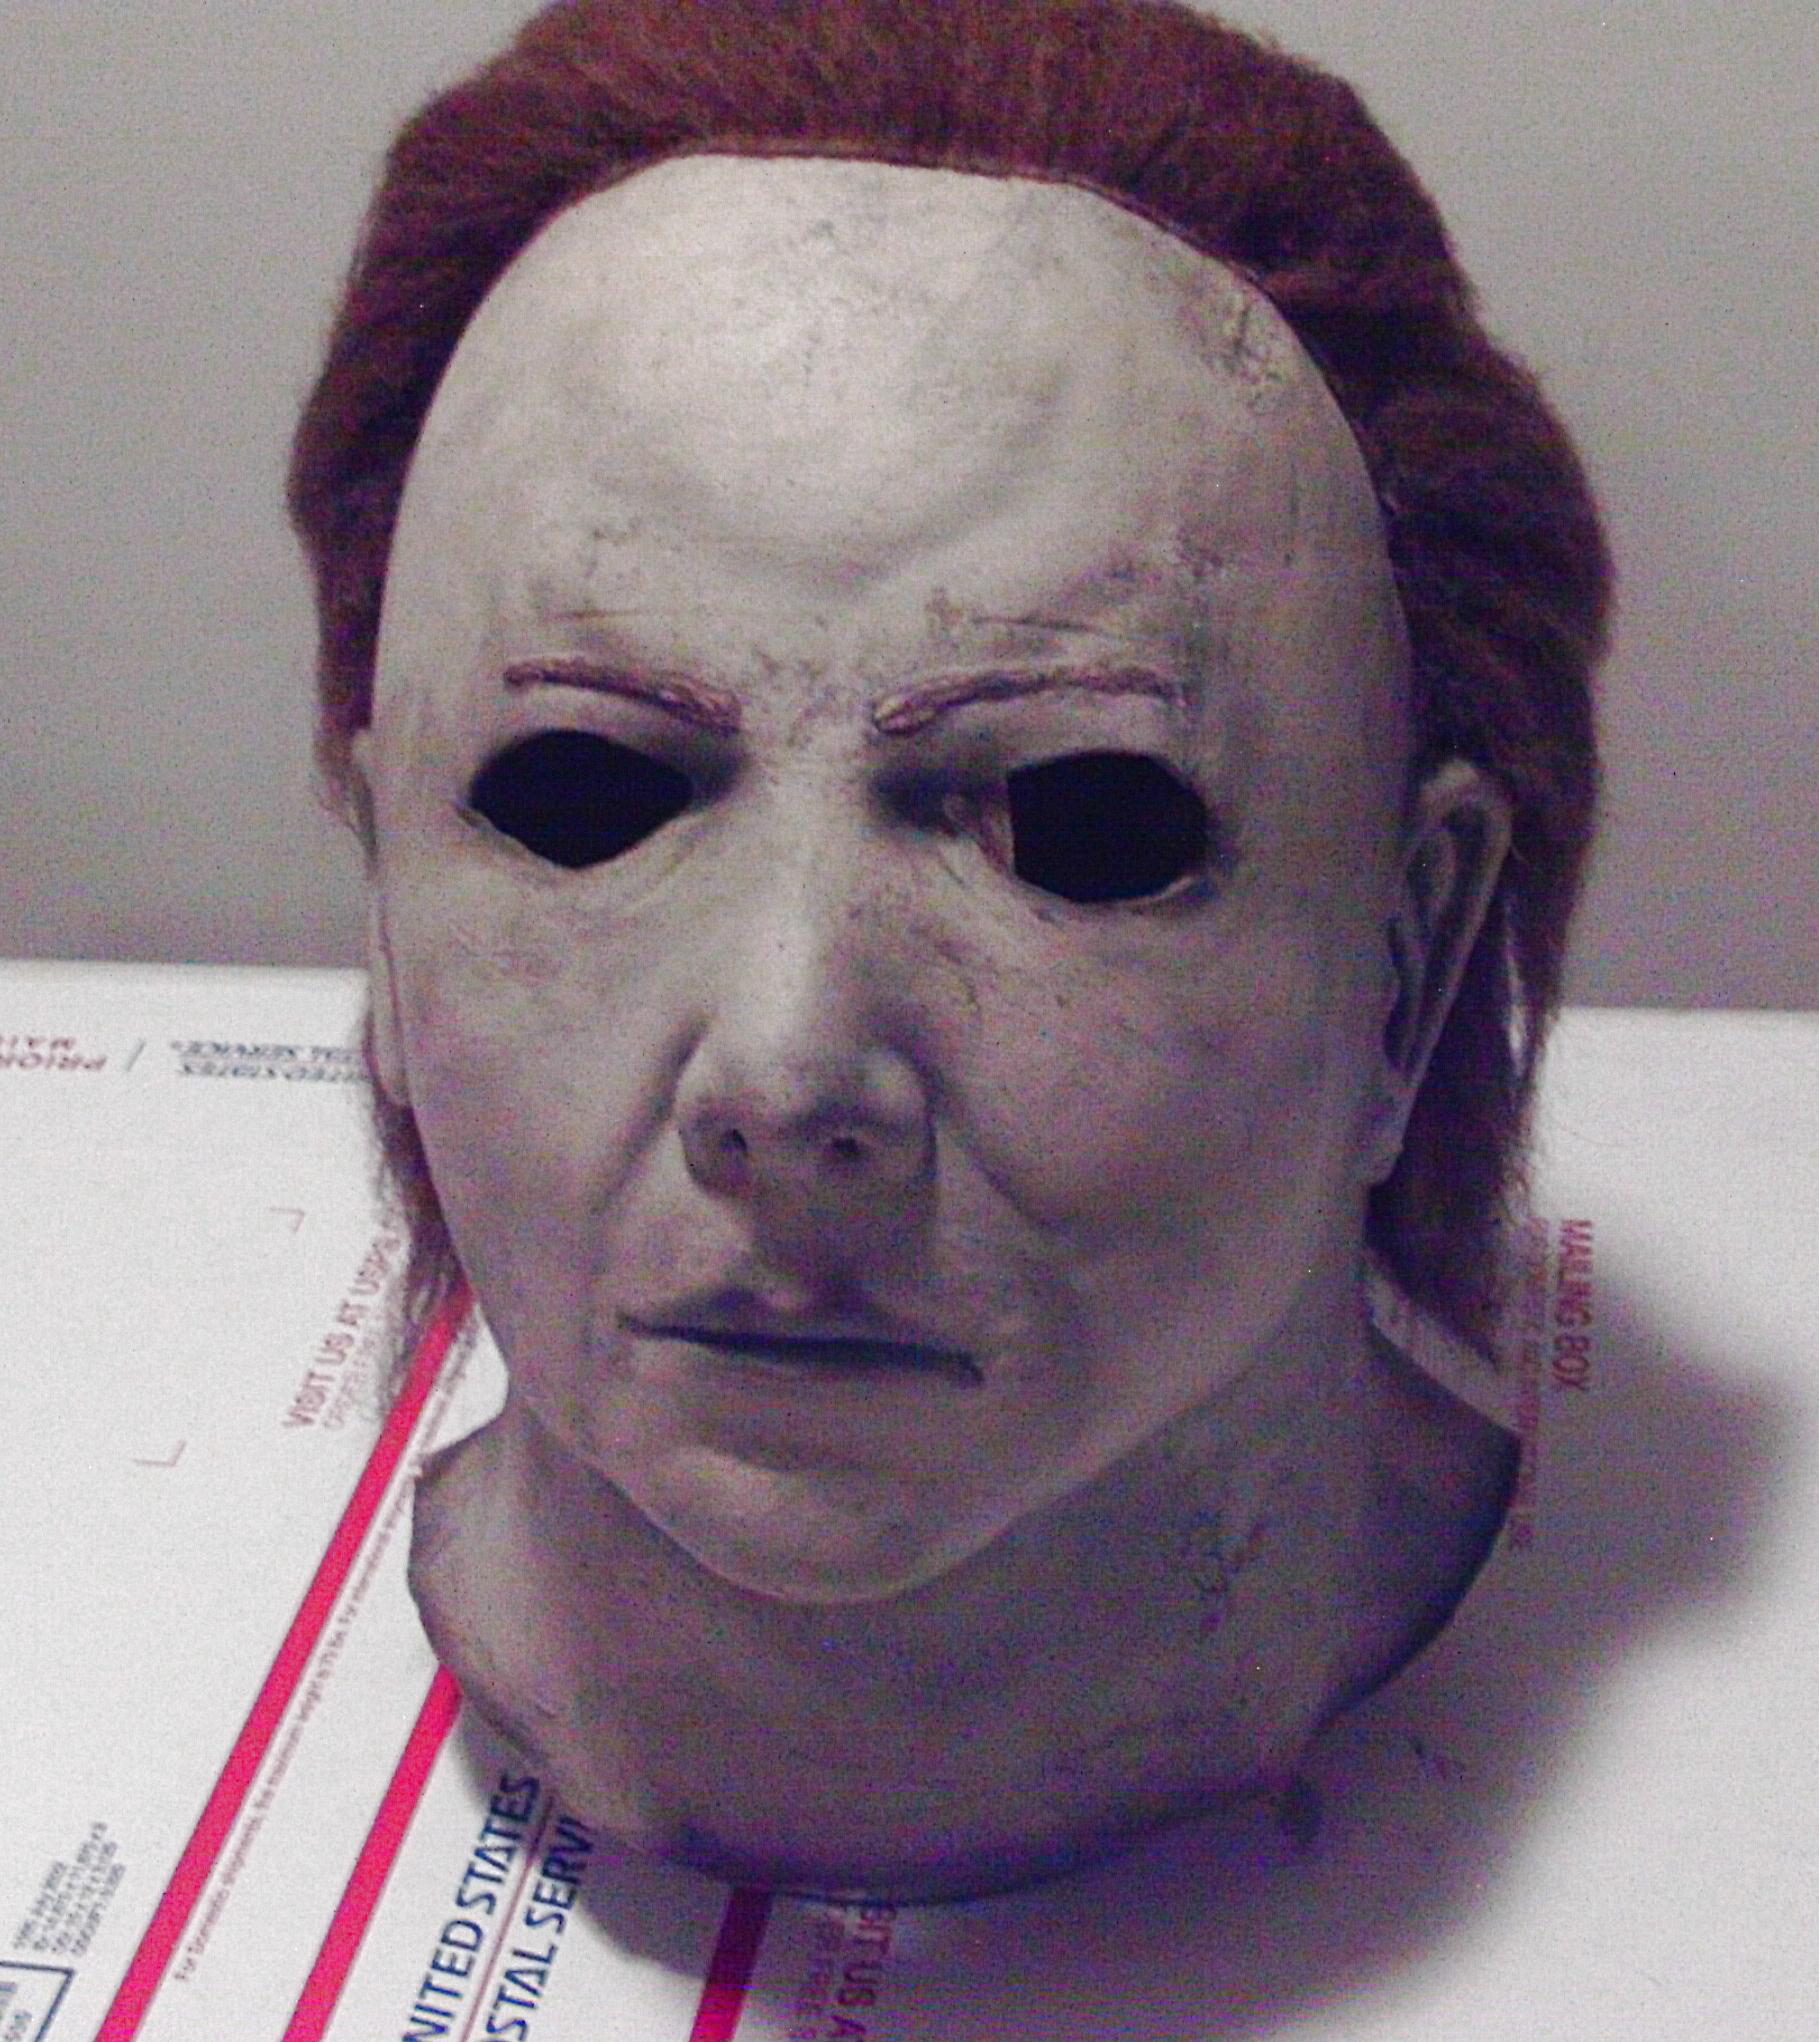
Michael fully repaired and back on the shelf!