Yeah then it would look more like the kills too which makes more sense because it’s the same mask just without the fire damage
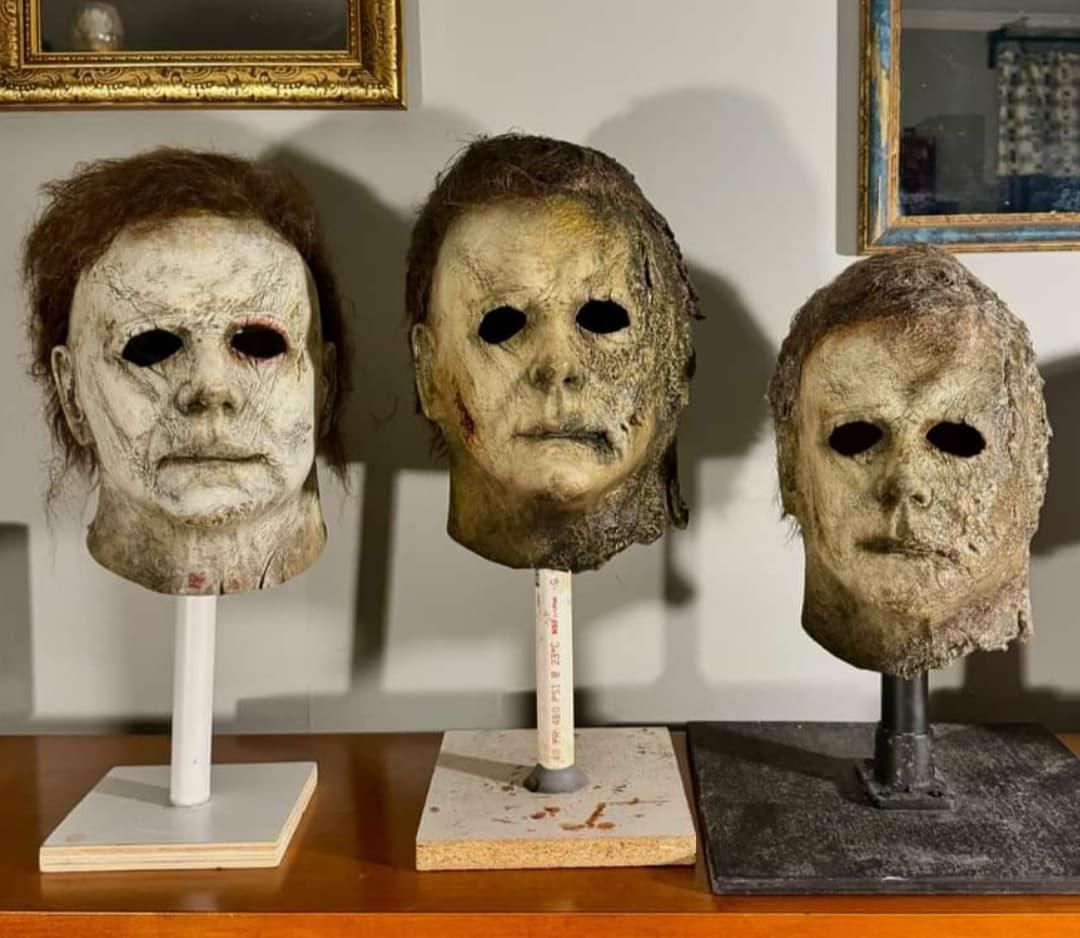
Pretty much! As shown in this trilogy of masks below, they all share that sort of ivory-aged base tone, with the Kills mask being the brightest, the H40 being more white, and the Ends being more green-yellow. But as said before: different masks, actors, stunts, lighting, etc. (excluding the picture with JJC’s white as heck mask vs the other two, just another example)

2 Likes
Yea! I’d like to do a set of masks that abide with that continuity, luckily all I’d have to do is a yellower H40 and I’d be set. Good luck though!
2 Likes
I appreciate all your help Bart thank you for sticking around😊
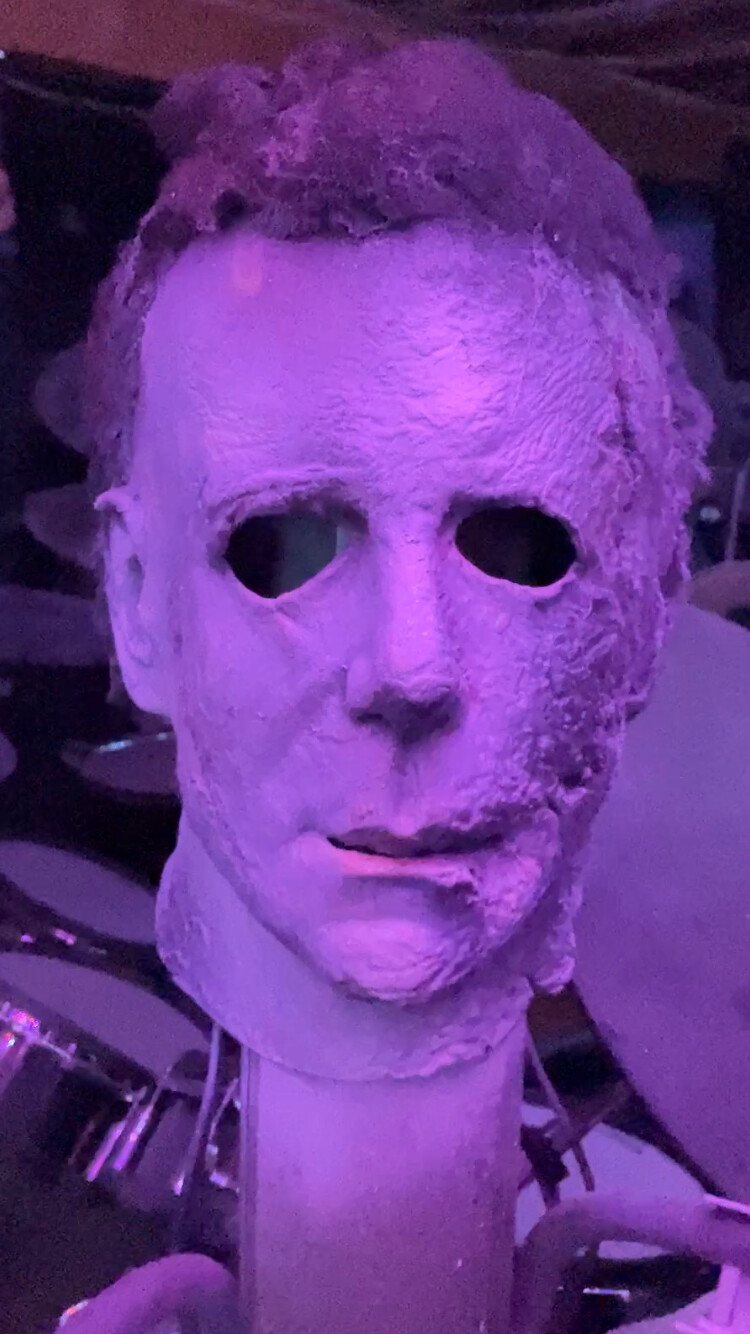
It looks killer man!! Great job!!
1 Like
How do you do the crack wash without ruining the rest of the paint job?
1 Like
So this is a bit tricky. You don’t want the wash to be any bigger than the area of the cracks you’re doing. I find this as an optional step as of now really, as I didn’t do it to my Kills mask and it looks fine, but if you want I’ll list the steps!
2 Likes
I think its very reminiscent of Castle’s mask. For the process, you just apply the wash only in the general area/span of the cracks. You can try wiping some of it away after a few seconds, but this can again get tedious as you may have to keep doing this until you’re satisfied with how it looks. After that, just lightly dry brush over it and you basically got the foundation of the cracks, where later you can go in with a brush and bring them out more with oil or acrylic paint.
2 Likes
I’ll keep trying and use your advice as I do, thank you for all the helpful advice my friend. And thank you for the compliment saying it resembles Castle’s mask.
2 Likes
No problem man! Just ask whenever you need anything
2 Likes
Are the top 3 mask pictures heros?
1 Like
Yep! Obviously different ones on the movie but all Nelson’s work
1 Like
Ok thx dude! The bottom ends is the corey version ? The kills is screen used , and as well as the H40? (bottom ones).
I think its just a regular kills. The crispier one with the char is much more vivid and soft, not as gritty as this one
1 Like
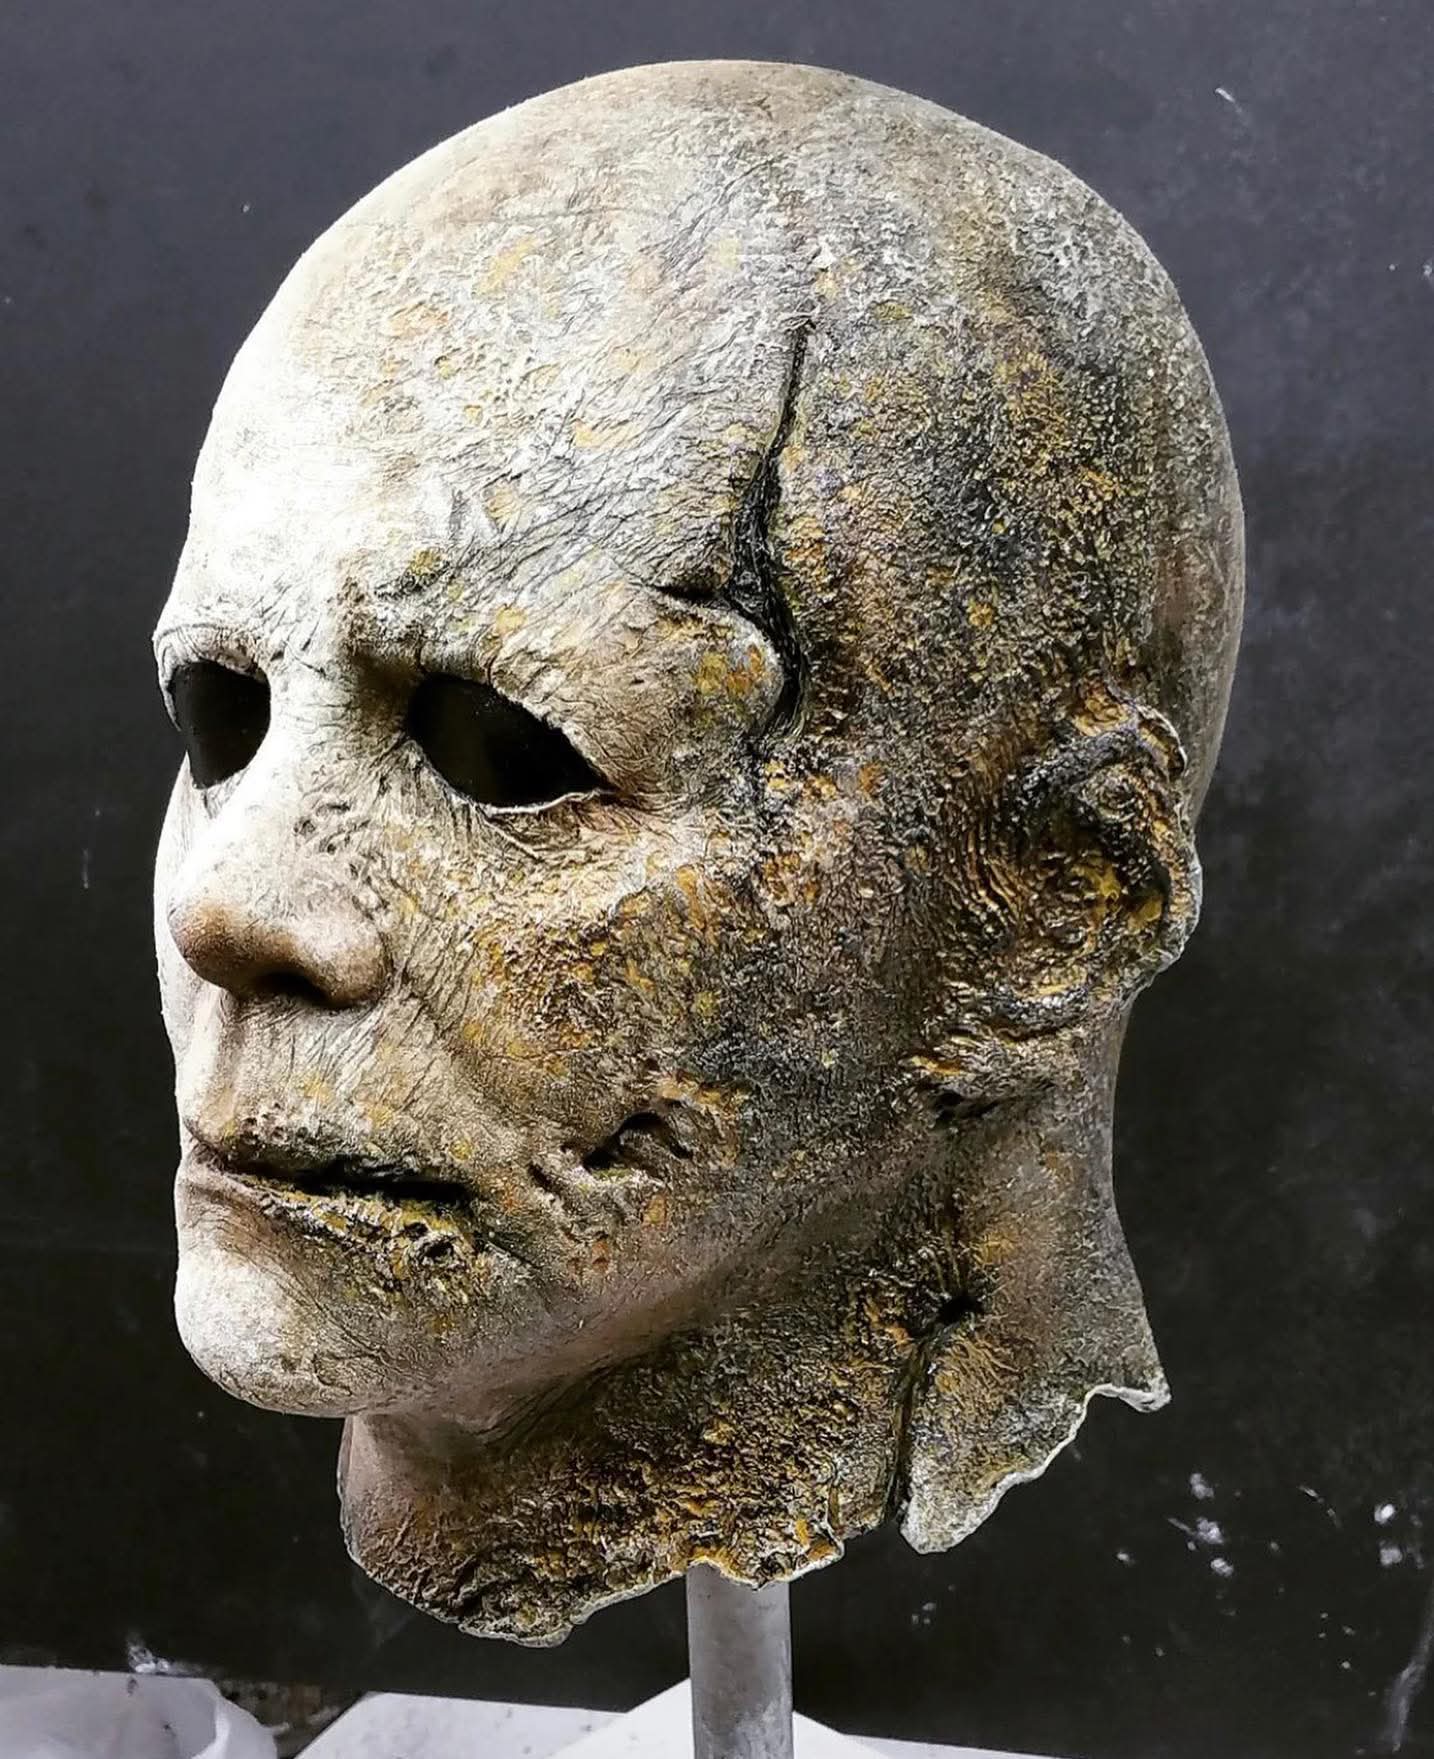
Hmm there’s yellow in places that aren’t on that hero mask or as far as I can tell…..I get the feeling this is some kind of hybrid thing. Wish nelson would post the finished , all we have is just speculation. He’s good at keeping the mystery/mystique ill give him that. Not to mention the suspense lol. So many questions. I wonder too if this is that hero mask not the crispy, is this his work on the hero for the movie or is this a new one he made. He just says “first pass at kills “ on the post.
2 Likes
Are you rehauling that???
1 Like