Hello! It’s been a while since I’ve made a thread, but I felt this topic was important enough to warrant one, especially with how undiscussed this certain aspect I wanted to cover is.
This isn’t about the placement of the bullet holes in Halloween II, but more so how to do, and tear them properly with the added blood.
For those looking for a good thread on the placement, please look to the excellent definitive guide that is currently a sticky. The main reason I wanted to start discussion about this is because I recently finally nabbed myself a pair of Roebucks, not the exact brand, I know, but very close. With something so rare on my hands, I want no chances to screw or fuck up on the weathering process like I have years previously with my old Red Kaps, where I was sorely disappointed with the job I did on the blood. So let’s try to get a discussion going of tips and tricks to get the perfect look for the definitive 1981 Myers.
Here’s some things I’d like to have covered by anyone with some real experience on this, if you can please provide some additional details.
The blood. What kind of fake blood, or paint do you use? How do you get the wet, fresh look for the stains instead of having it come out dried and fake looking? Any advice or tips on this would be extremely appreciated.
The size and shape of the tears/holes. There’s a lot of variation on this, big or small? Circles or messy flapping tears? How do you do them?
The spread and or splattering of the blood. When you do this, how do you do it? Do you just put it on there, try to make it seem like it’s dripping?
This may some extreme to some people, but I’m a nut over this stuff, and I know a ton of you are as well, obsessing over every little detail of the costume. But as someone who really does not want to risk fucking up such rare coveralls, I find this very important.
Thanks everyone! All contributions to this would be very appreciated by those who’ve done this before.
Perma-blood. Amazing stuff. Looks wet, dry to the touch, probably your best bet.
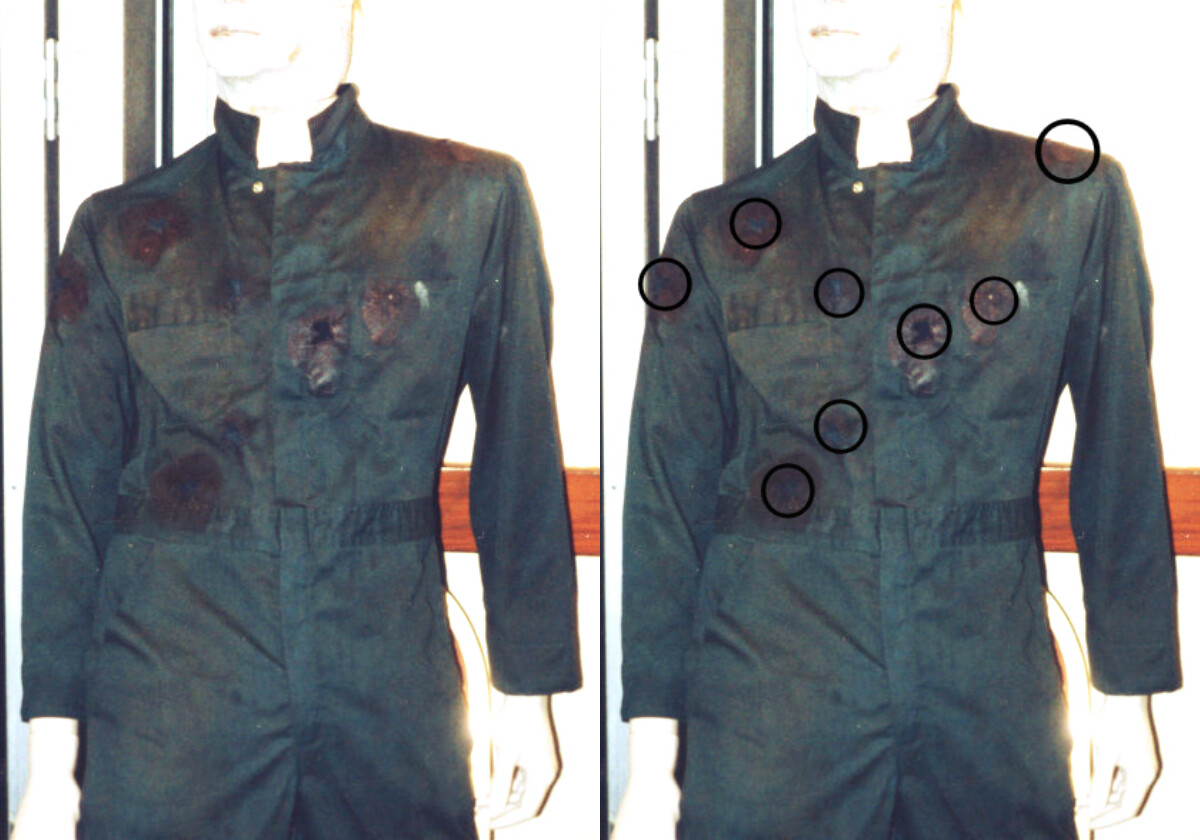
There are enough photos of the SU coveralls that you could size them to scale and make templates. Do that then cut them out roughly with an exacto knife. Some are larger and smaller than others. Too small is fine, you could always cut more away. But once you make them too big there’s no going back.
Do a large(ish) circle of blood around the hole, that way it will give the effect that the fabric has soaked up the blood to it’s max ability.
If it is needed (haven’t studied the blood pattern around the holes in depth), pour a bit of the perma wet below the hole you’ve cut, then hang the coveralls upright. It will naturally drip downward to give the running effect. If not use a sponge brush and form the drip yourself however you want.
Hope this helps some. I’ll pull up some pics of the hero coveralls and put them in this post.
Yeah, I’m absolutely obsessive-compulsive over this myself. Plan on doing this for Halloween next year and even though it’s a full year away I’m already trying to get prepared for it. I’ve read in places how to use a Car cigarette lighter for the bullet holes but I’m not sure if that’s the best route. Not really sure myself. Guess I should watch the film over again and see if I can find the exact way the bullet holes look.
Thanks for the advice and tips! Where would be the best site to purchase perma-blood however? There’s varying prices and websites,
so I’d like to get your input on that.
Also, do you have any pictures of the bullet holes from behind as well? I know there were some. Also, I’m looking to do the version at the beginning of the film with only six bullet holes, and the screen used ones as they are currently also include the shots Loomis put into Michael near the end of the film, if you have any specific shots of them with just the six, then It’d be appreciated.
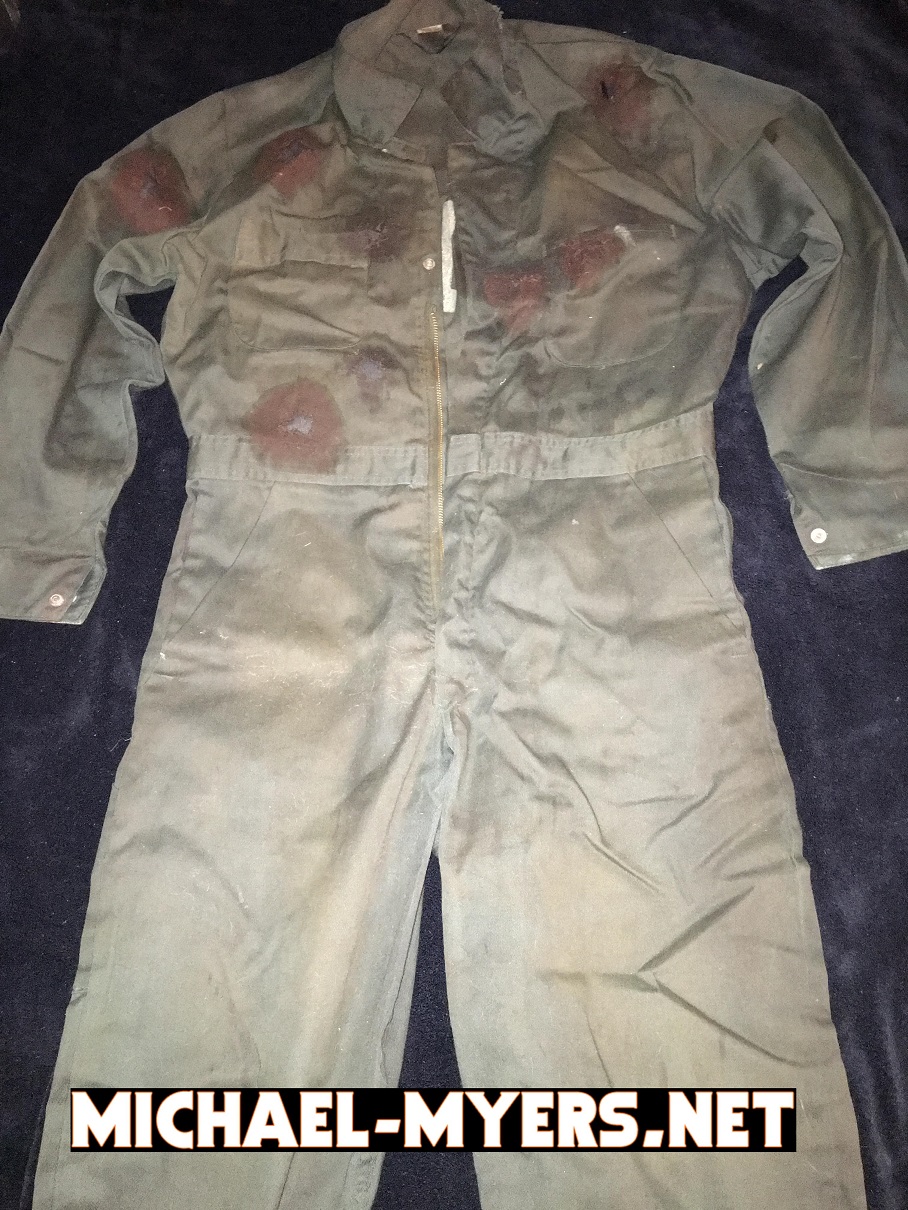
I referenced the above pic of the coveralls and took my power drill to my coveralls on the work bench with a big enough drill bit to mimic holes. With gloves on and a bottle of fake blood I ran my bloody finger through each hole, stretched them out a bit and soaked the area. Pretty quick and easy to do but I wasnt picky about it.
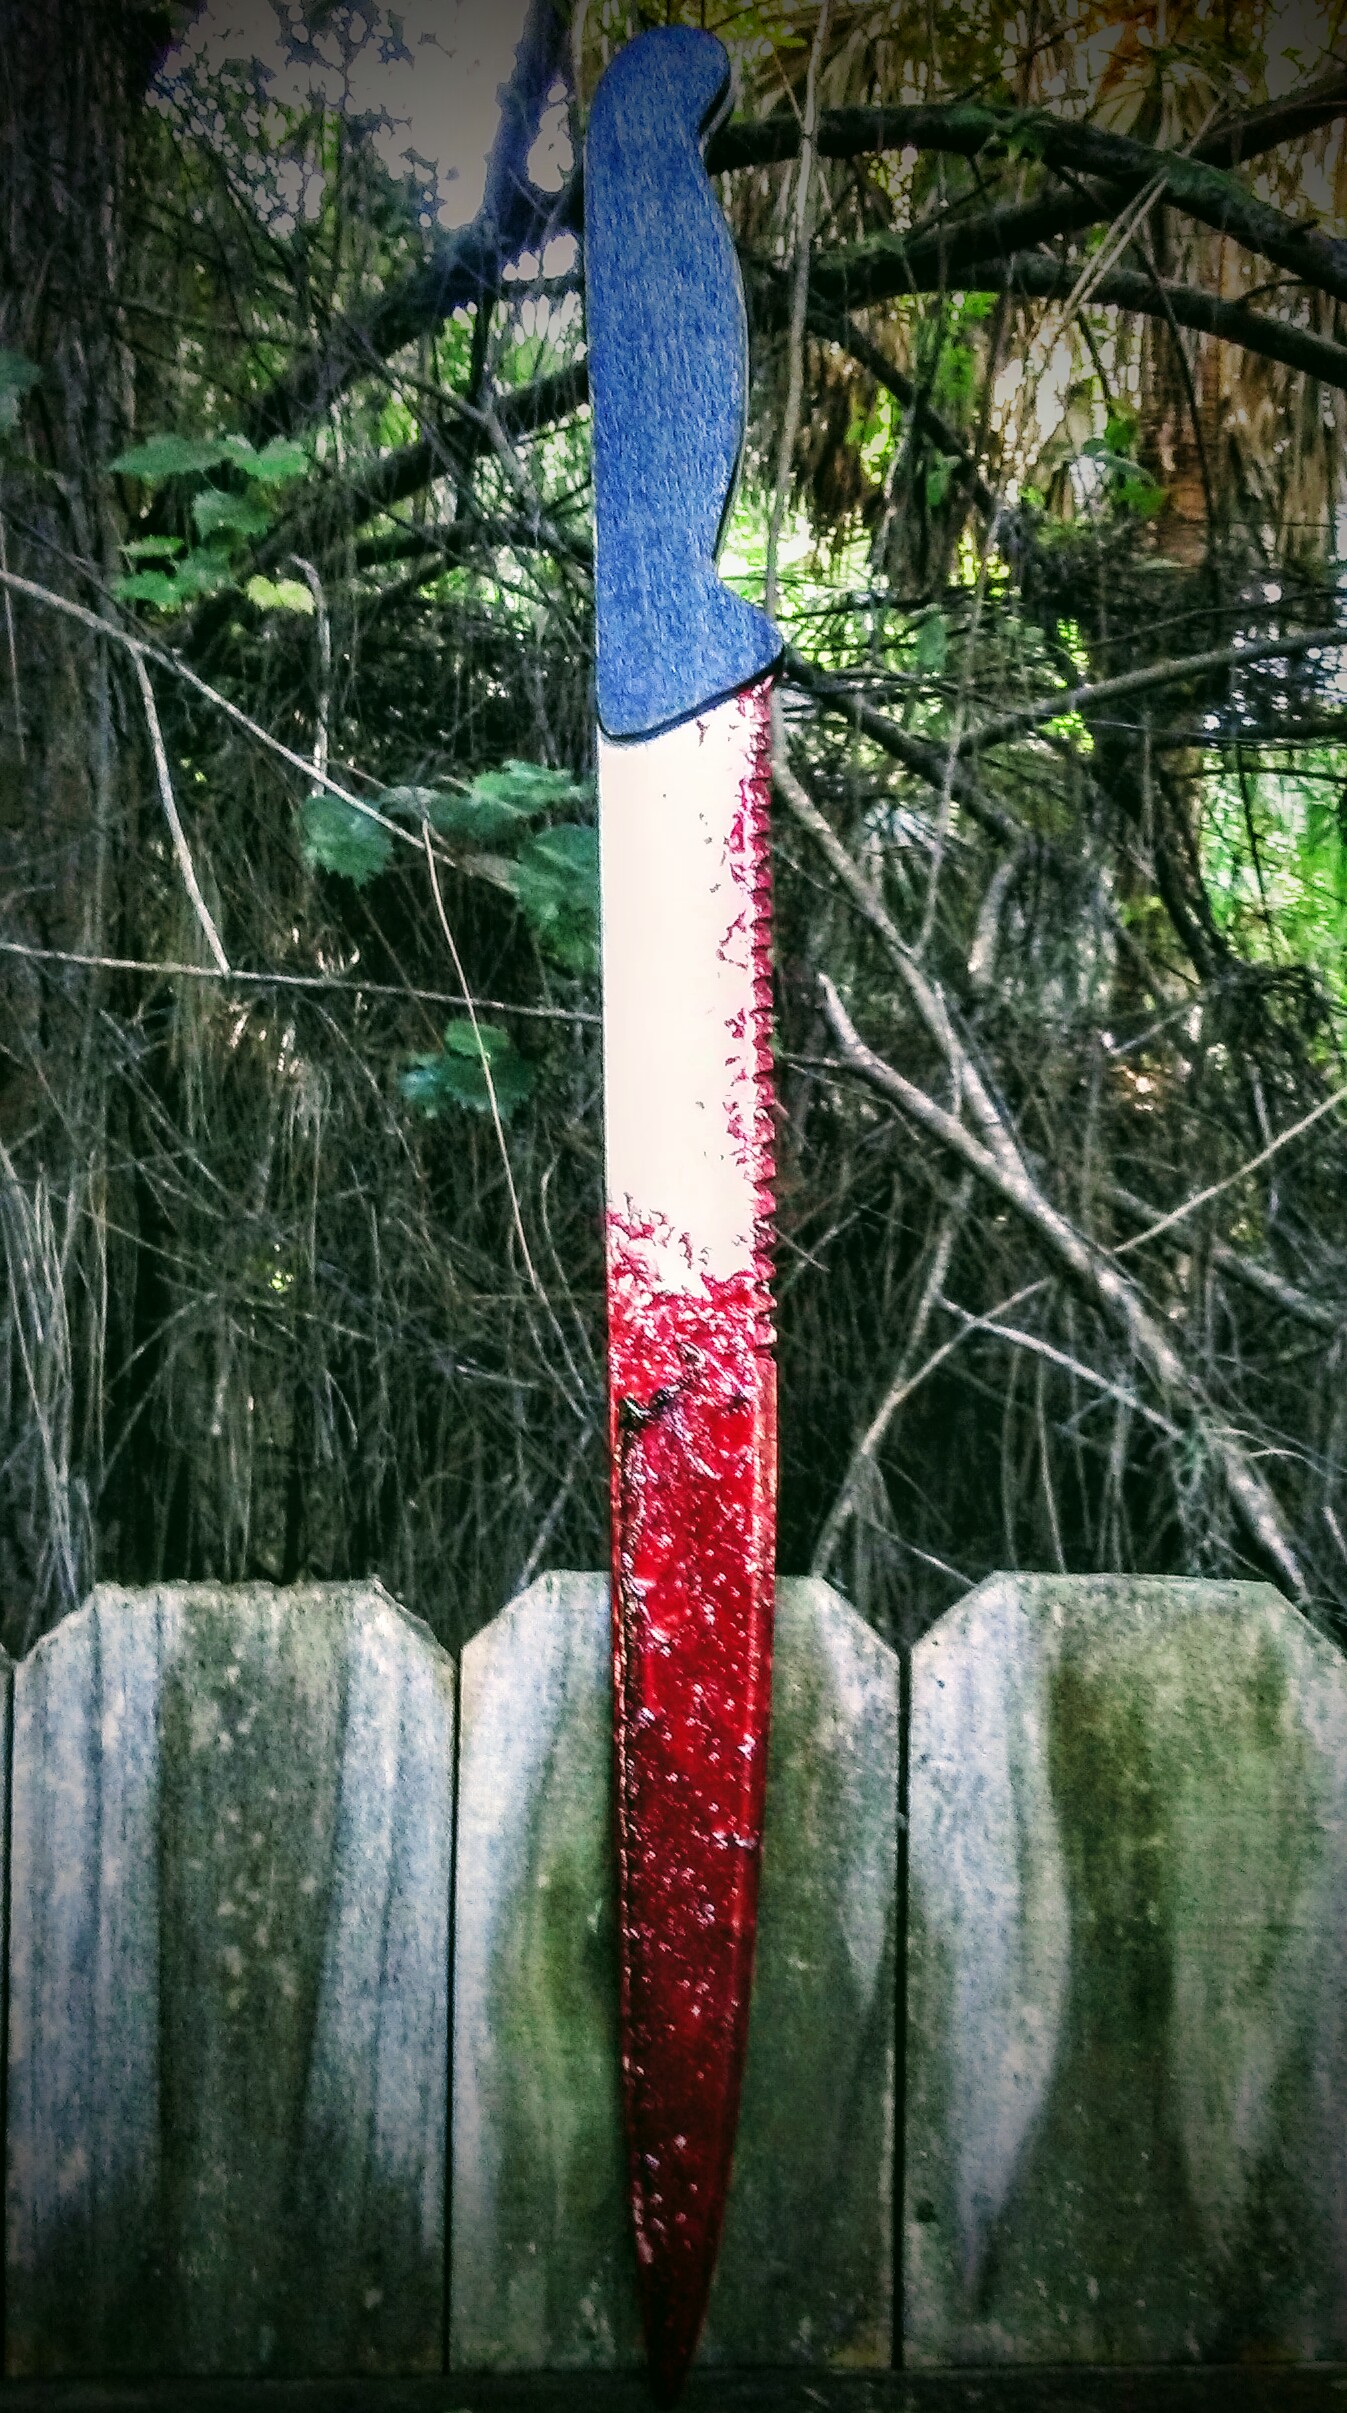
I cut my holes out with scissors. Made them big so they are more noticeable. Wasn’t going for accuracy there, just locations. Wanted them to pop more. As you can see, the perma-blood is awesome. I use it on my knives too. And picture frames, my car…everything lol
I borrowed a couple of cigarettes (I don’t smoke) and burned the holes through the fabric. Worked out nice. And since the holes are burned they won’t frey as quickly.
Thanks for everyones contributions! This has been helpful beyond belief. Yet, I’m still lacking any pictures or reference to simply the six bullet hole look, or any of them from behind as well. If someone could find that for me, since I haven’t had much luck, I’d be very thankful.
I have back coverall hole reference somewhere too, but I’ll have to find them. I don’t believe there is a “simple six bullet hole look” unless you came up with one yourself by not making a few bullet holes.
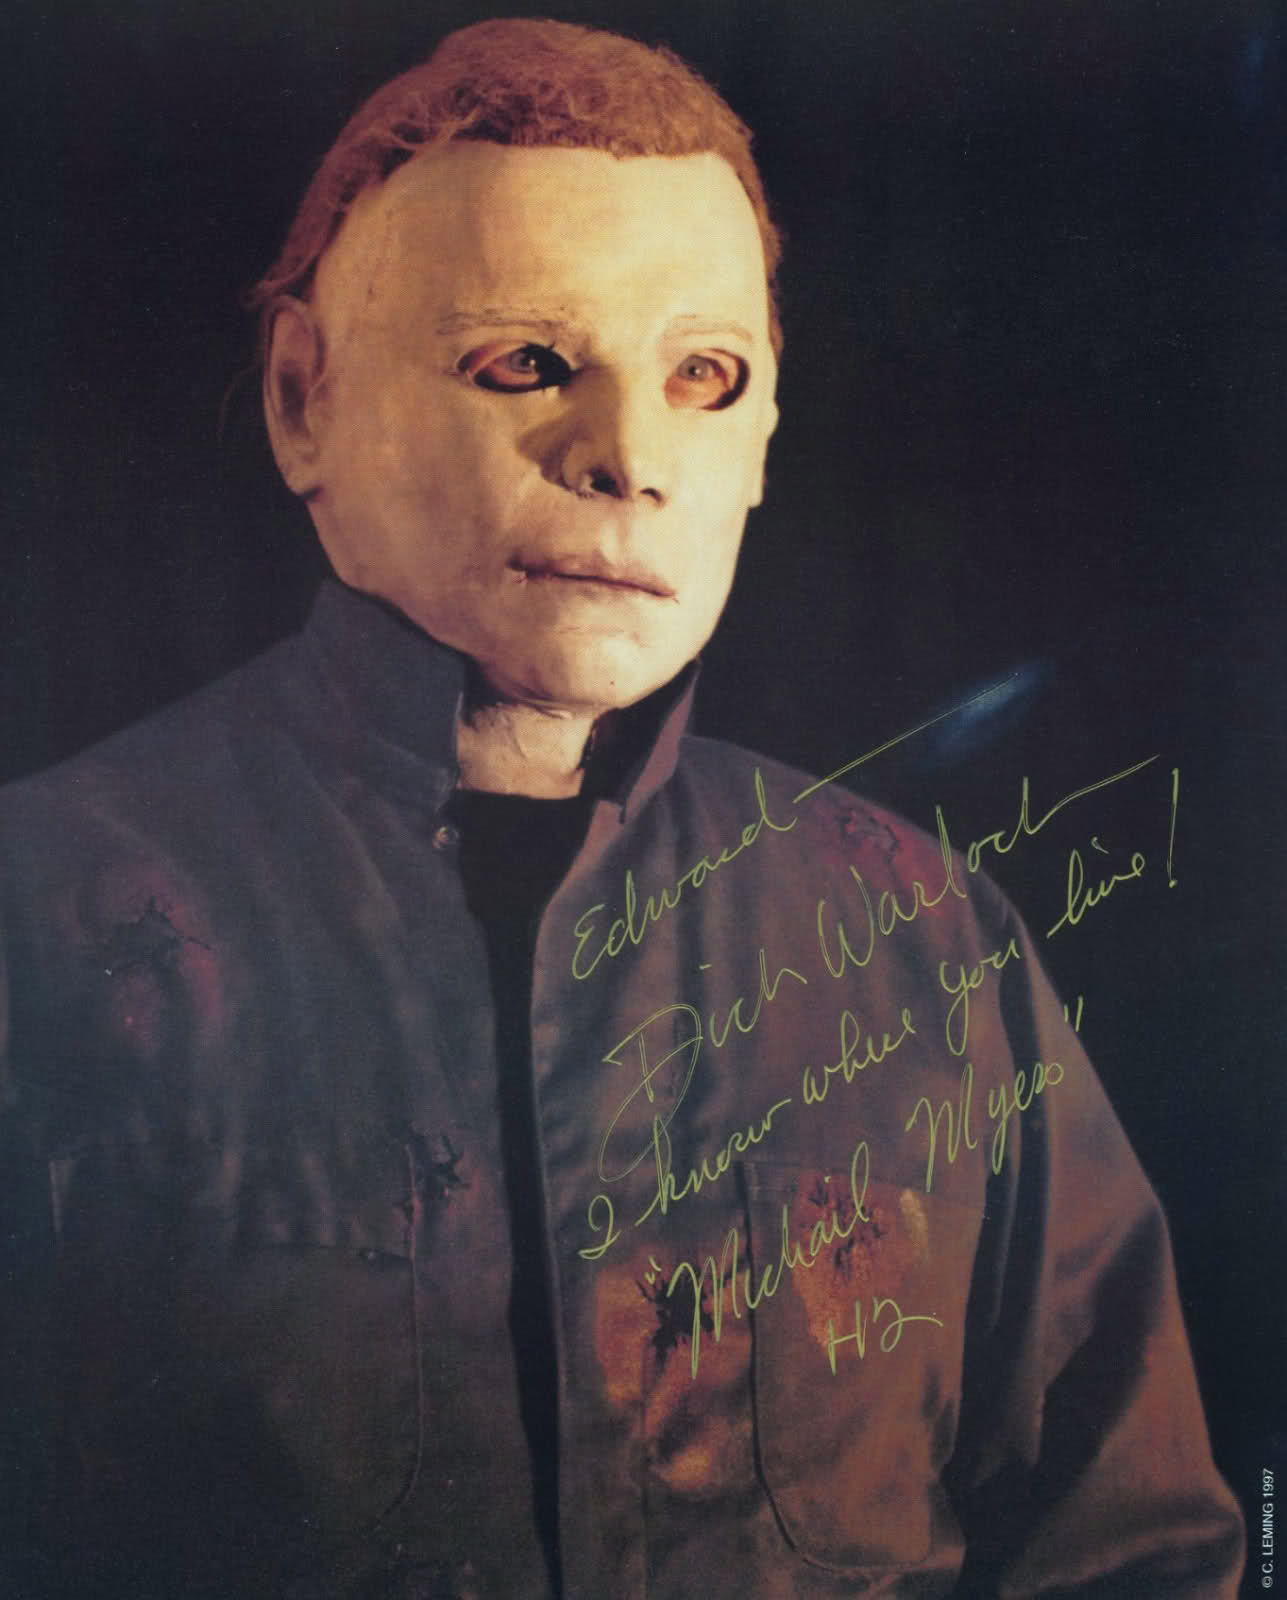
The second pic here is appeared to be pretty spot-on. But what I’m not yet 100% on his what exactly is being used to accomplish this visual effect. Cigarette lighter burns? Scissors? A combination of both? And he won’t have a definite on this? I plan on doing this this year so I’d like to know the best way to go for accuracy here without high risk of screwing anything up.
Did anyone else think it was interesting that they taped Velcro behind the holes to give it a wet look? I read that in the Roberts interviews and was surprised, I never would have thought to do that.
I used a lit cigarette to burn holes in mine. The trick is keeping the fire as hot as possible by puffing on it. I’m not a smoker so that was interesting, lol.
I think I went through two or three of my wife’s cigarettes. She was like…“really?”
Bumping this because I stole want to have definites on this. Is there any risk with using a cigarette or a lighter? I would think this would be a bit risky.
If you are wondering about fire risk with cigarettes, the polyester material of the coveralls kind of melts instead of burn. I’ve done this to several sets of coveralls and have had no problem. Hope this helps.