Hey folks, I’ve been searching and perusing as much of the boards to seek advice on how to go about rehauling this TOTS H6 mask I have. It was already rehauled buy a guy from a con I bought from last year and I think it was all pretty solid except the hair, but now I want to re-rehaul it. I need to know should I just paint over this with liquid latex/paint/water or should I try to get this paint off first? I don’t want to lose any details in the sculpt so I would like any info on that. If yes, I have no experience with naphtha so should I use lacquer thinner instead? If no, would applying the base with a sponge suit this mask since it’s a bit more grungy or should I shill for a $23 airbrush like I read in another thread? I have applied sponged liquid latex paint mix before so I have experience and I do have a secondary mask to practice on free of any issues to work out before working on this main mask.
I’m ordering dark brown crepe hair since that’s the only color close to the h6 available for easy purchase off amazon.
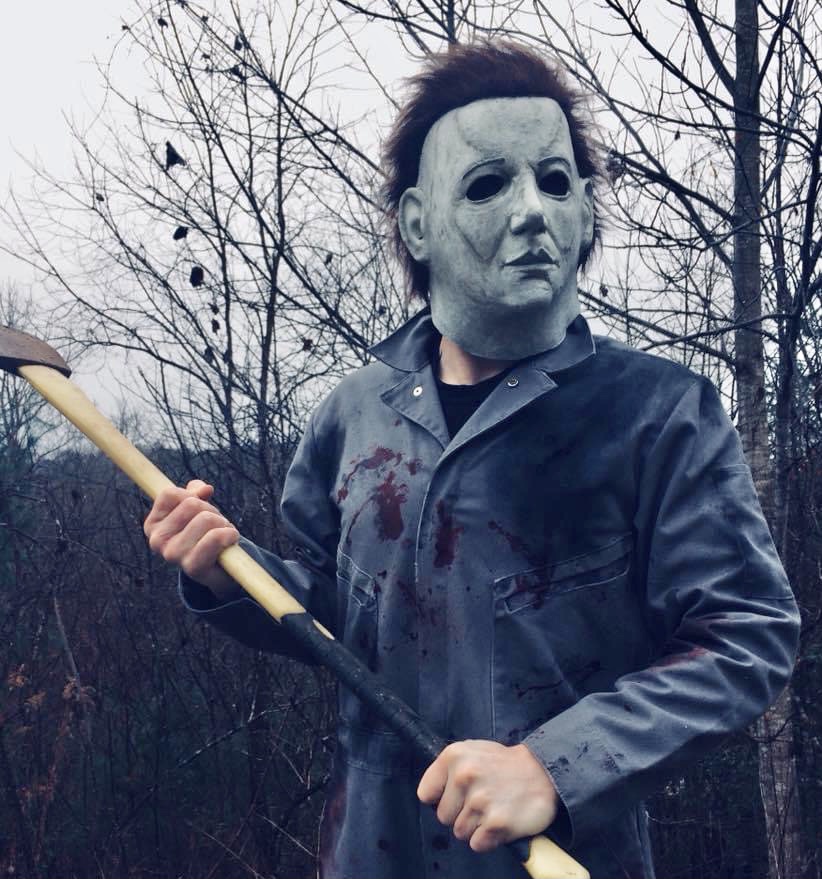
I know the H6 has a mix of light blue and grey-ish tones and I perused the BTS and other masks for guidance. I notice a lot make from the reshoot mask but not the (imo) superior Producer’s Cut mask so that’s the look i’m going for, not the more grungy reshoot mask.
I have seen many advice on masks that are almost always the 78 or the H2 or the 2018 but hardly ever the other, more unique masks. I searched and searched and I figure just making a direct post would help me better. Please send as much advice as you can, I would really appreciate it, even if it’s something I didn’t mention.
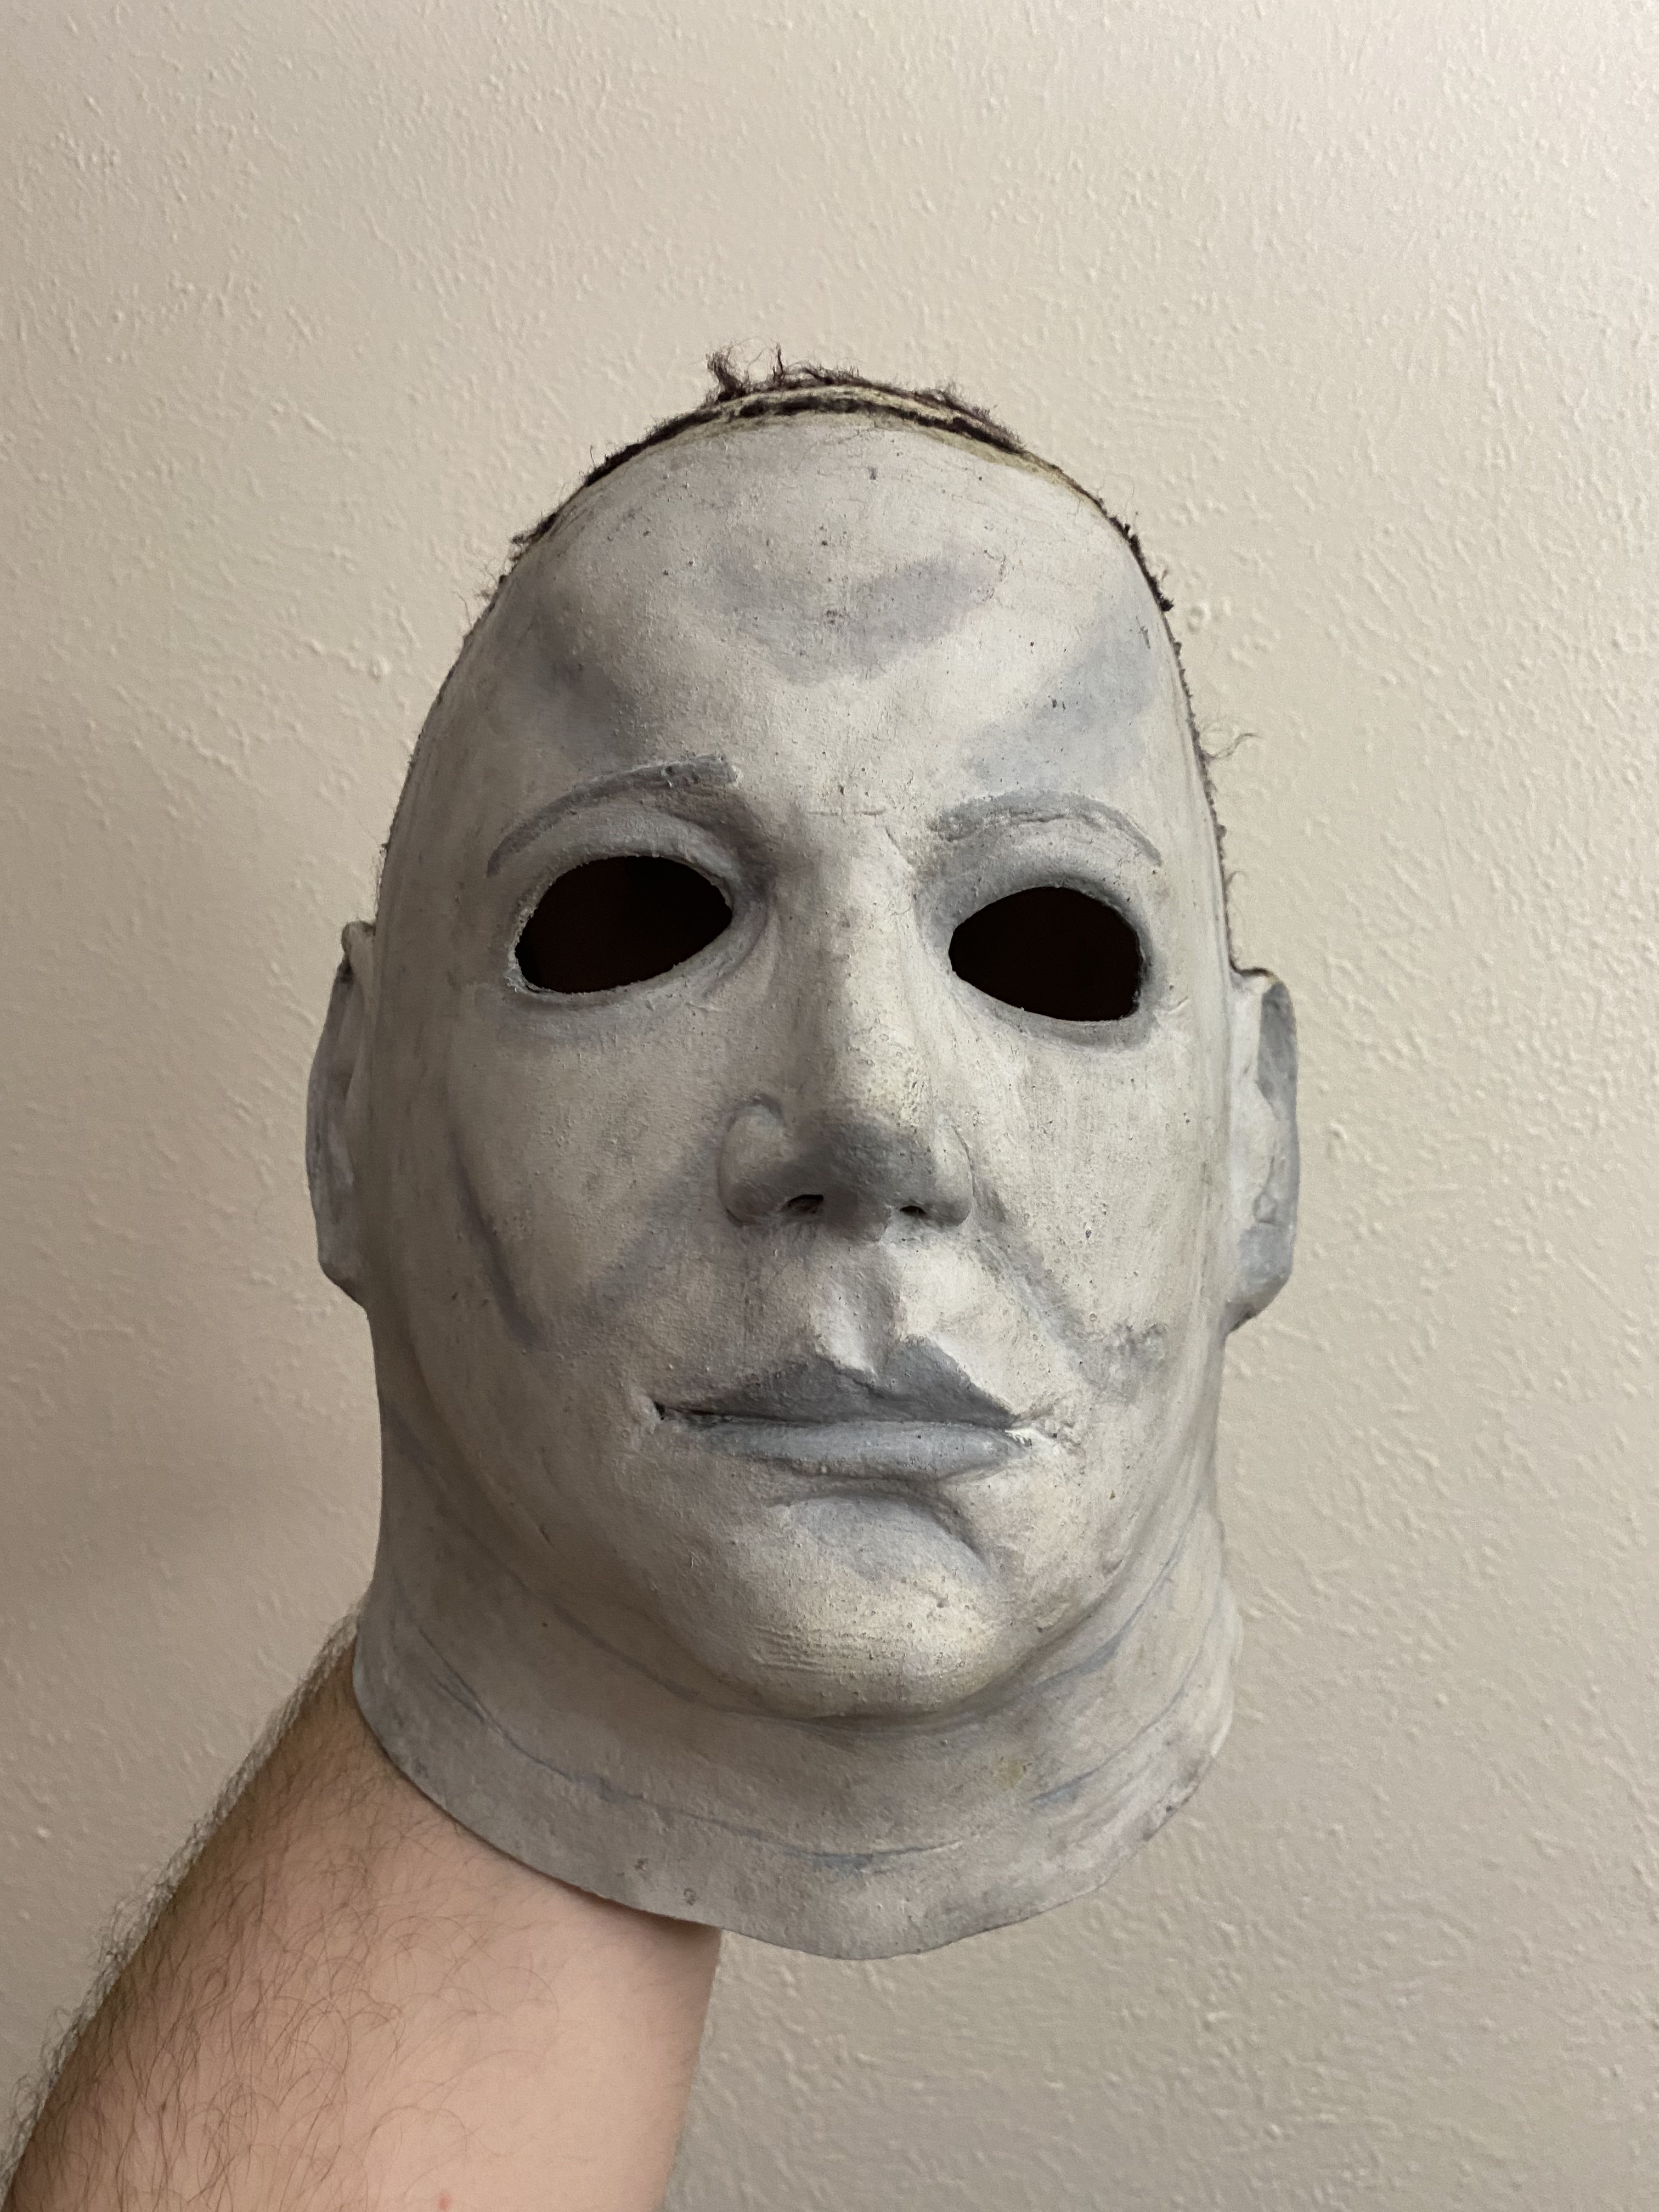
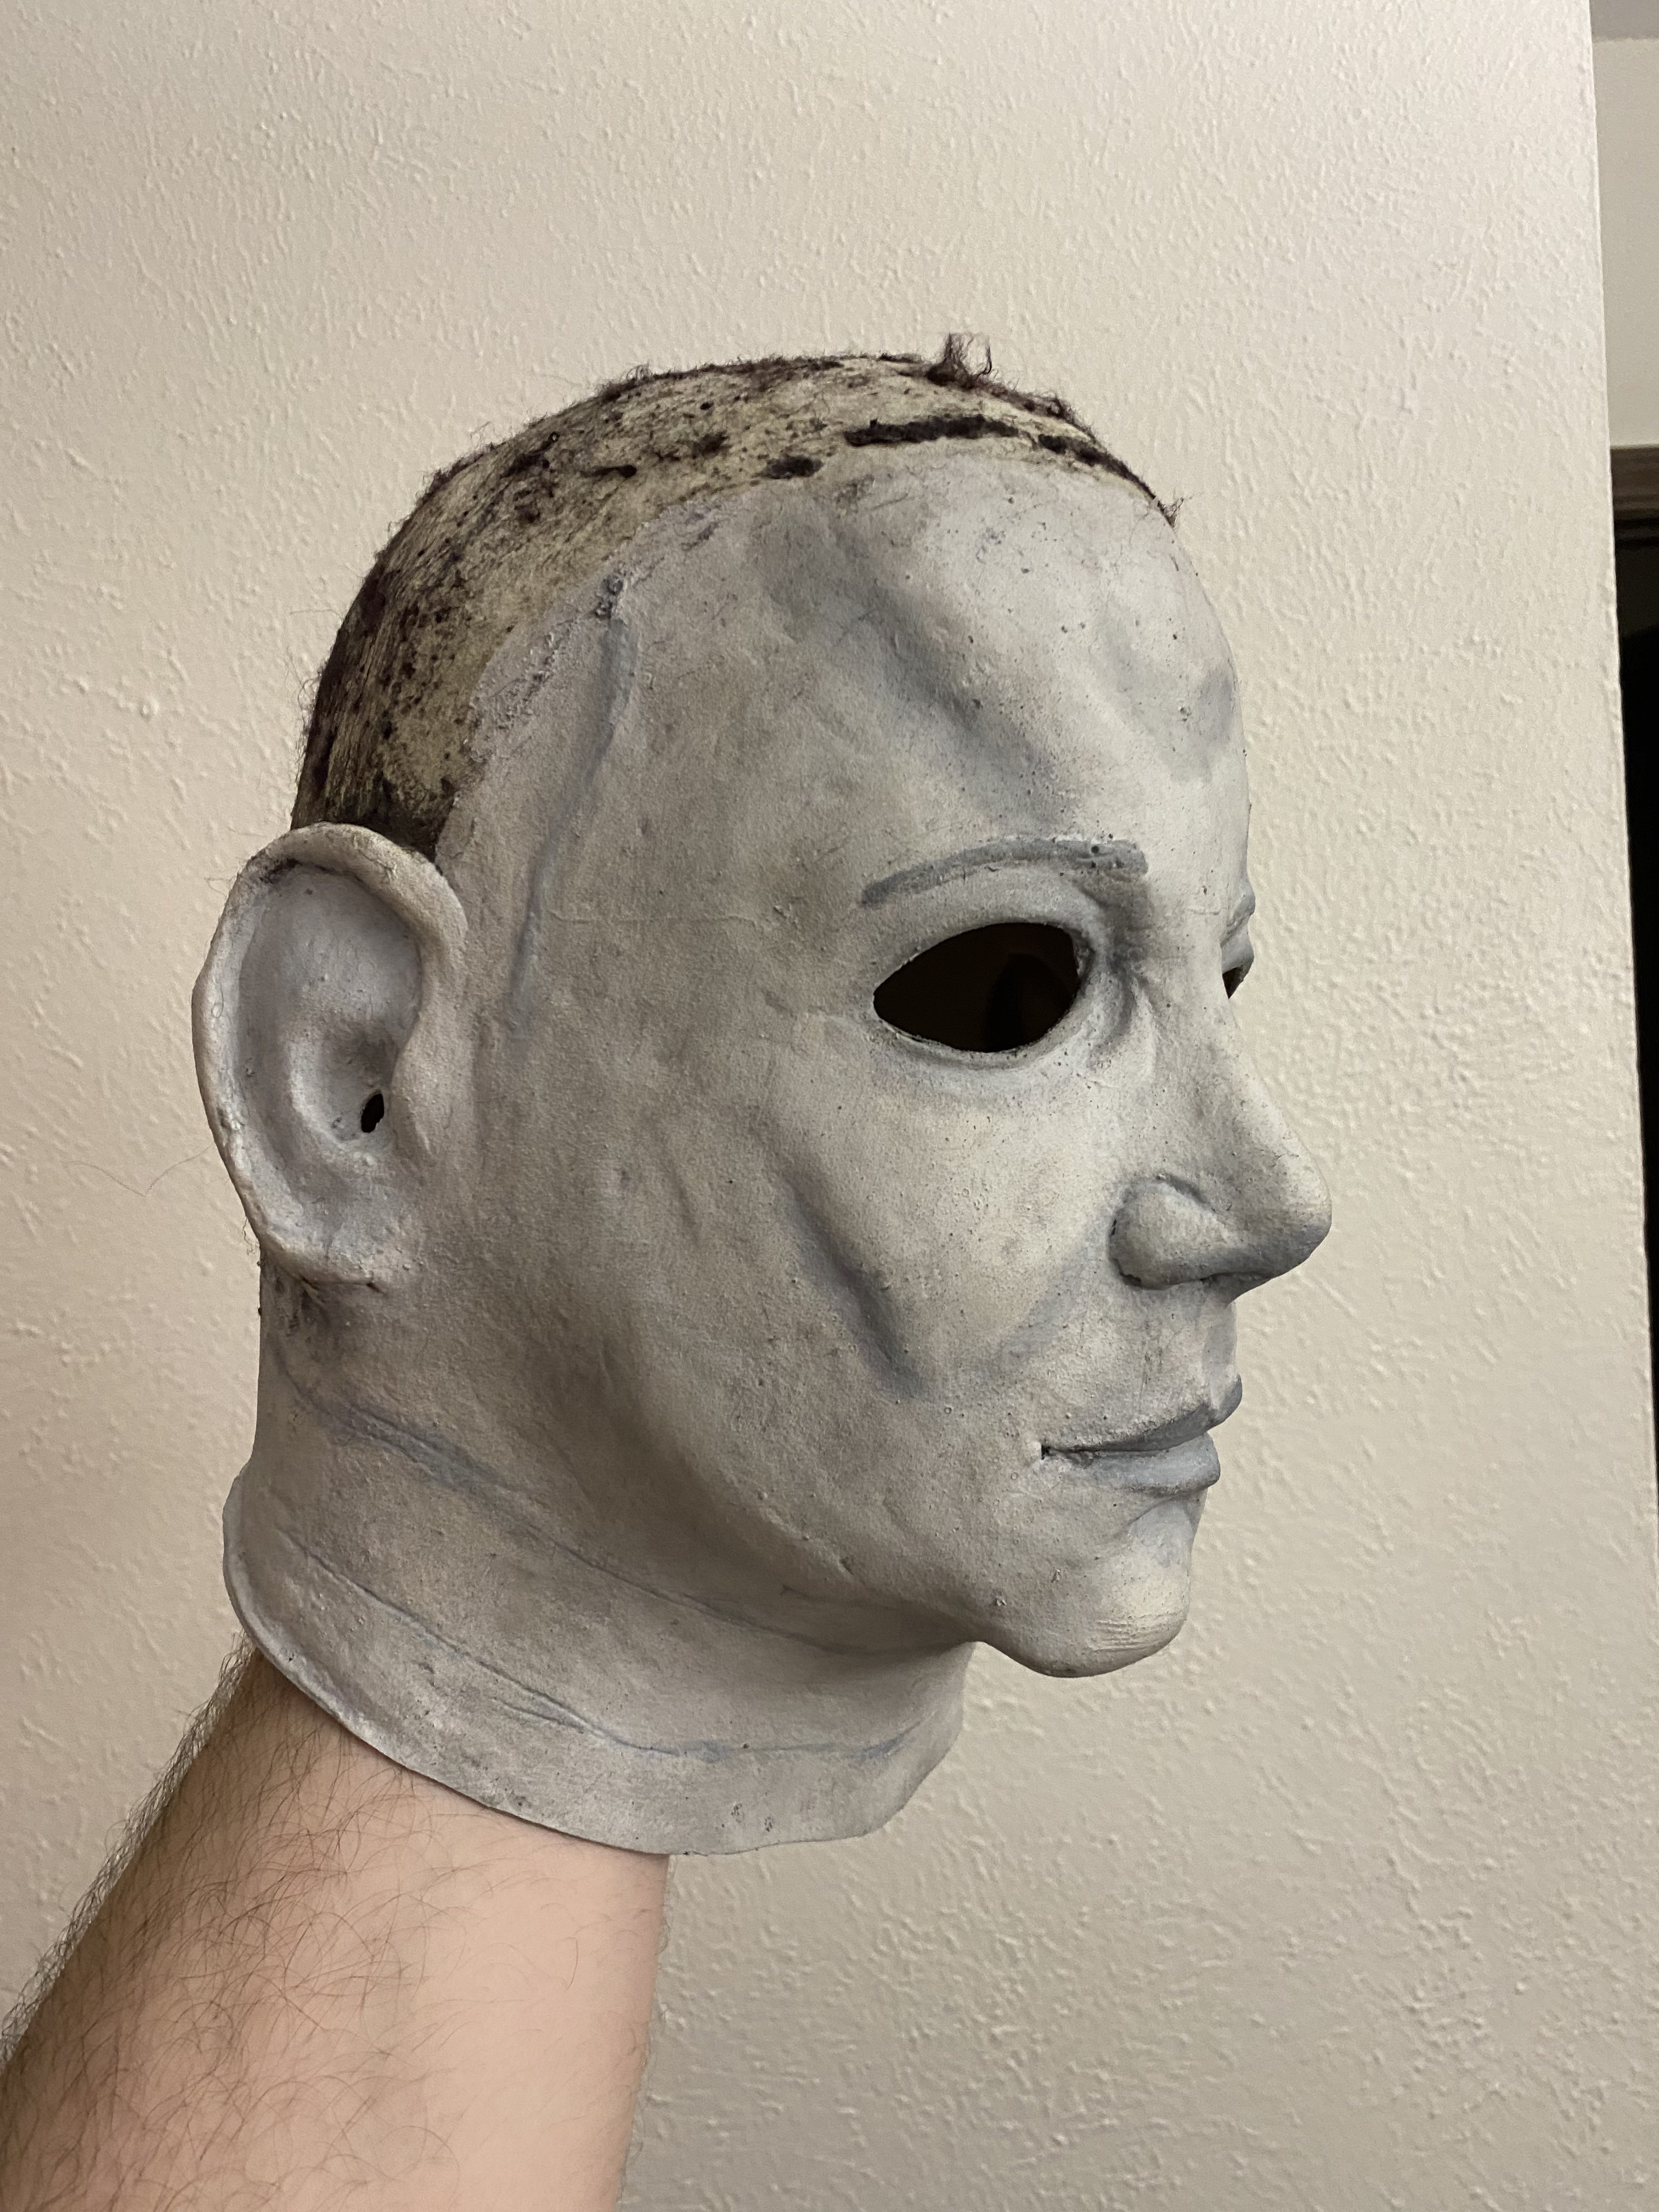
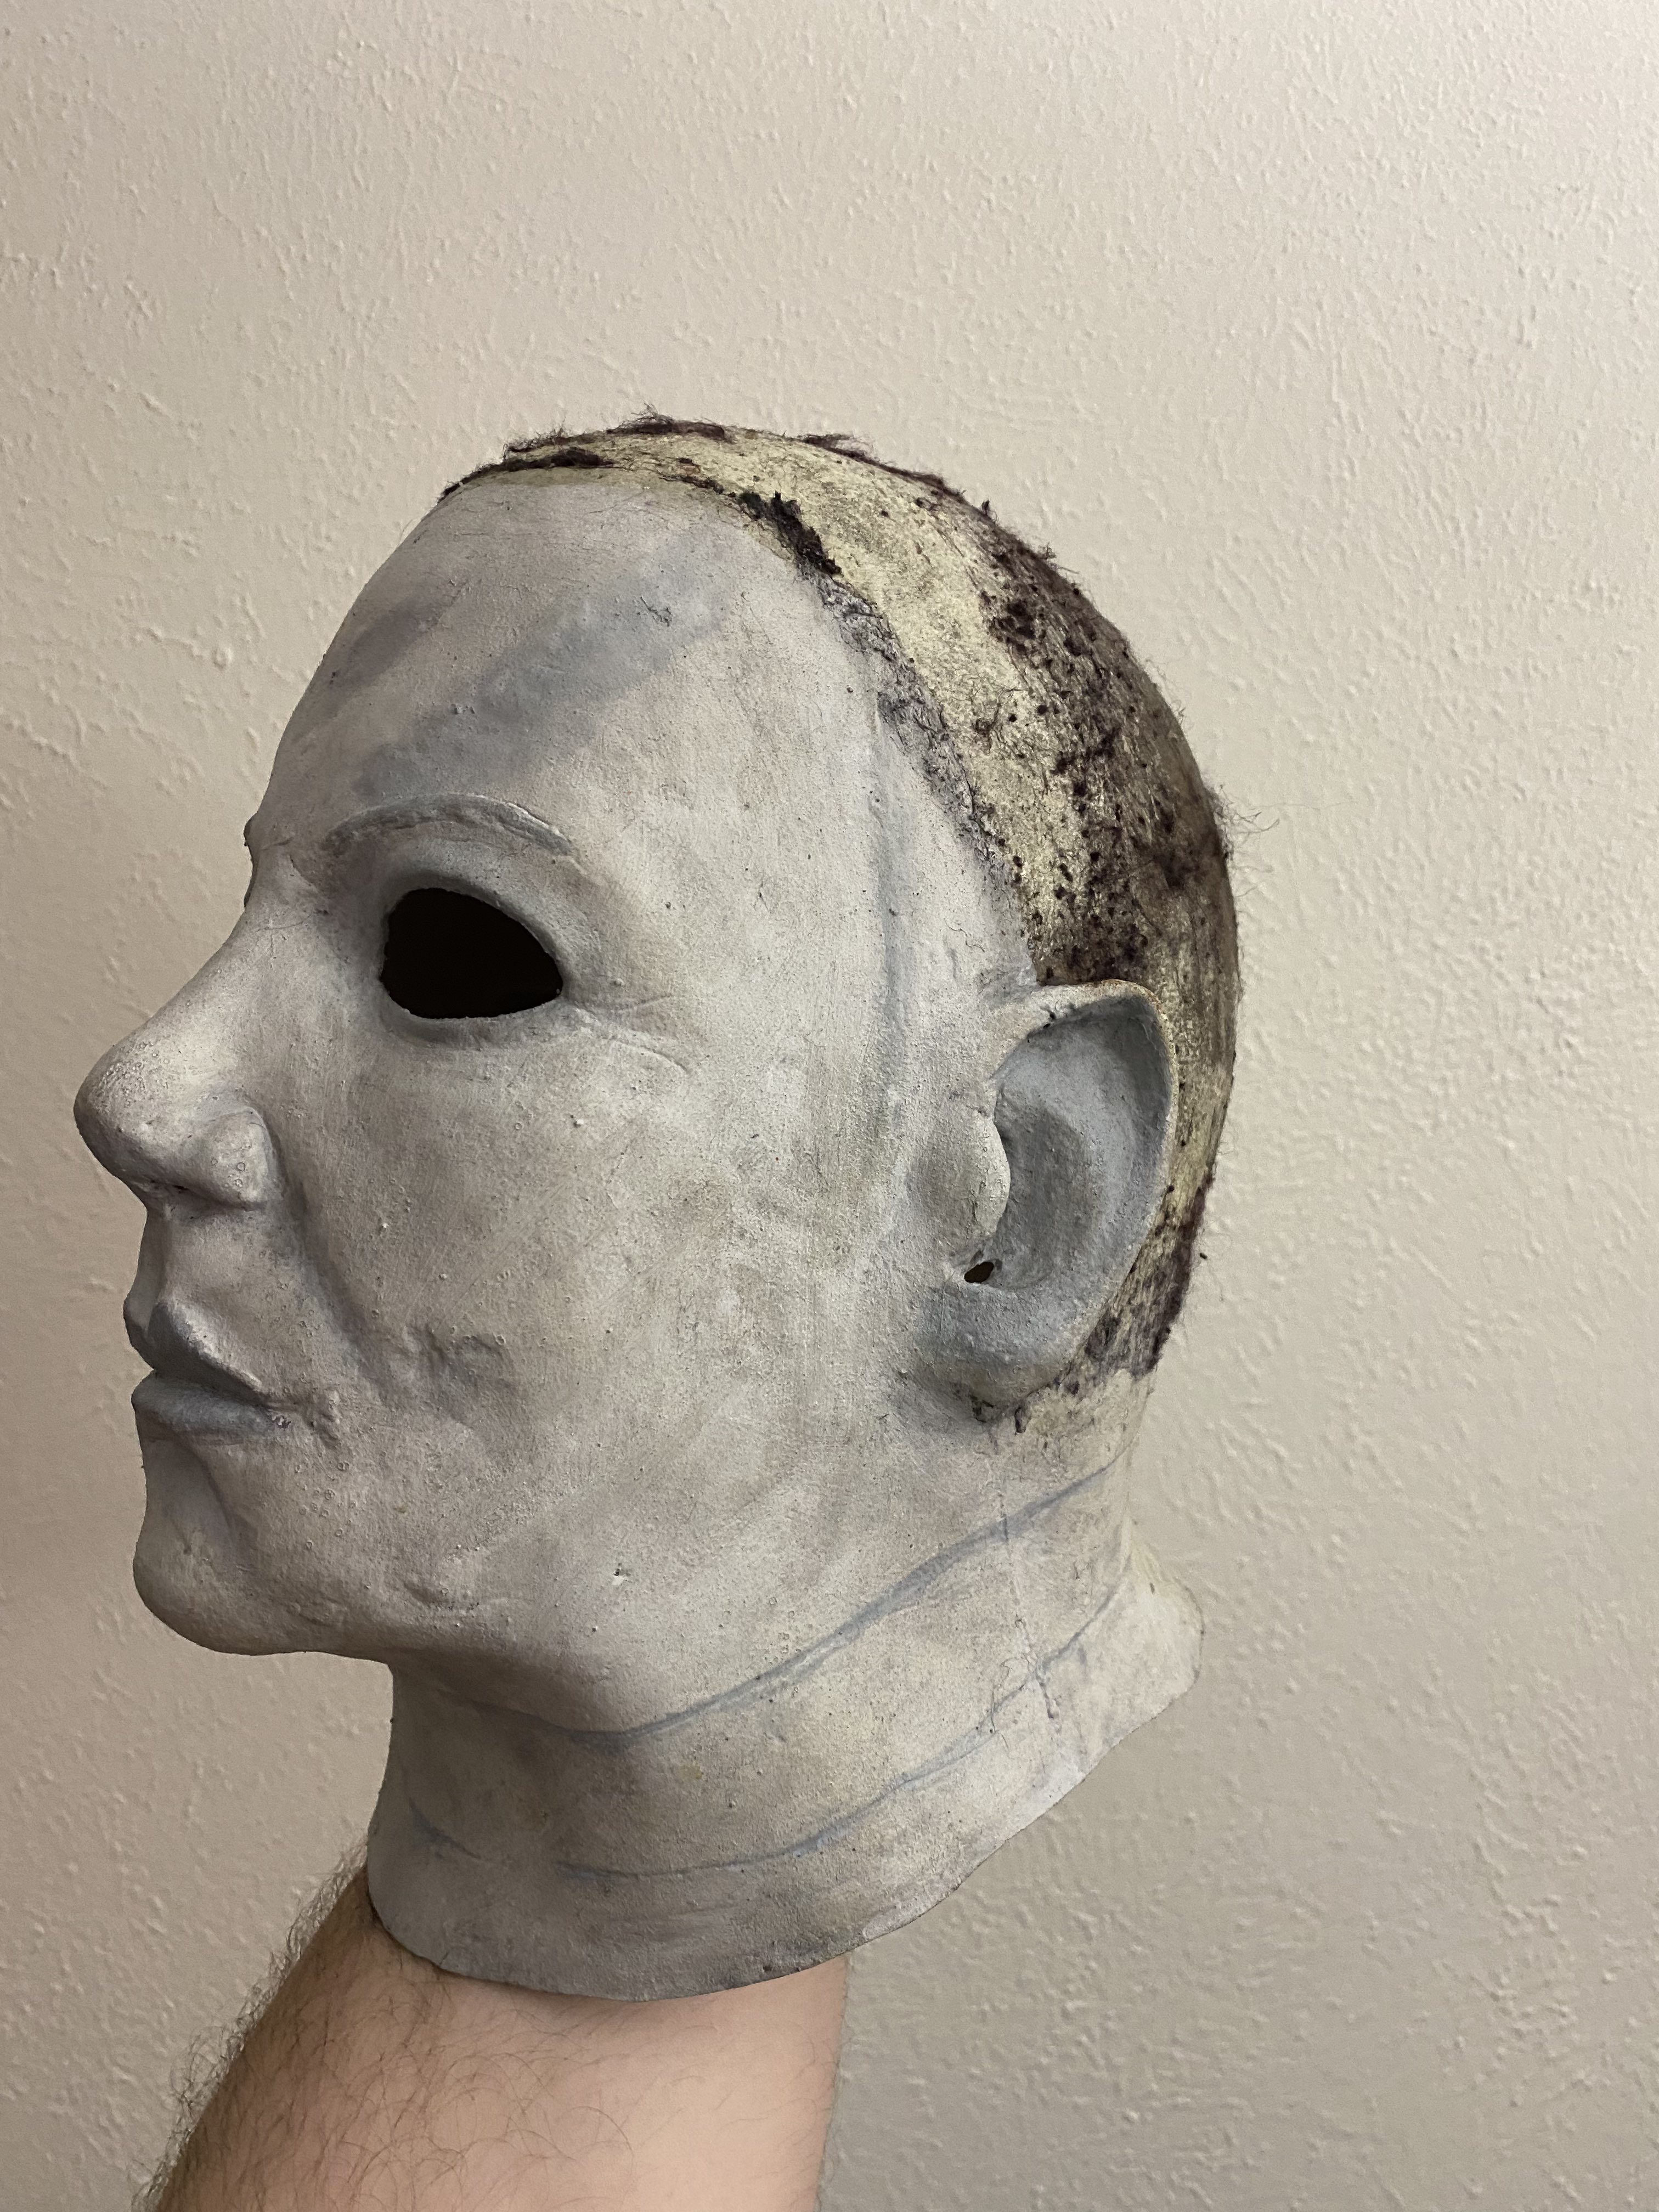
In my opinion being an avid H6 fan and one who has painted a few H6 masks including the TOTS. I would say there isn’t too much of a reason to strip it, it’s one of those mask where another base over top won’t effect it much and in fact would help with a more authentic hero look as the movie masks had a very heavily layered and thick grungy painted look. I always used a damp heavy duty paper towel folded tightly in a square to carefully apply my base. Viva paper towels work wonderful for a good H6 base. I use the 50:50 paint and liquid latex and like I stated tightly fold my viva paper towel into a smaller square and dampen it then dip into the latex/paint mixture and carefully wipe the base. Applying the base this way gets the job done well and helps a lot with that rough H6 base look. You will need to have 3-4 damp paper towel folded squares handy as that is what it will take to base the entire mask. Also applying your washes with a rough texture damp wash cloth works wonders for the H6. Color wise a lot of light to medium grays with even a very slight touch of neutral light blue thrown in works nicely also. It’s good to come in with a very slight touch of burnt sienna in places also for your wash phases. The H6 is mostly all done with washes to begin with. I can’t stress enough on the lip paint as well as it can make or break the H6 easily. The way yours is now the gray is def too dark and bold and they are painted way too much. I could keep going on and on but I hope what input I have gave helps you out some.
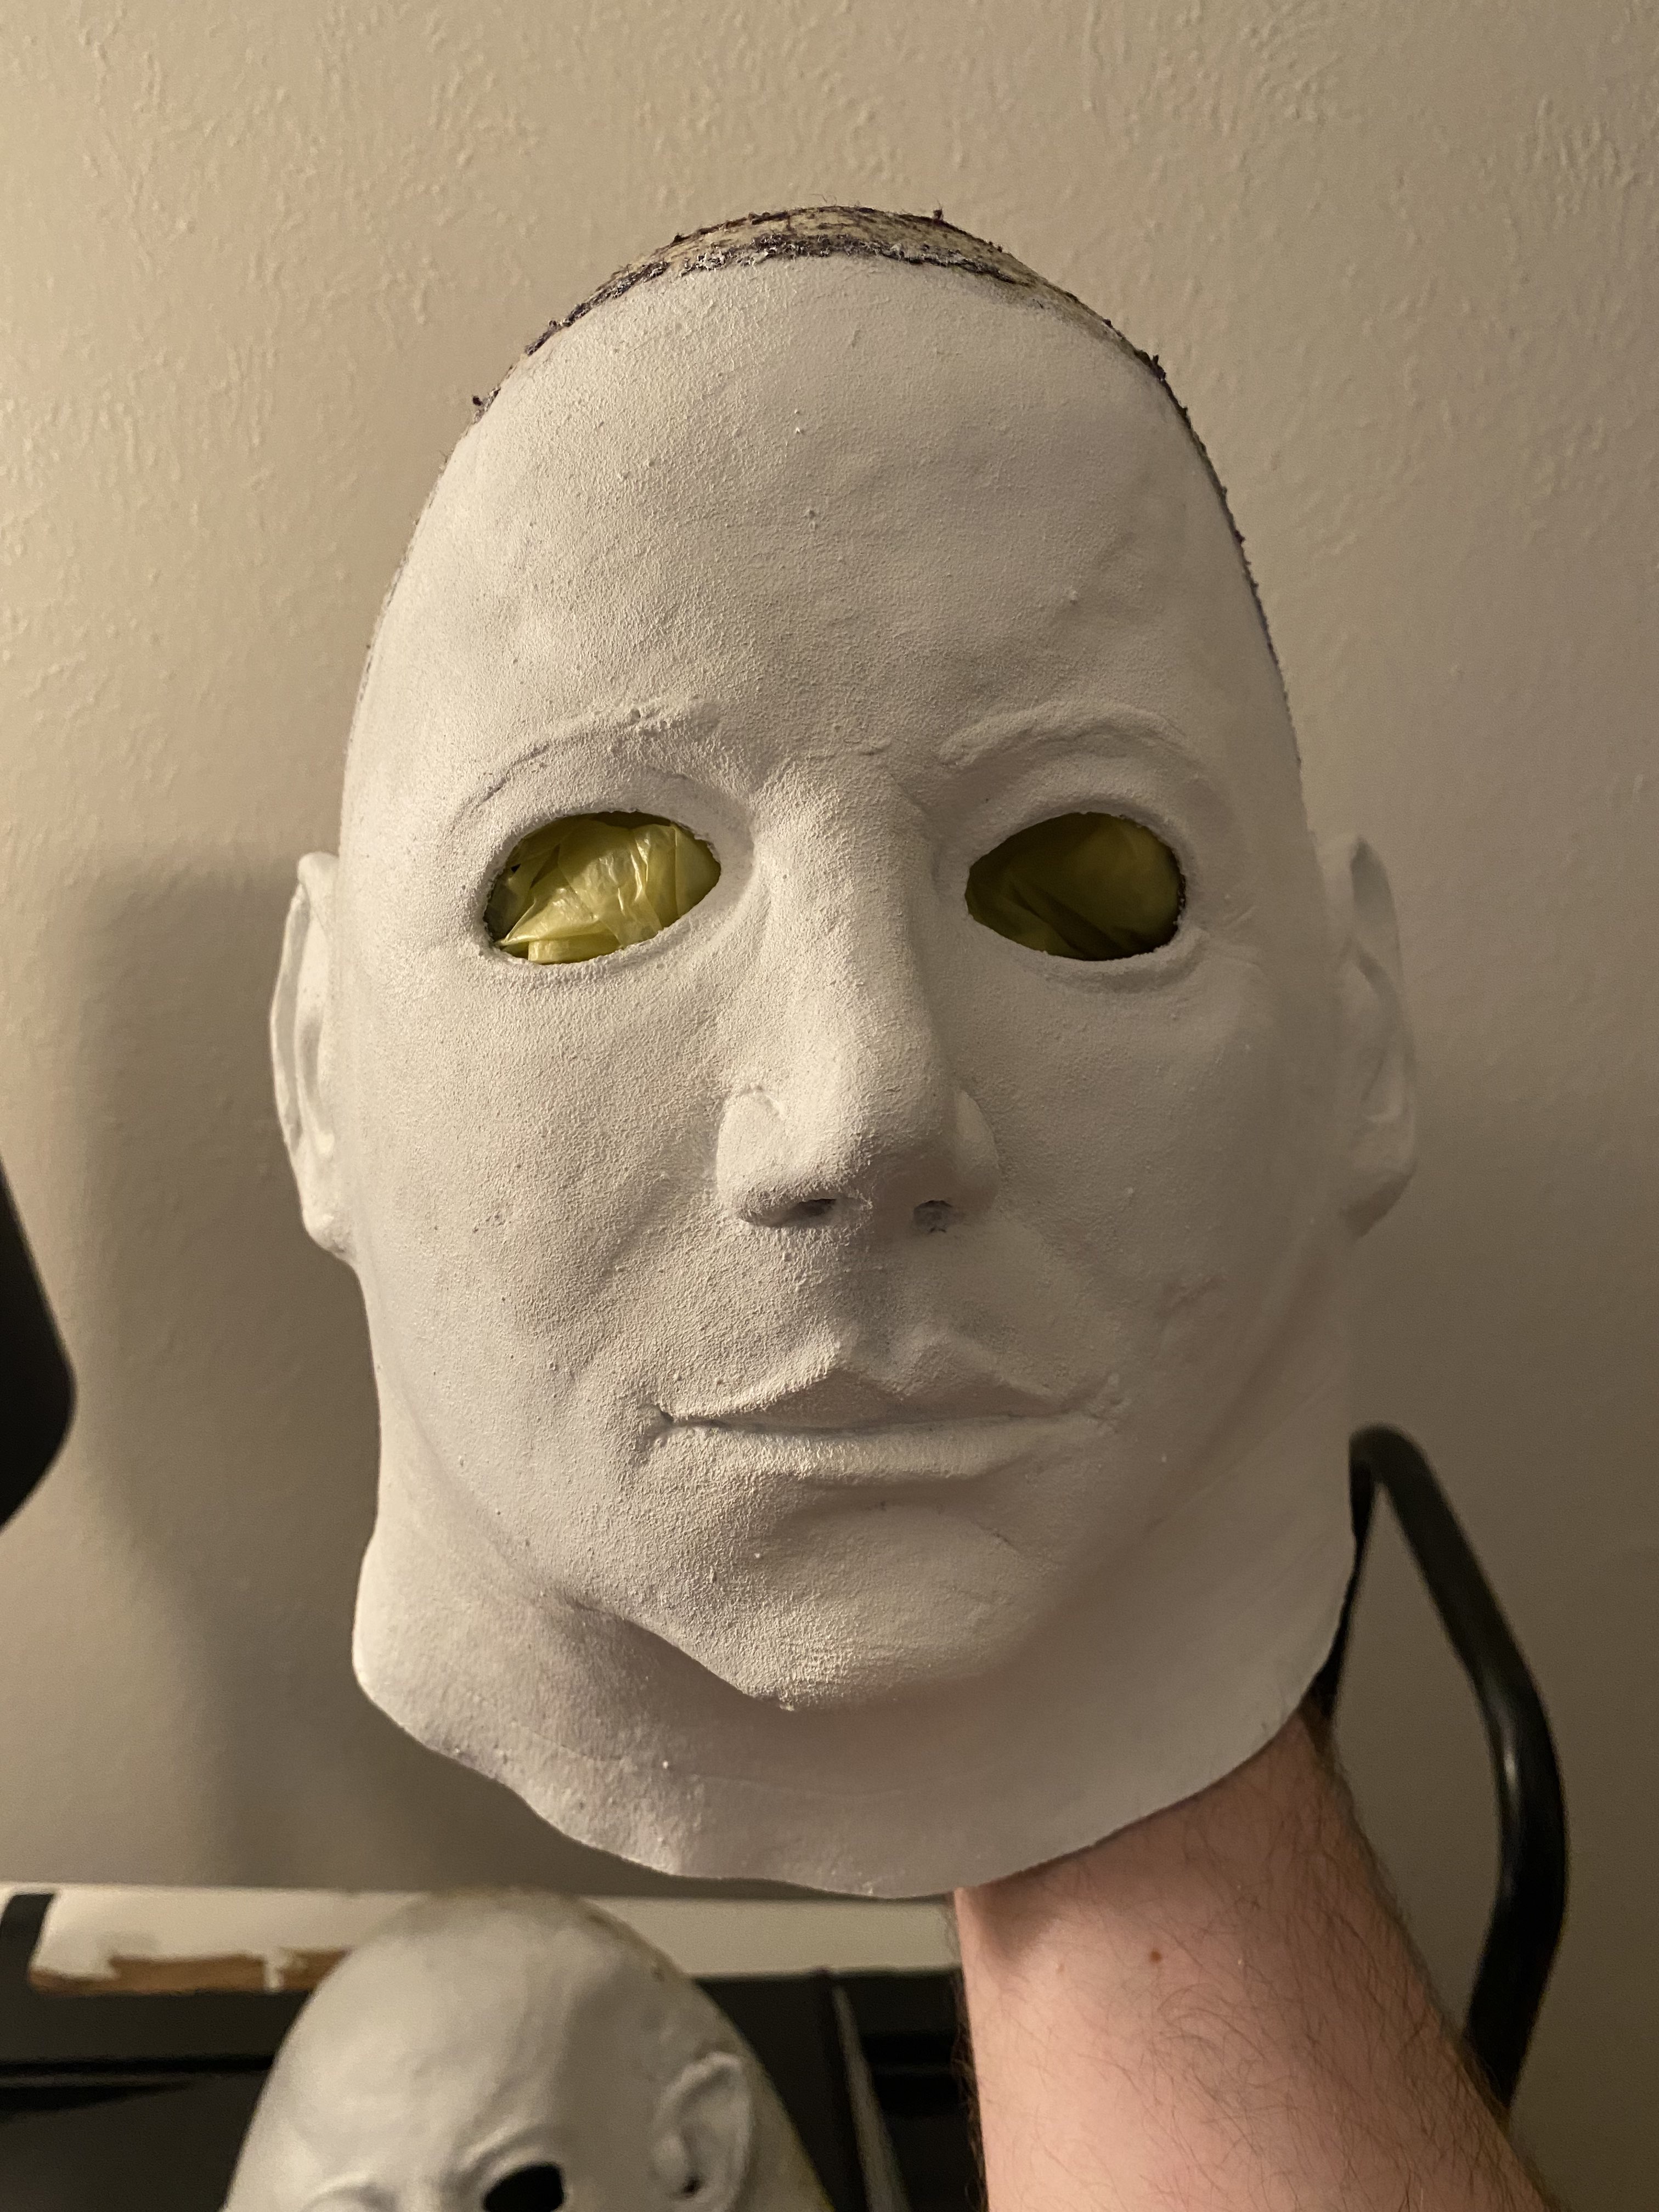
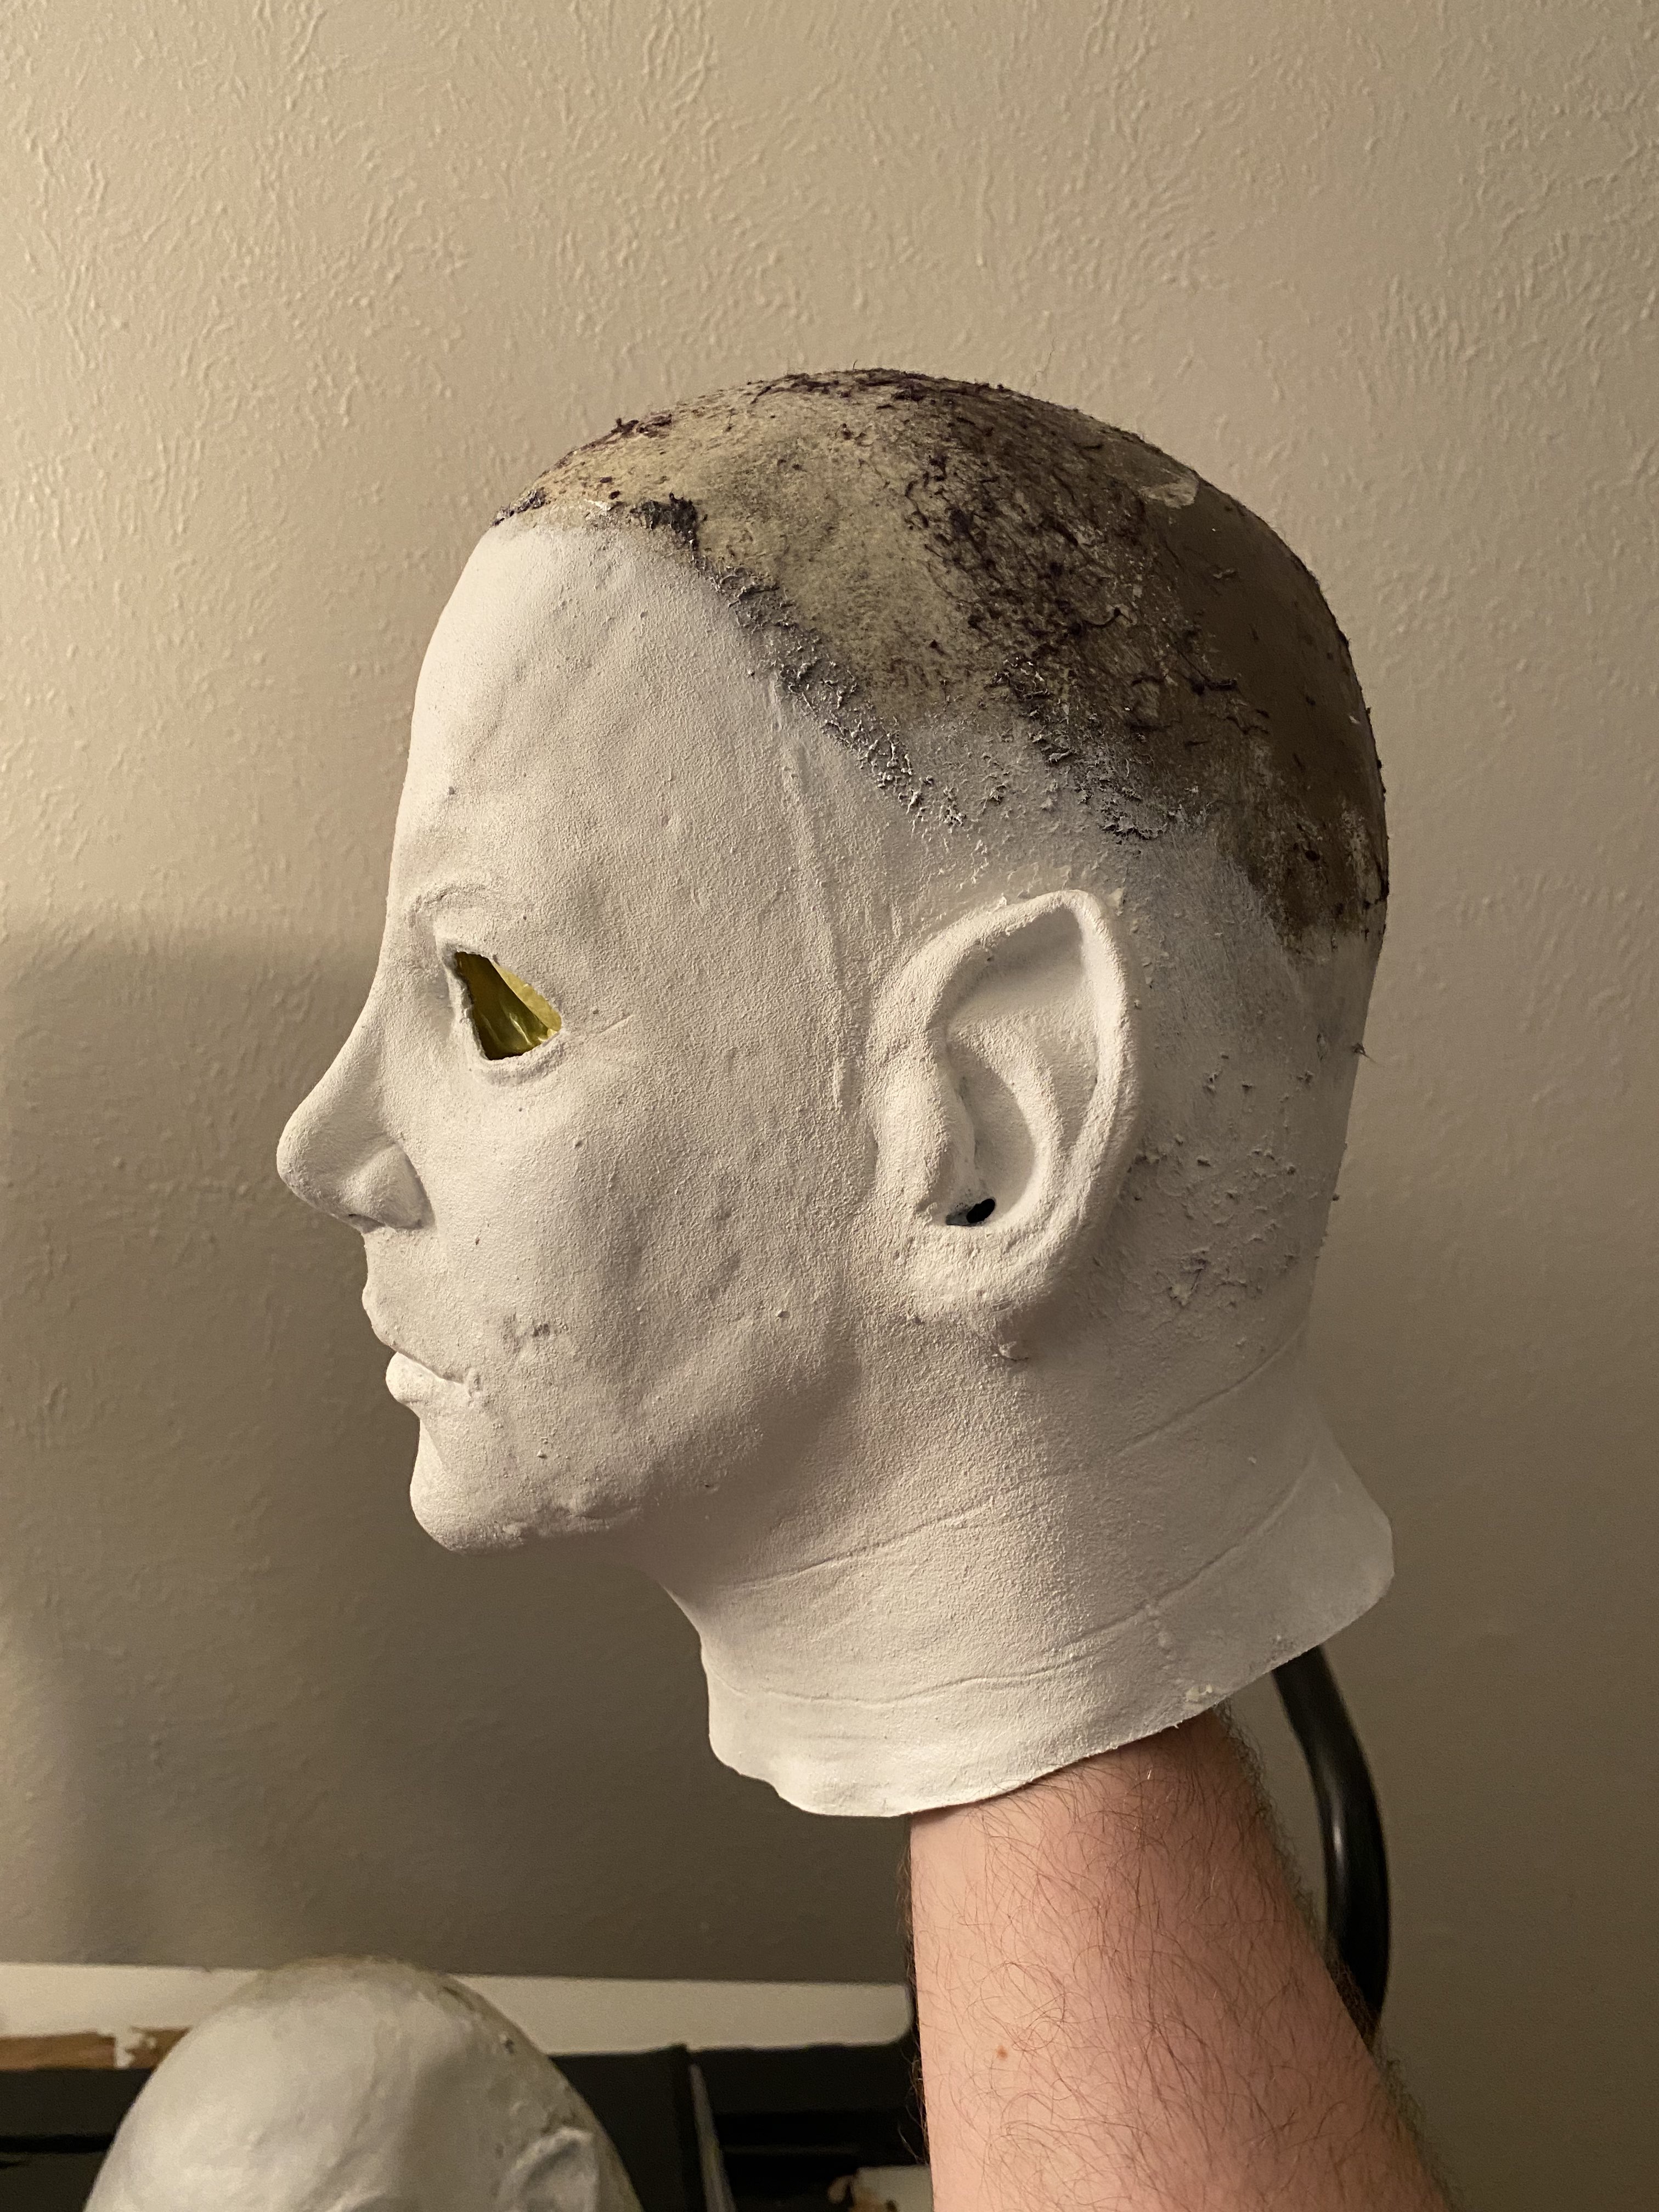
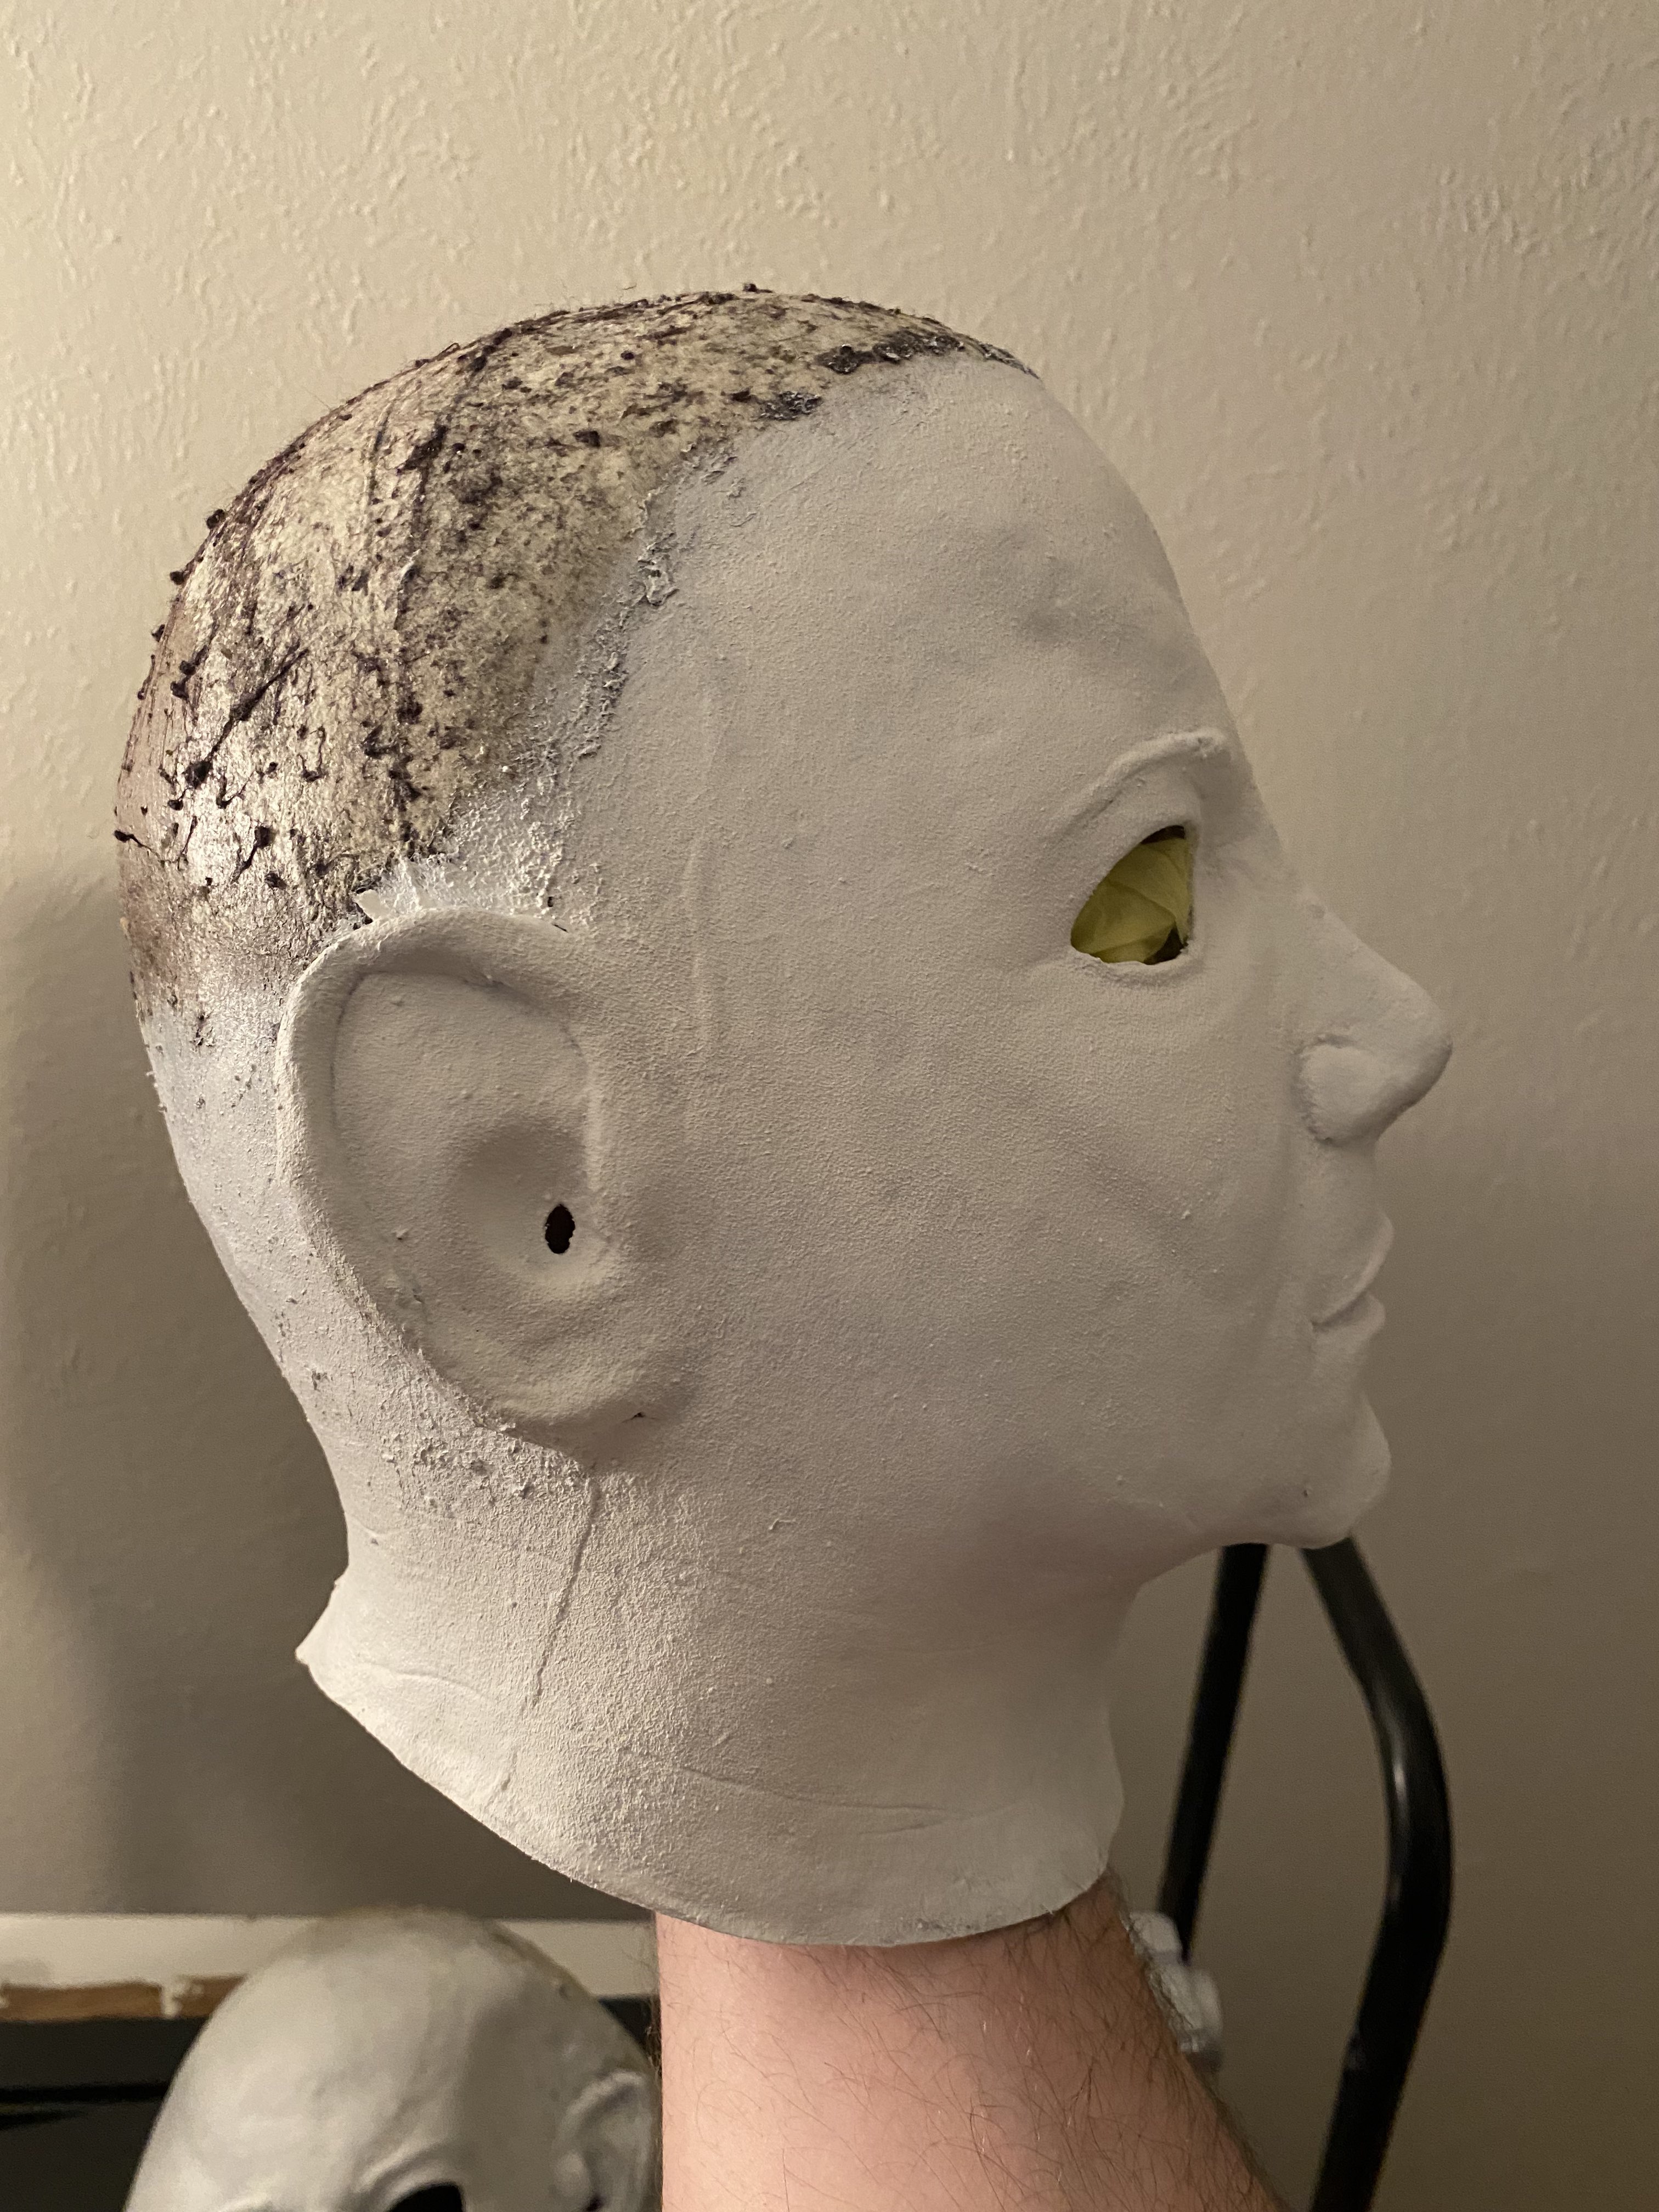
Literally this is what I needed to hear thanks so much!!! How many layers for the base white and how long of a dry time in-between? I want to make sure I get this done well. I did a test run on a spare TOTS H6 but I think my layers were too thin or my dry time was too minimal (despite using a hair dryer to speed up the drying process). I used a rough wash rag for the washses but i either didn’t wait enough time after the base layering or was worried the rag was too abrasive as some parts ended up peeling or making the texture look a bit crunchy lol. I should note my layering was done in sponges, but I will def get the Viva towels.
Do you have any pics of your mask works and rehauls? I’d love to see them!!!
Like I said it’s been awhile since I’ve painted an H6 mask or any mask for that matter. I’m talking 4 years or more but if im not mistaken I just did one full layer with that process I told you. I just made sure to apply it as thick as I needed to get a full covering base coat. You will know when it’s time to grab a new damp viva square because it will start to want to fall apart after wiping the paint on the mask for a little bit. Like I said you’ll need 3-4 squares for a whole mask. I had to really dig to locate these two photos but this is the only H6 rehaul I could find that I personally did. It is a TOTs and I’m not or never was a pro at it but I hope I could help.
I don’t think you’re giving yourself enough credit, that work looks GREAT imo! I’ll post updates when I can, but you have been THE biggest help and what I needed. My only other question would be lining for where the hair goes (if you can recall!). I plan on buying three 12in crepe hair (36 inch/3 foot) do you think that will be enough for the whole head?
I really appreciate the kind words. I am sorry unfortunately, I never got around to rehairing a mask. You might be able to find info on YouTube though.
I thought as much the first time I saw it, and I think it’s better than the base TOTS paintjob. It joes doesn’t feel as accurate as it could be I think. Plus it’s a fun project to do to get into the start of the season! I wanted a Myers mask project to do just for myself so this one is it!
This will be my second attempt for screen accuracy. I worked on a TOTS H2 many years ago. I also did my own custom mask from a kirk blank which was QUITE a learning experience lmao
I appreciate the support and will keep pics coming!!
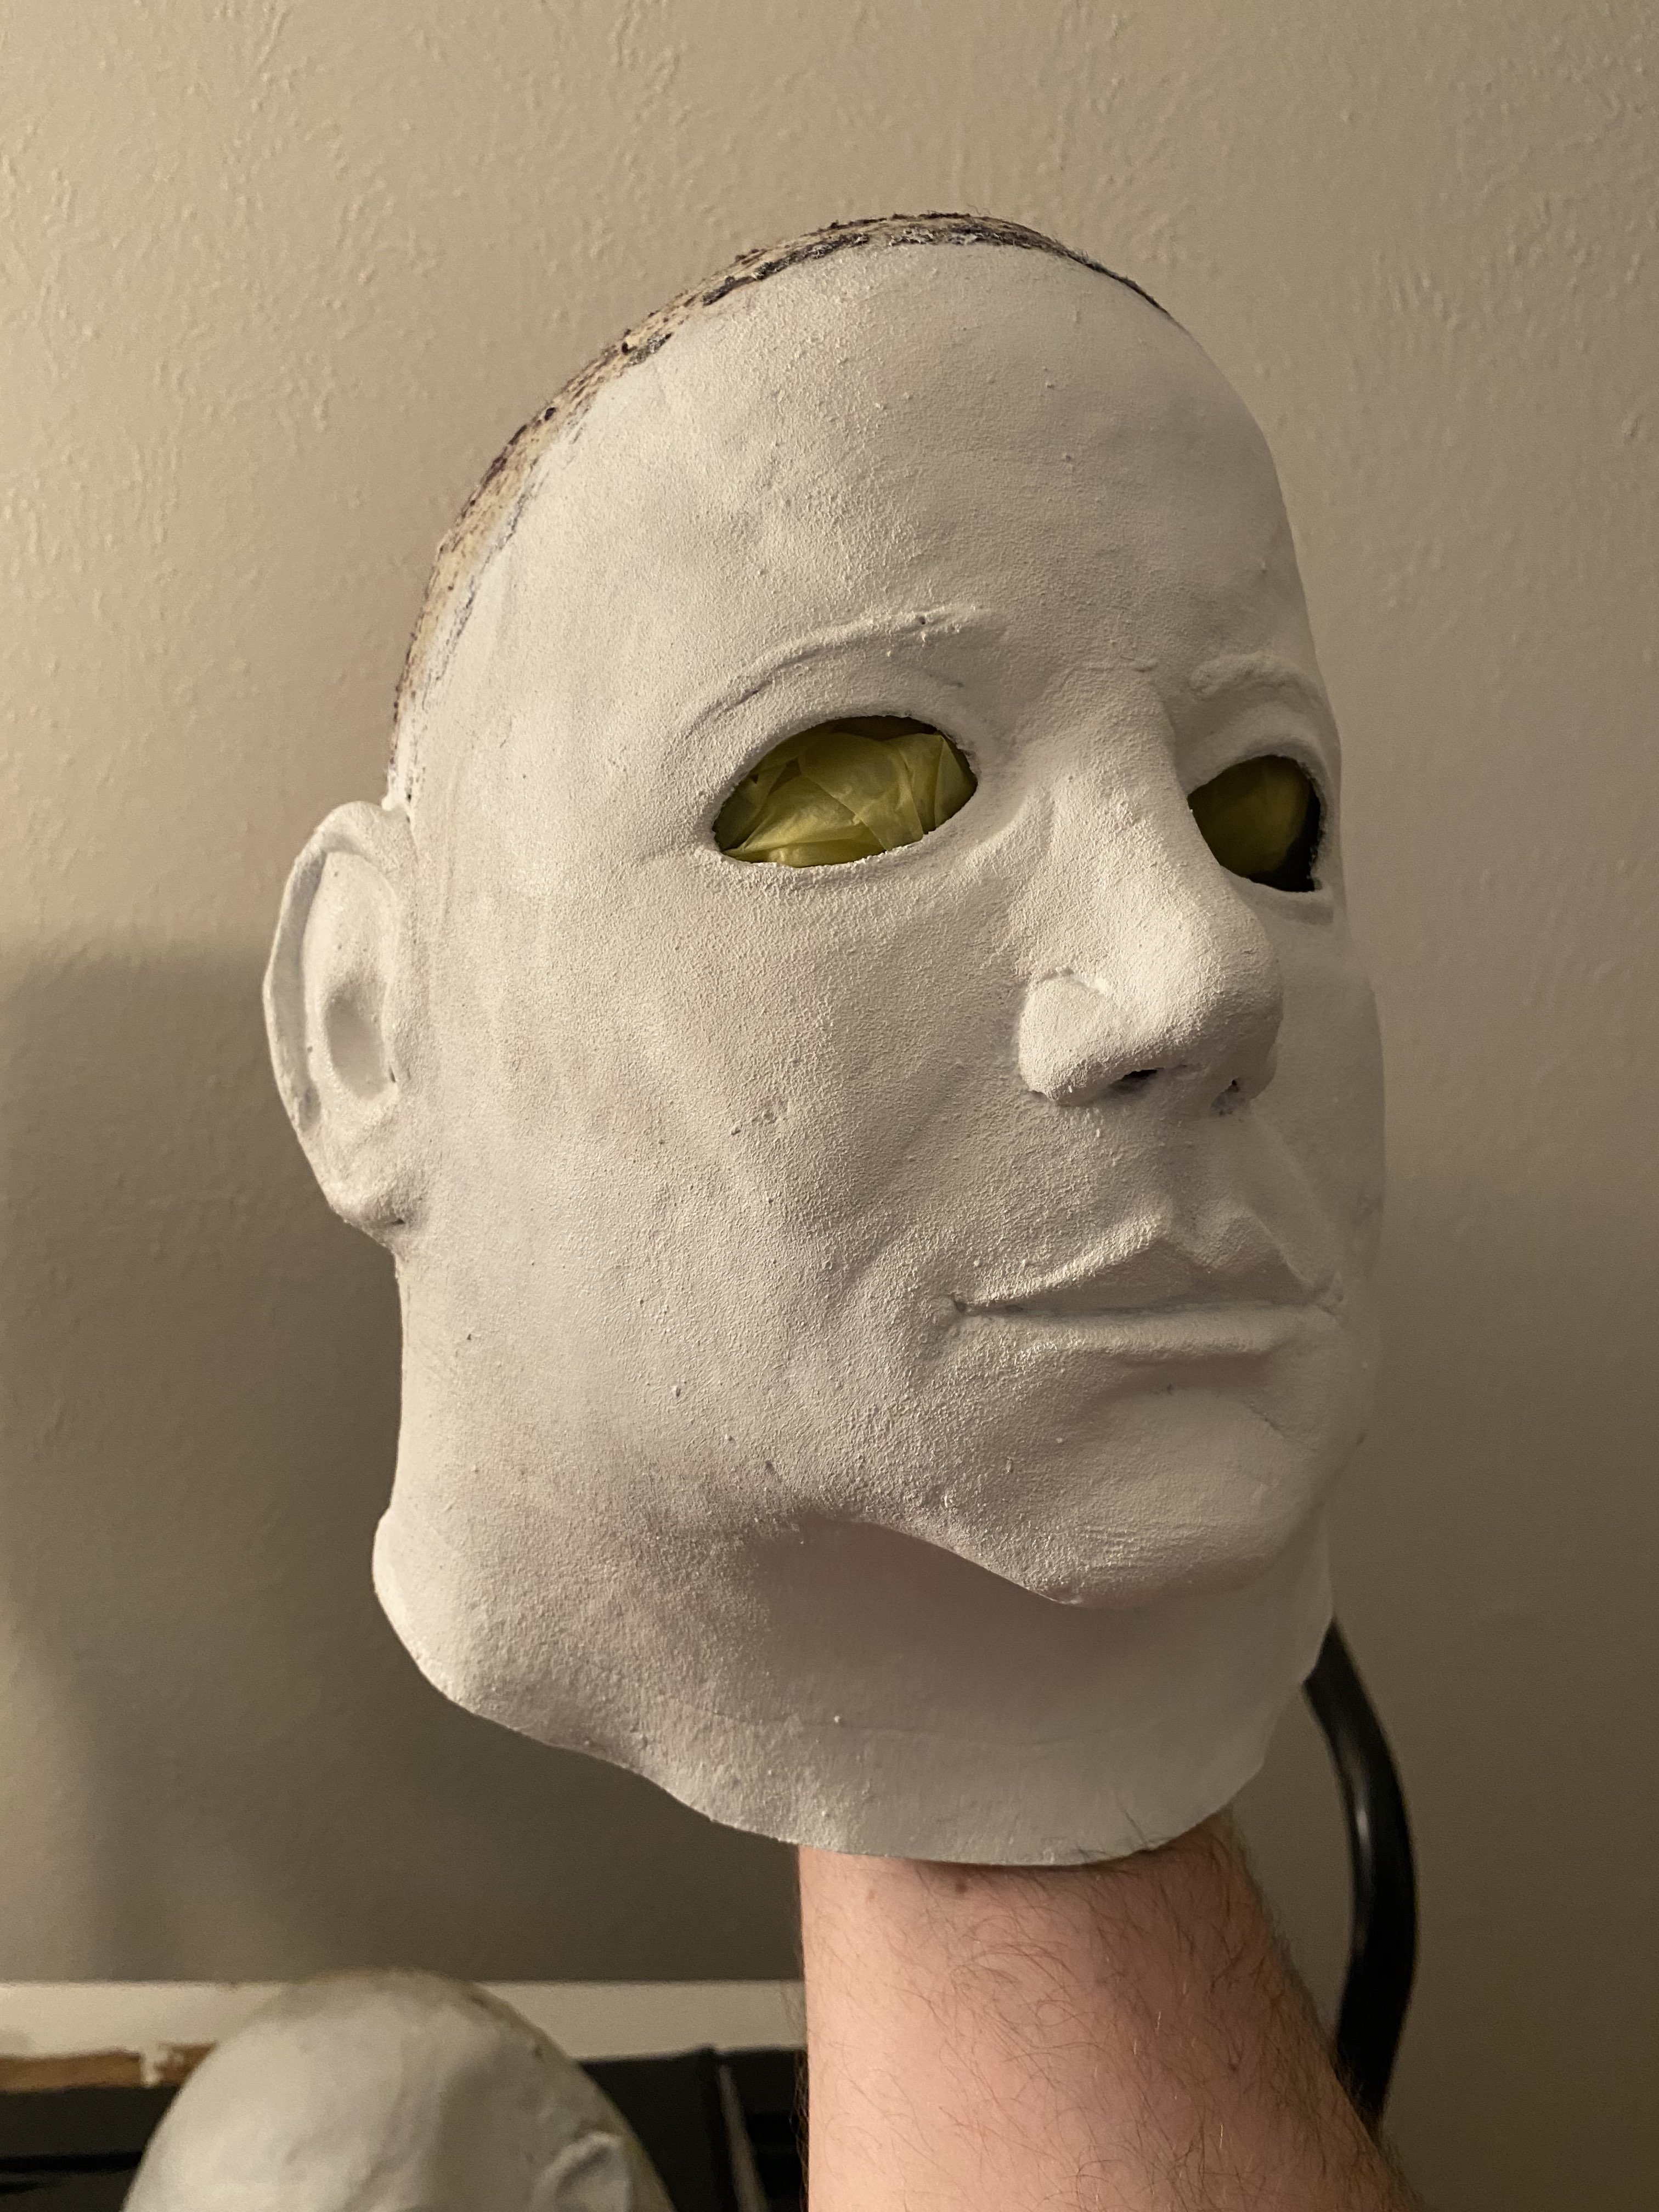
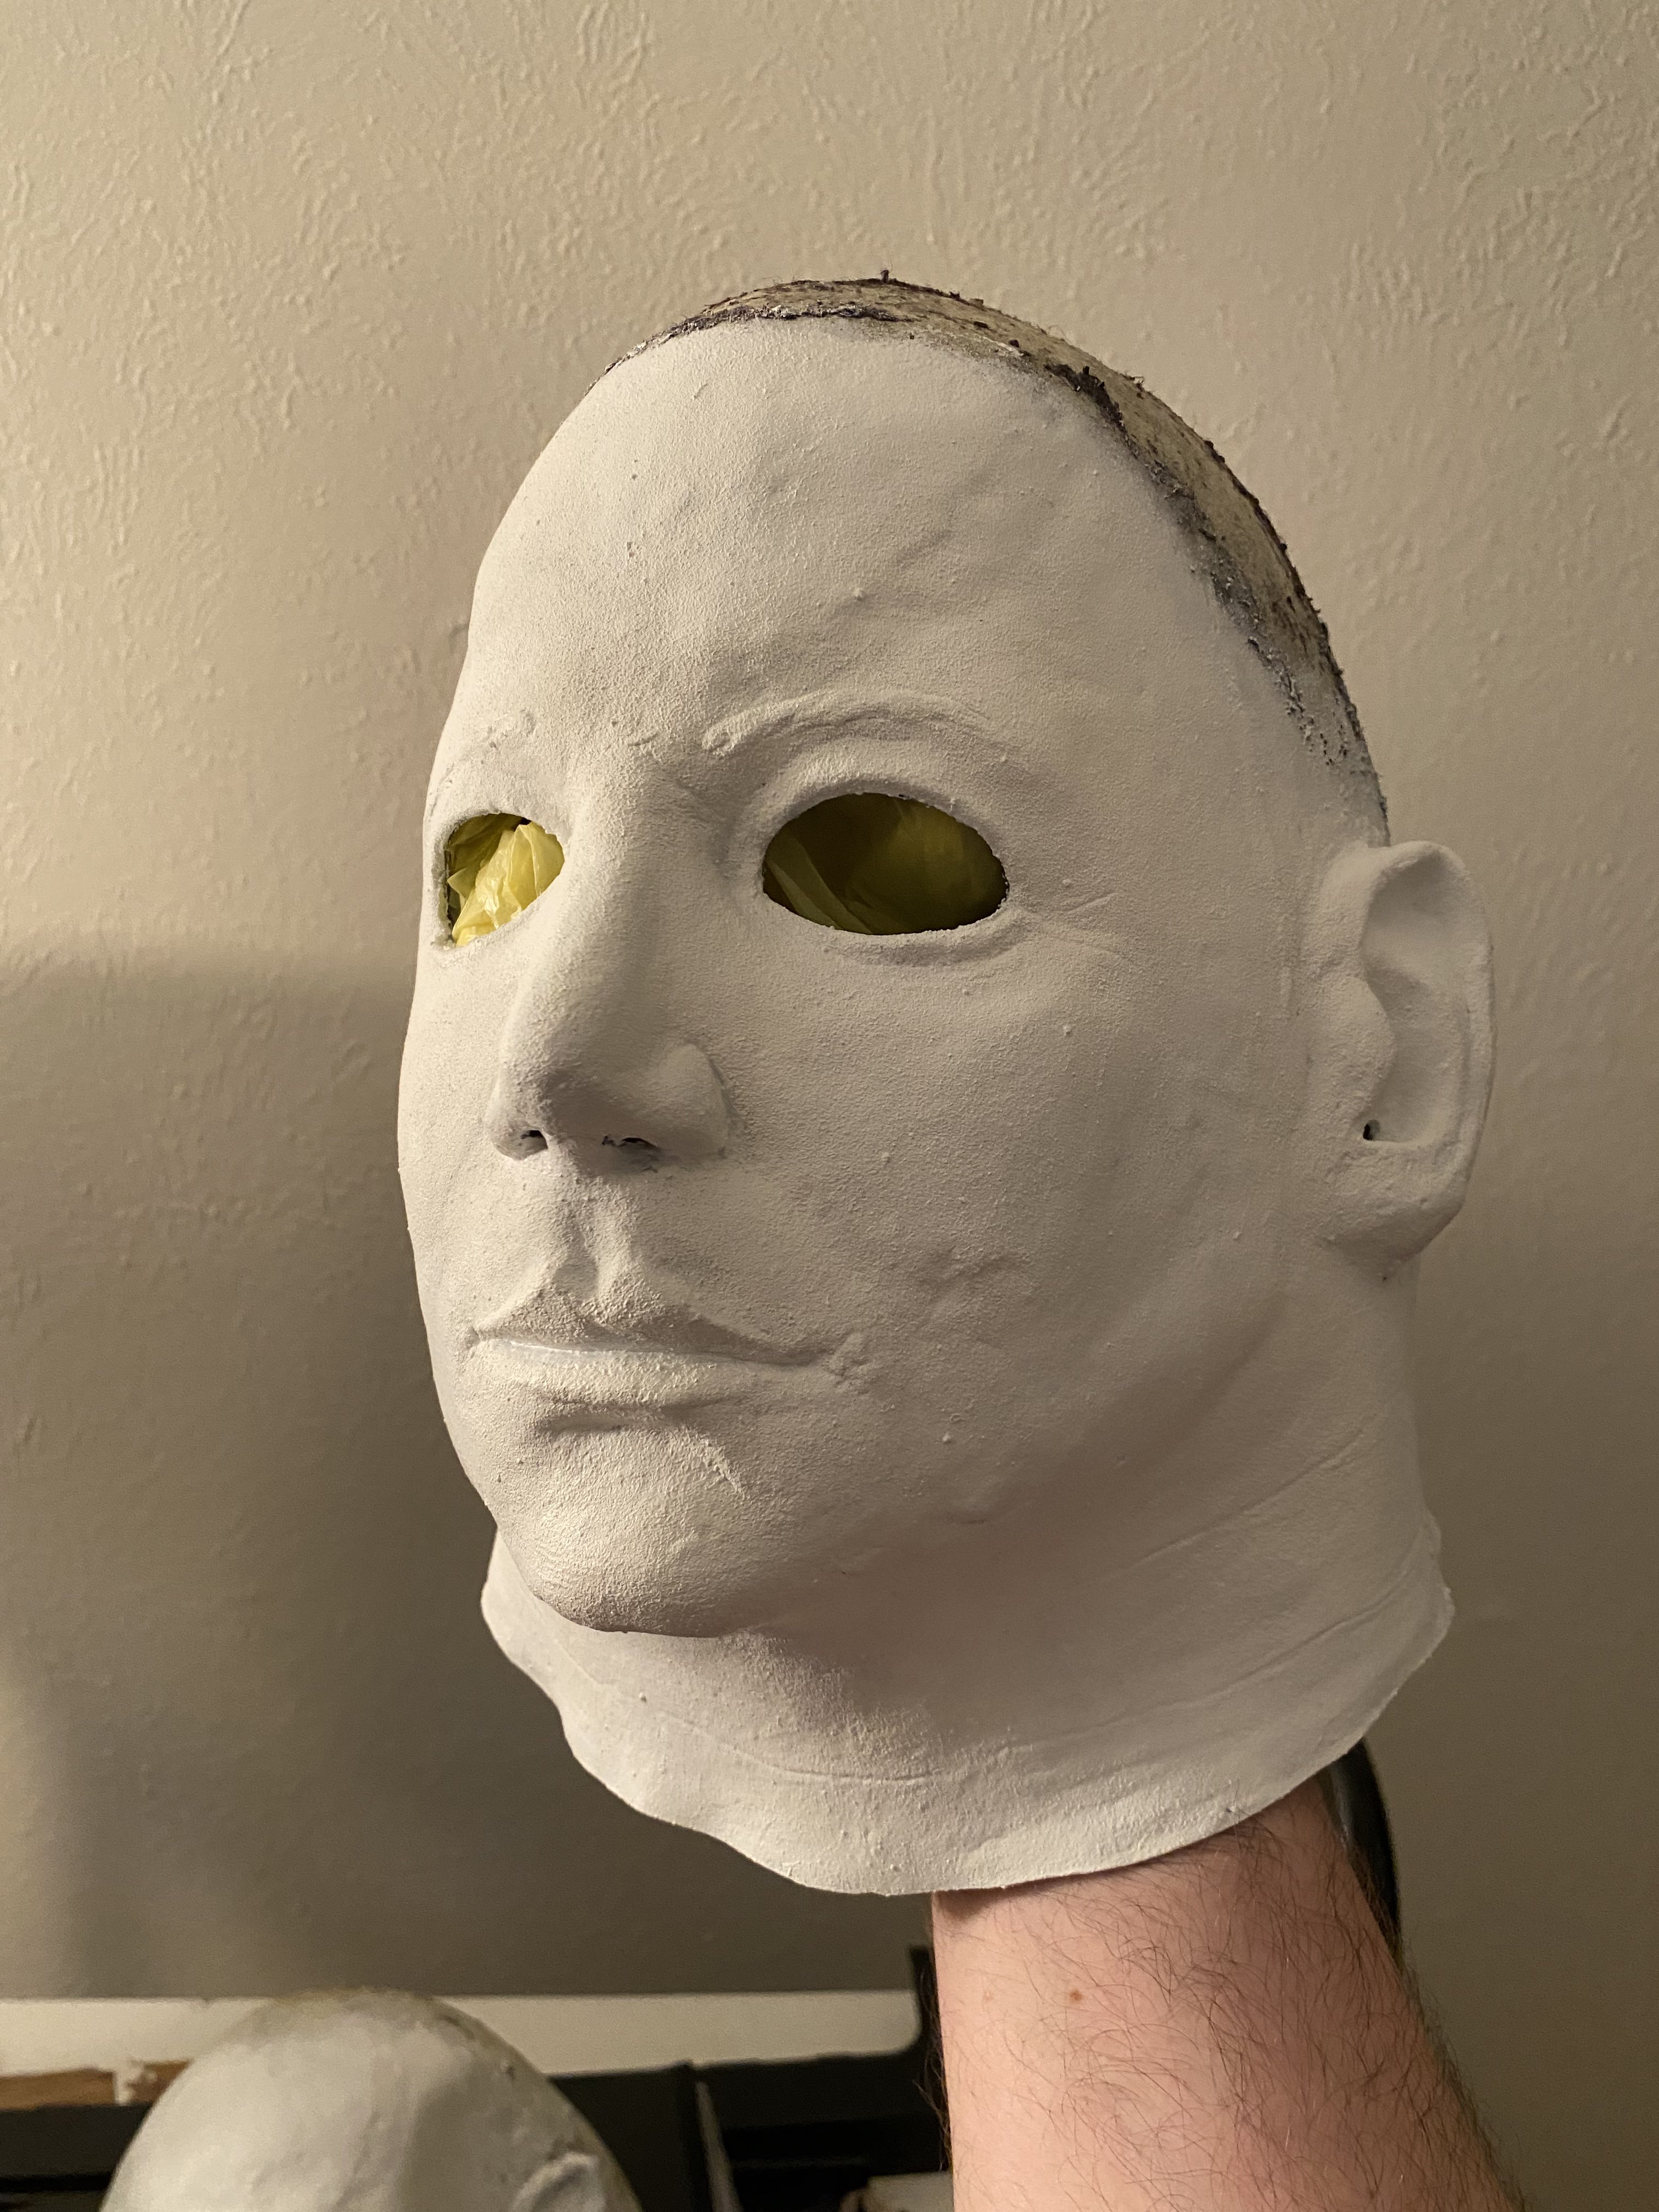
An update for those curious! Here’s the mask in the base coating. I put a few layers on and inbetween i used a blow dryer on high (i only read recently to blow dry on low lmaooo) this is now my other test mask as it’s starting to warp along the neck after I tried to get the stray hair bits off so I got a new TOTS H6 ( and an H4) on the way! Tomorrow I work on weathering!